
How to Draw Portrait Step By Step with Simple Techniques
Welcome to this comprehensive guide on portraiture! Drawing a face might seem daunting, but by breaking it down into manageable stages, anyone can learn How to draw portrait capturing character and likeness.
This tutorial will walk you through six fundamental steps, using a structural approach that ensures accurate proportions before adding specific details. Whether you want to learn how to draw a portrait step by step, each step includes a detailed illustration showing exactly what your drawing should look like at that stage.
Ready to begin? Let’s pick up our pencils.
Step 1: The Luminous Sphere and Axis
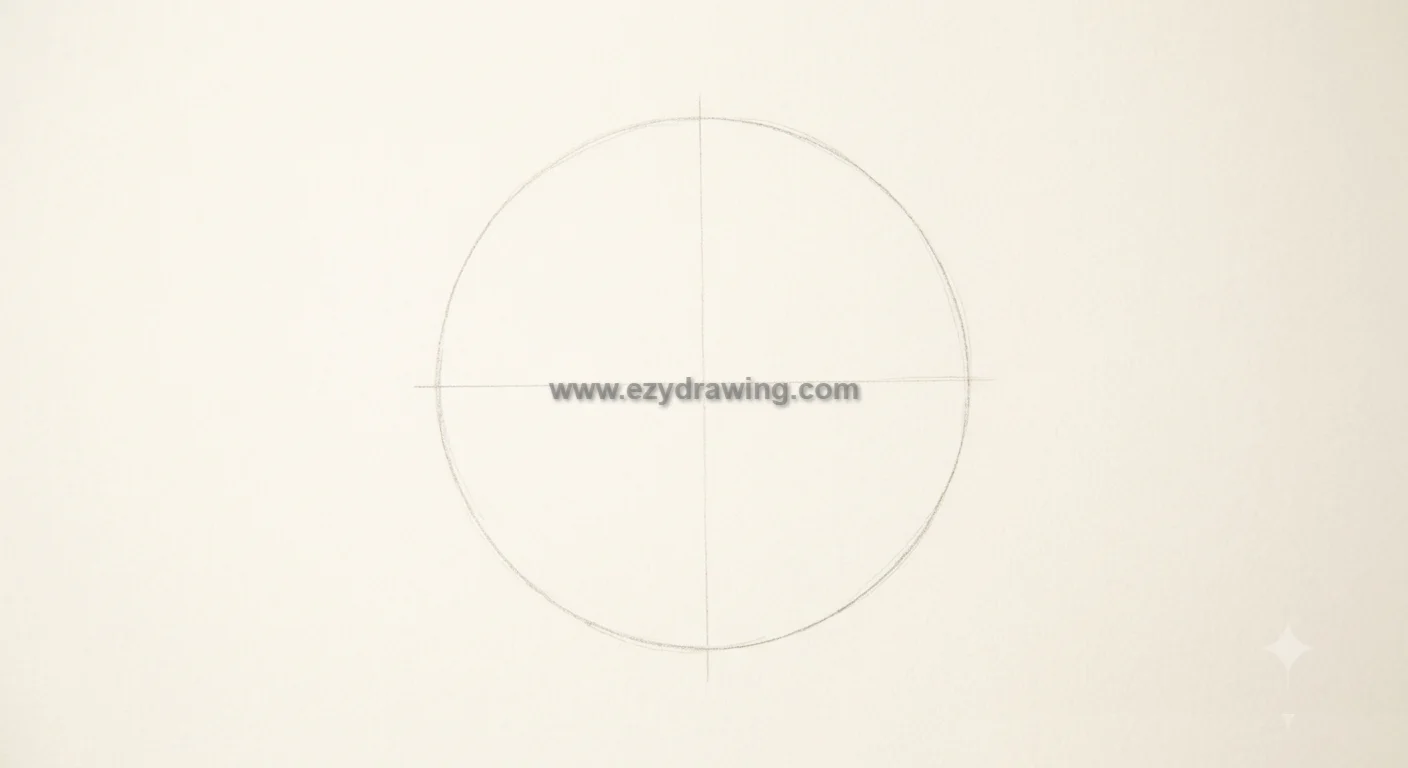
We must start with the most basic geometry. Do not think about ‘a face’ yet; think about simple volumes. A human head, at its core, is a sphere combined with a slight elongated block for the jaw. This Portrait Drawing Technique helps establish a strong and accurate foundation before adding facial features.
Start your drawing by lightly sketching a perfect circle in the center of your page. This circle defines the cranium (the braincase). Next, establish the vertical axis by drawing a subtle, light line (the ‘axis of symmetry’) straight down through the center of the sphere.
This line will divide the face equally. A second, horizontal line is then drawn across the lower-middle of the sphere; this is the ‘brow line,’ the crucial anchor for all subsequent features. Keep these initial lines very faint.
Step 2: Defining the Facial Plane and Features
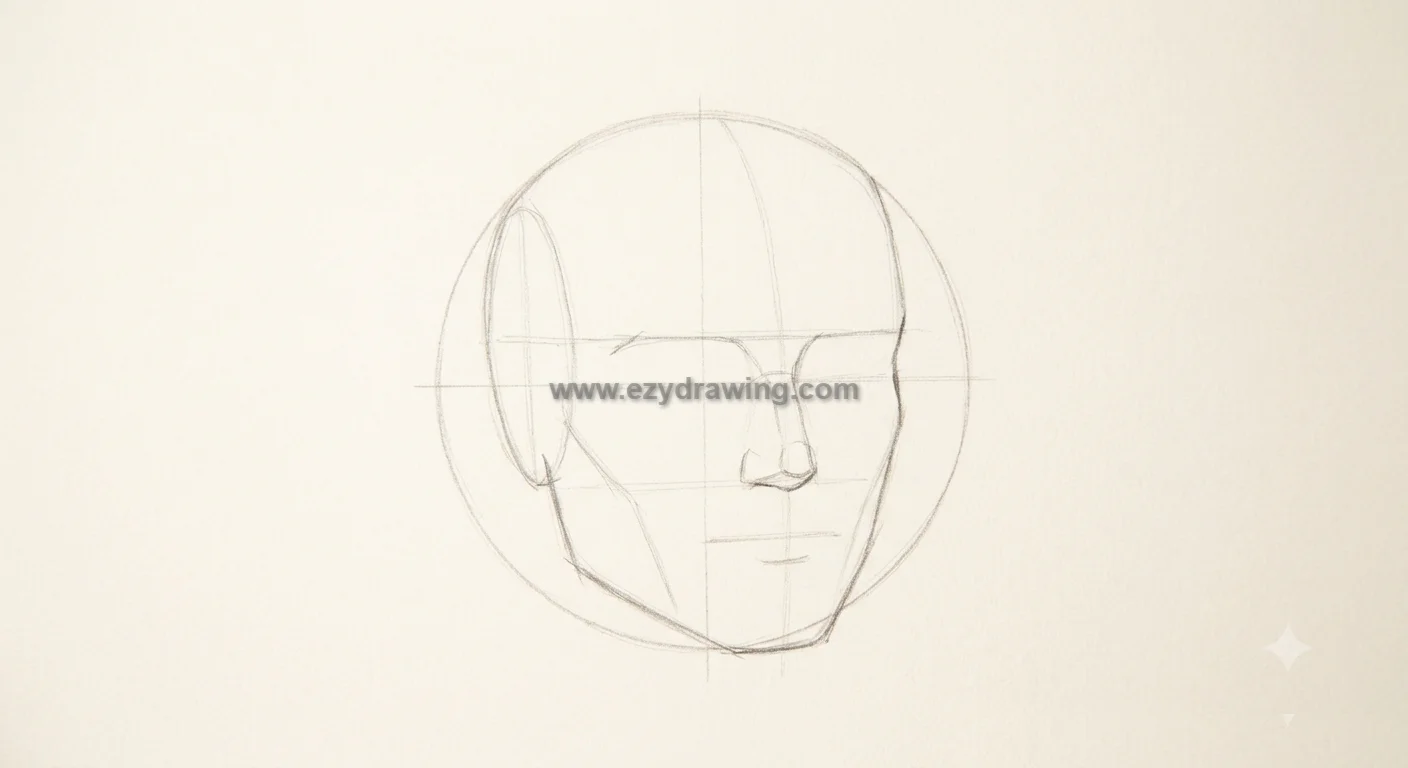
Now we will transition from basic geometry to the actual plane of the face. In this stage, we determine where the features drop.
First, observe how the sphere (image 0) is modified: the sides are sliced off. Use light vertical lines to narrow the shape. Now, extend that vertical axis line downward past the sphere to establish the length of the chin. From the temporary brow line we made, measure down a standard distance (often one ‘nose length’) to find the base of the nose, and then another equal measure to find the bottom of the chin. Connect these points to draw the jawline and the specific ‘egg shape’ of the head. Finally, add light horizontal guide lines for the eyes (halfway between the crown and the chin) and the mouth (image 1).
IMAGE 2 Caption: Building directly on the sphere, the jawline is defined, making the basic ‘egg shape’ (image 0 modified). The nose plane is established, and general guidelines mark the eyes and mouth.
Step 3: Blocking the Features and Major Planes
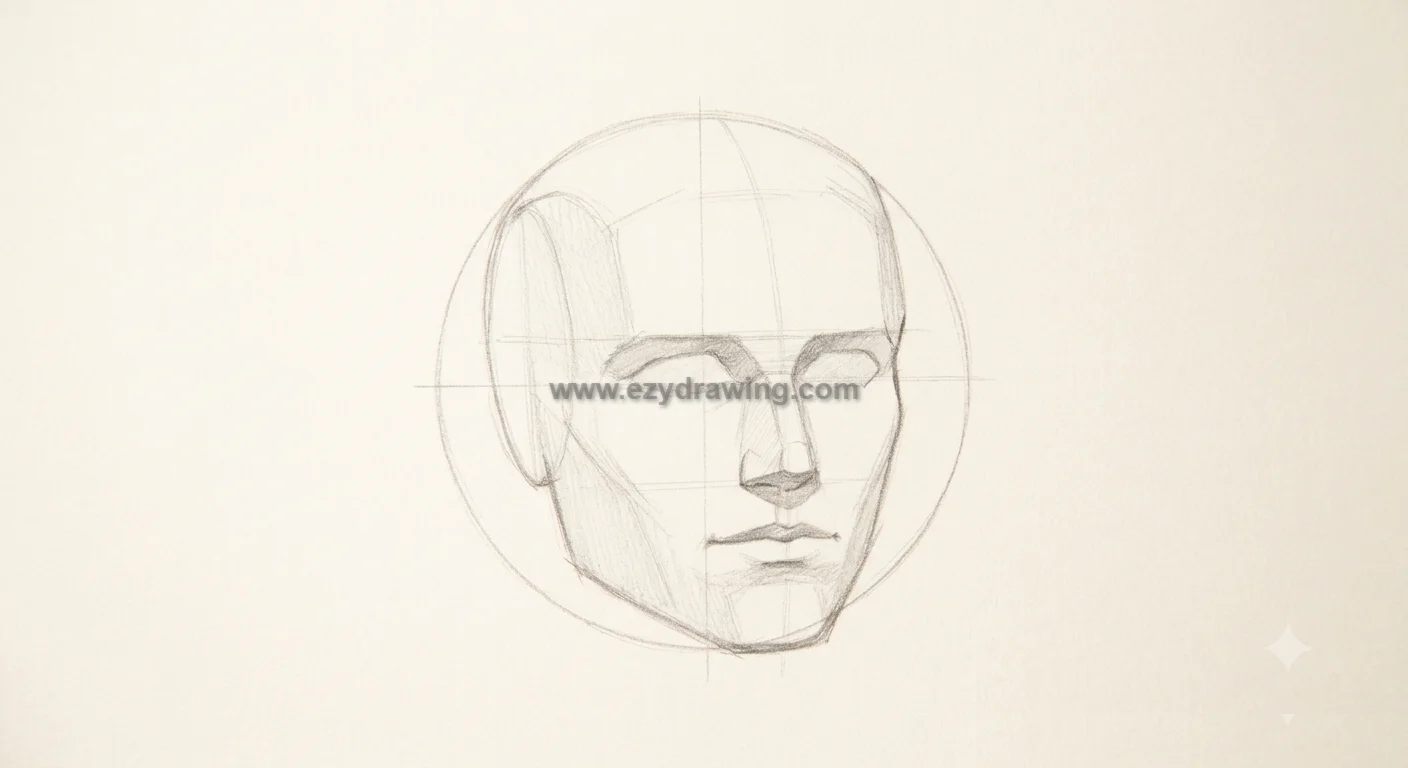
With our proportions established, it is time to map the major structures. Do not draw outlines of eyes or lips. Instead, focus on blocking the large volumes and shadow shapes.
Locate the eyes on their horizontal centerline. For a standard portrait, the width of one eye fits exactly between the eyes. Define the eye sockets as large, soft-edged shadow shapes. Block the nose as a simple three-dimensional structure (a wedge) attached to the face. Rather than outlining lips, define the dark line where the lips meet, and block in the shadow under the lower lip (image 2). Keep all work soft; we are defining planes, not details.
IMAGE 3 Caption: The features are now ‘blocked in’ using large masses. Eyes and sockets are defined by shadow shapes. The nose wedge is rendered three-dimensionally, and the mouth planes are softly established.
Step 4: Introducing Structure and Shading
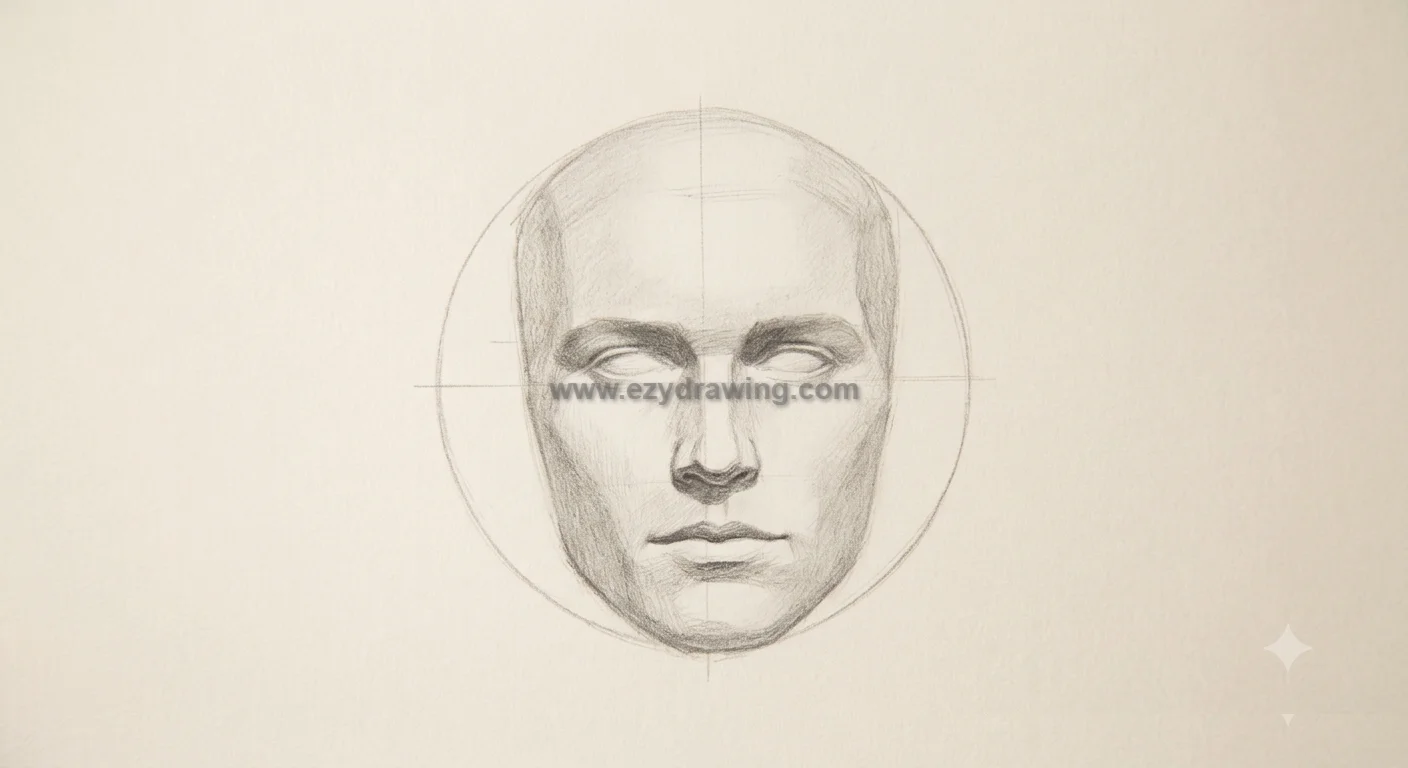
This is the transition point from technical drawing to rendering. We now take the forms established in the block-in (image 2) and give them dimension using light and shadow.
Define a single, consistent light source (in this case, soft front lighting). Begin darkening the core shadow areas: the eye sockets, the shadow side of the nose (defined in Step 3), the area beneath the chin, and the upper lip. Use soft graphite and subtle rendering to smooth the transitions between light and dark planes. Notice how the features—the bridge of the nose and the cheekbones—begin to emerge from the paper simply because of where the shadow isn’t. The light on the textured paper (seen previously) is preserved for the highlights (image 3).
IMAGE 4 Caption: The drawing is now defined by value, not lines. Soft graphite shading renders the volumes of the cheeks, nose, and chin (derived from Step 3), creating depth under soft front light.
Step 5: Defining Features and Refining Details
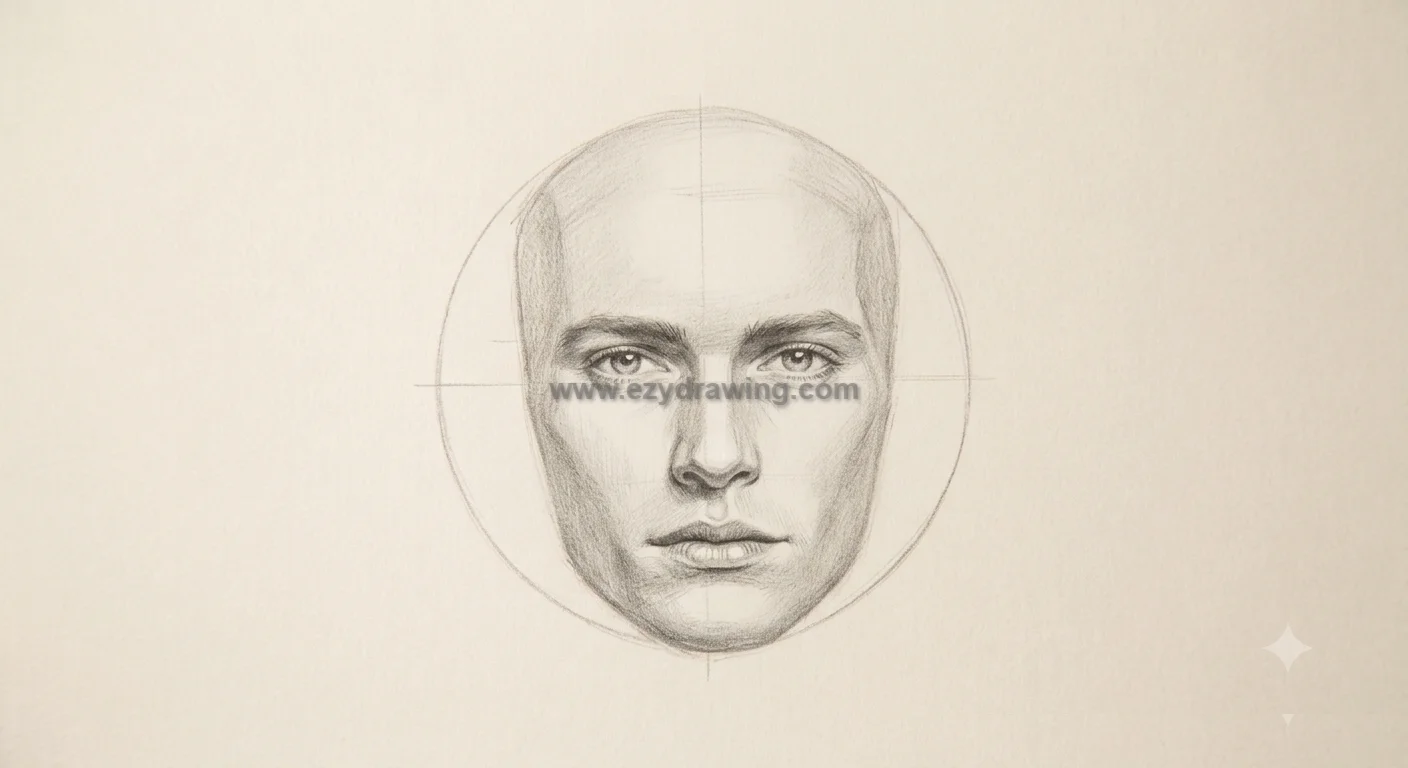
With the structures softly shaded (image 3), we can now add specific details and ‘sharpen’ the features.
Refine the eyes: define the eyelids, place the pupils carefully, and add the crucial catchlight (highlight) that gives them life. Sharpen the contours of the nostrils, ensuring they are rendered as dark holes and not just lines. Define the specific shape of the lips, paying close attention to the delicate, dark line where they meet and the shadow that defines the philtrum (the groove above the upper lip). Keep the soft lighting established earlier, but use a sharper pencil for these specific accents (image 4).
IMAGE 5 Caption: Features are now defined. The eyes have pupils and lashes, the nose contours are specific, and the lips are subtly modeled with volume, building directly on the soft structures of Step 4.
Step 6: Finalizing Tone and Texture
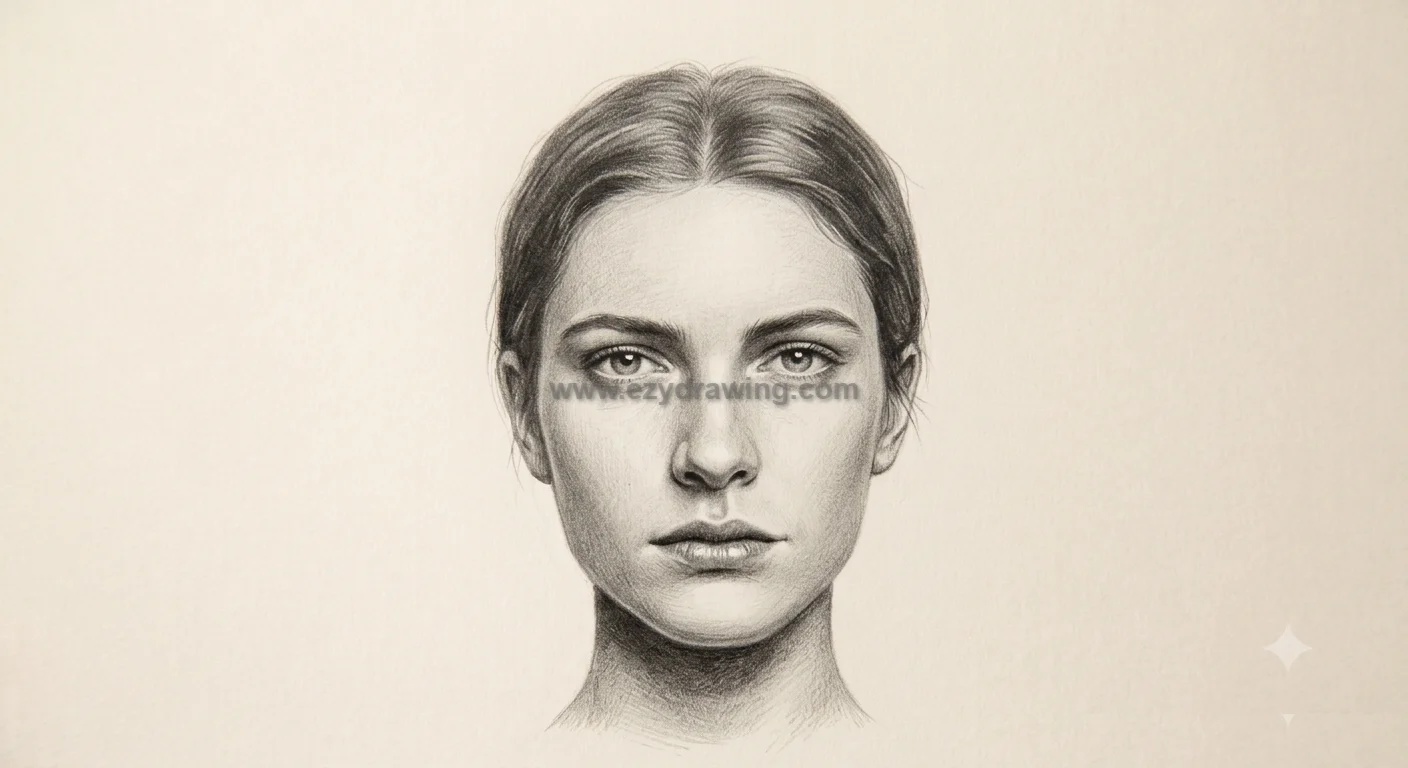
The final step is about unity, contrast, and adding realistic texture. We must integrate the sharp details of Step 5 into a cohesive whole.
Evaluate the overall tonal range. Deepen the darkest accents (the pupils, the deep nostrils, and the line between the lips) to create strong contrast. Block in the hair as a single mass, defining its volume first rather than drawing individual strands. Once the mass of hair is shaded, add texture by using varied pencil strokes—from soft and blended for underlying tone to sharp and crisp for individual flyaway hairs. Use an eraser to pick out subtle highlights on the hair, nose, and lips to finalize the illusion of three-dimensional form.
IMAGE 6 Caption: The finished portrait. Contrast is deepened in the focal points (eyes, shadows). The hair is fully developed as a mass with specific texture, all maintaining the soft lighting established earlier (seen throughout the sequence).
Summary: The 6 Stages of Portraiture
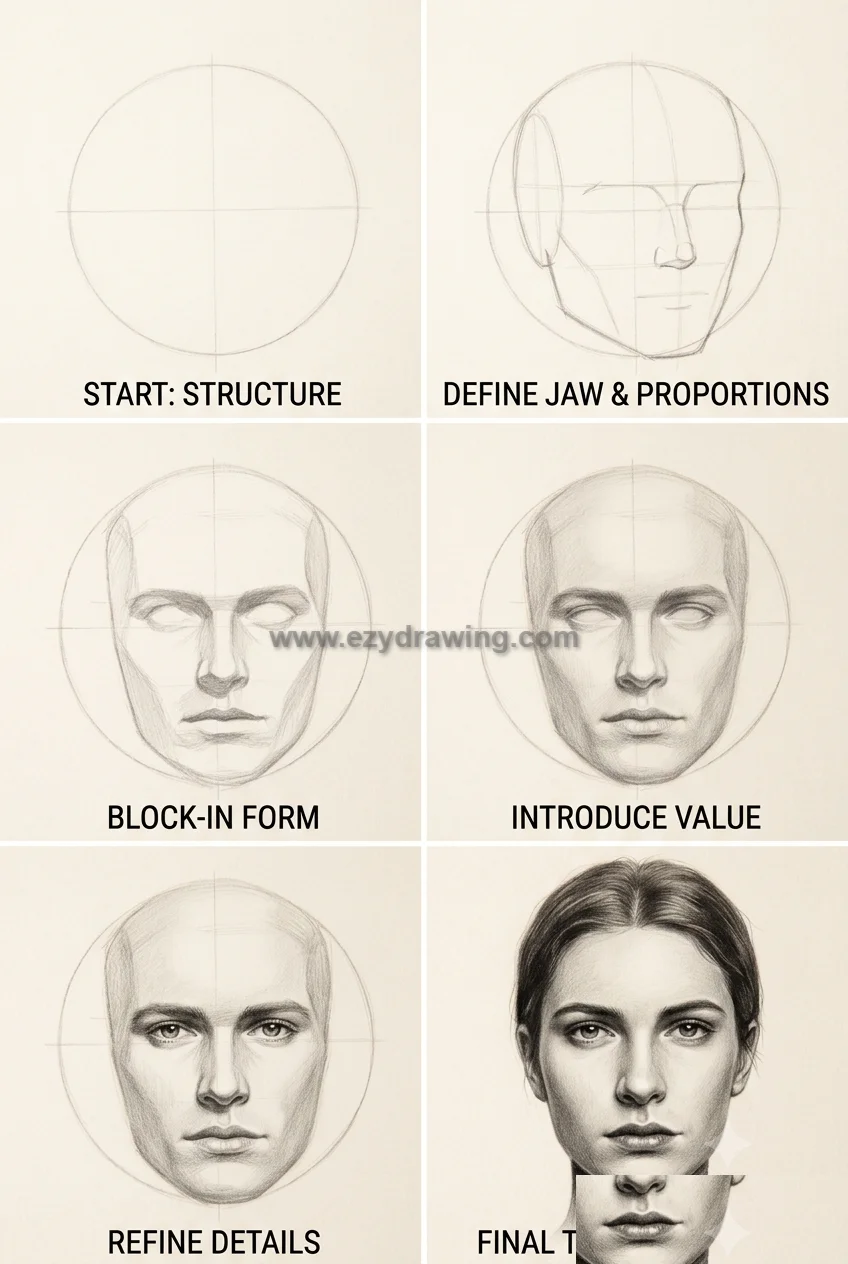
By reviewing the sequence of images generated, we can see the logic of the entire structure. We move from abstract geometry to spatial structure, then block in masses, apply value to define those masses, refine details within the value structure, and finally unite the drawing with texture and deep contrast. This approach minimizes errors and ensures the final rendering is built on a solid anatomical foundation.
Here is a visual composite showcasing the six-step transformation:
IMAGE 7: The Tutorial Summary: This poster visually compiles the six stages: 1. Structure (Image 0); 2. Jaw/Proportions (Image 1); 3. Block-In (Image 2); 4. Value (Image 3); 5. Refinement (Image 4); and 6. Final Texture (Image 5).
Conclusion
Congratulations on completing this guide! Learning How to draw portrait is a rewarding journey that blends observation, anatomy, and technique.
By mastering these foundational steps—starting with simple structure and progressively building form and detail—you have established a workflow that can accommodate any face, expression, or lighting setup.
Remember that consistency in the early construction phases is the key to realistic rendering later. Keep practicing these basics, and you will find your unique voice in portraiture. Happy drawing!
How To Draw Fish
How To Draw A Candle
How To Draw dinosaurs
How To Draw a Cow
How to Draw Nose