How To Draw A Candle Easy Step By Step Guide
Welcome to this easy, step-by-step tutorial on How To Draw a Candle! Drawing a simple candle is a fantastic project for beginners. It helps you practice fundamental shapes, manage symmetry, and understand how simple elements like a flame and melted wax are constructed.
In this guide, we will break down the process into six clear, manageable steps, making the how to draw process simple and enjoyable for every learner. By the end, you’ll have a charming drawing of a lit candle, and you can apply these principles to more complex still-life subjects.
Easy Candle Sketching Techniques for Kids and Beginners
How To Draw A Candle for Kids Easy Art Lesson is a simple and fun drawing guide made for young artists who want to create a neat candle sketch with easy lines and basic shapes.
In this lesson, kids can learn how to draw the candle body, add a glowing flame, create melted wax details, and finish the drawing with a clean and creative look. This beginner-friendly candle easy drawing activity helps improve drawing confidence while making the process enjoyable and simple to follow. Now, let’s move toward the steps.
Step 1: Establish the Main Body

The foundation of our candle is a simple cylinder. For this tutorial, we will view the candle from a direct front angle, leveled with the center of the wax.
Start by drawing a tall, slightly narrow rectangle in the center of your page. Because the camera is level, the top and bottom edges are perfectly straight, horizontal lines. Do not draw an oval or ellipse for the top yet; that comes later. Keep your lines light. This simple rectangle defines the height and width of your candle and makes the how to draw a candle process easier to follow.
Step 2: Define the Top and Wick
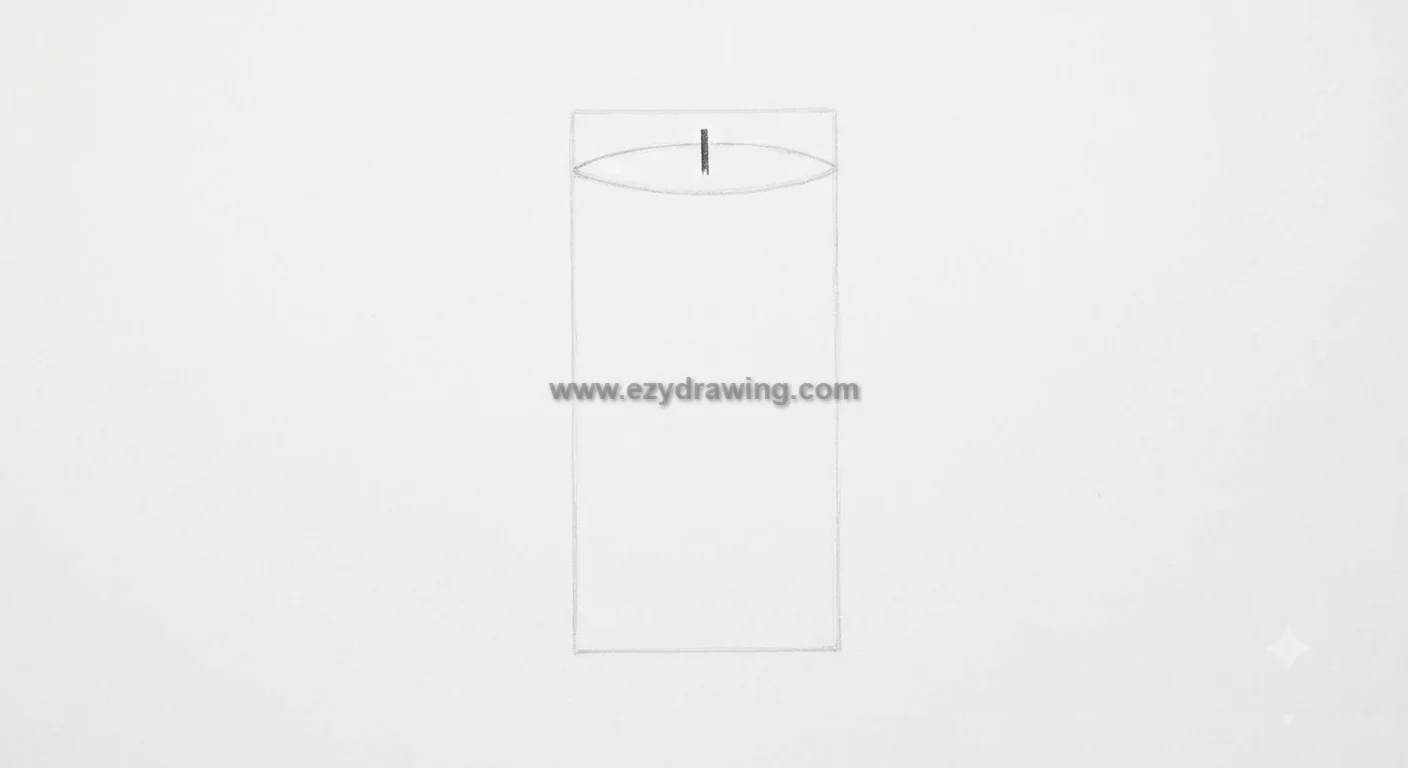
Now we will transition our shape from a simple rectangle into a defined candle.
First, gently curve the top horizontal line of the rectangle upwards, turning that flat edge into a soft, subtle curve. This defines the circular top surface of the candle from our level perspective. Now that the surface is established, we add the wick. Draw a single, short, dark, vertical line segment emerging precisely from the center of that new curved top edge. This wick anchors the flame we will add next and keeps the how to draw a candle process clear and simple.
Step 3: Draw the Core Flame Shape
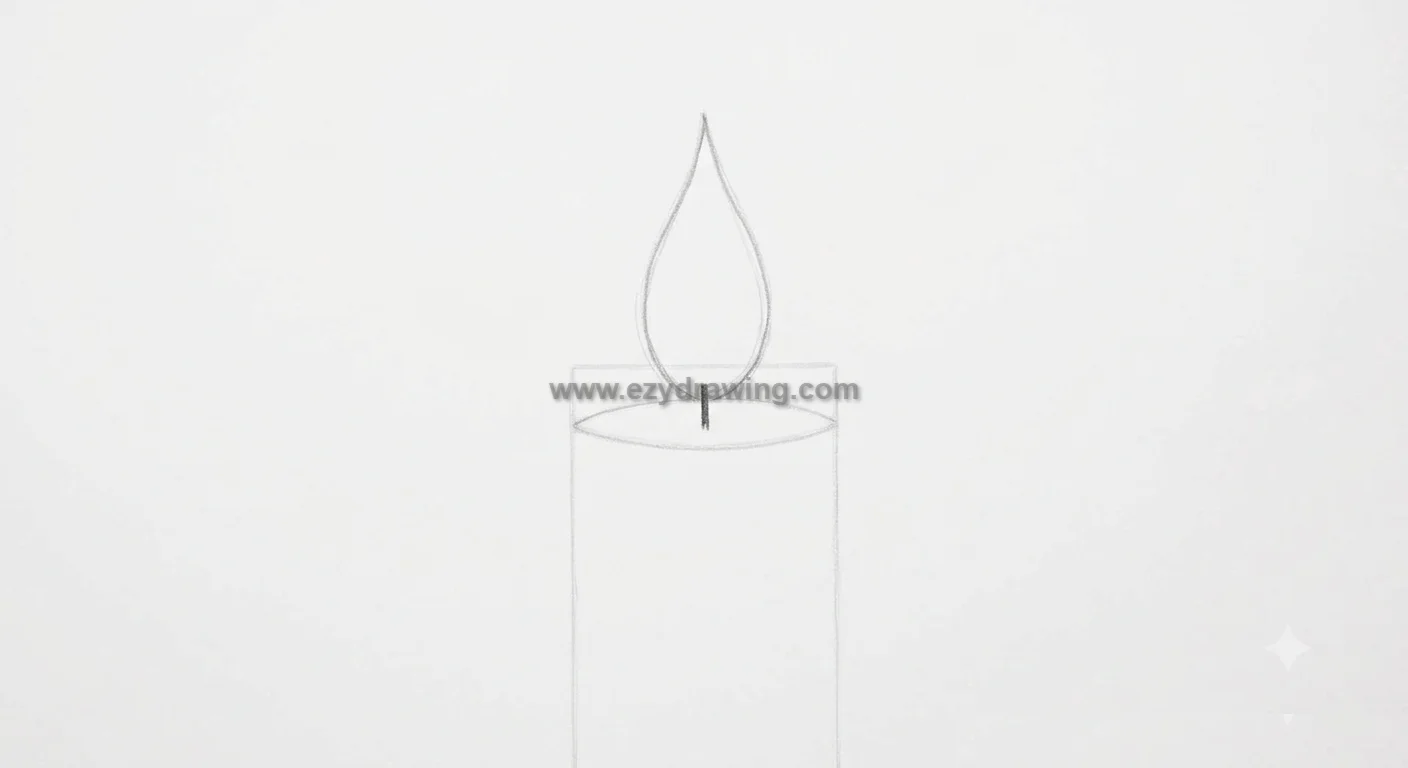
The candle is now ready to be lit. The flame is a classic teardrop shape.
At the top of the wick you just drew, draw an elongated, symmetrical teardrop shape. The flame should sit elegantly on the wick, maintaining the direct front perspective established in the previous steps. Keep this line light and smooth. It defines the boundary of the light source and makes the how to draw a candle process easier to understand.
Step 4: Add Character with Melted Wax
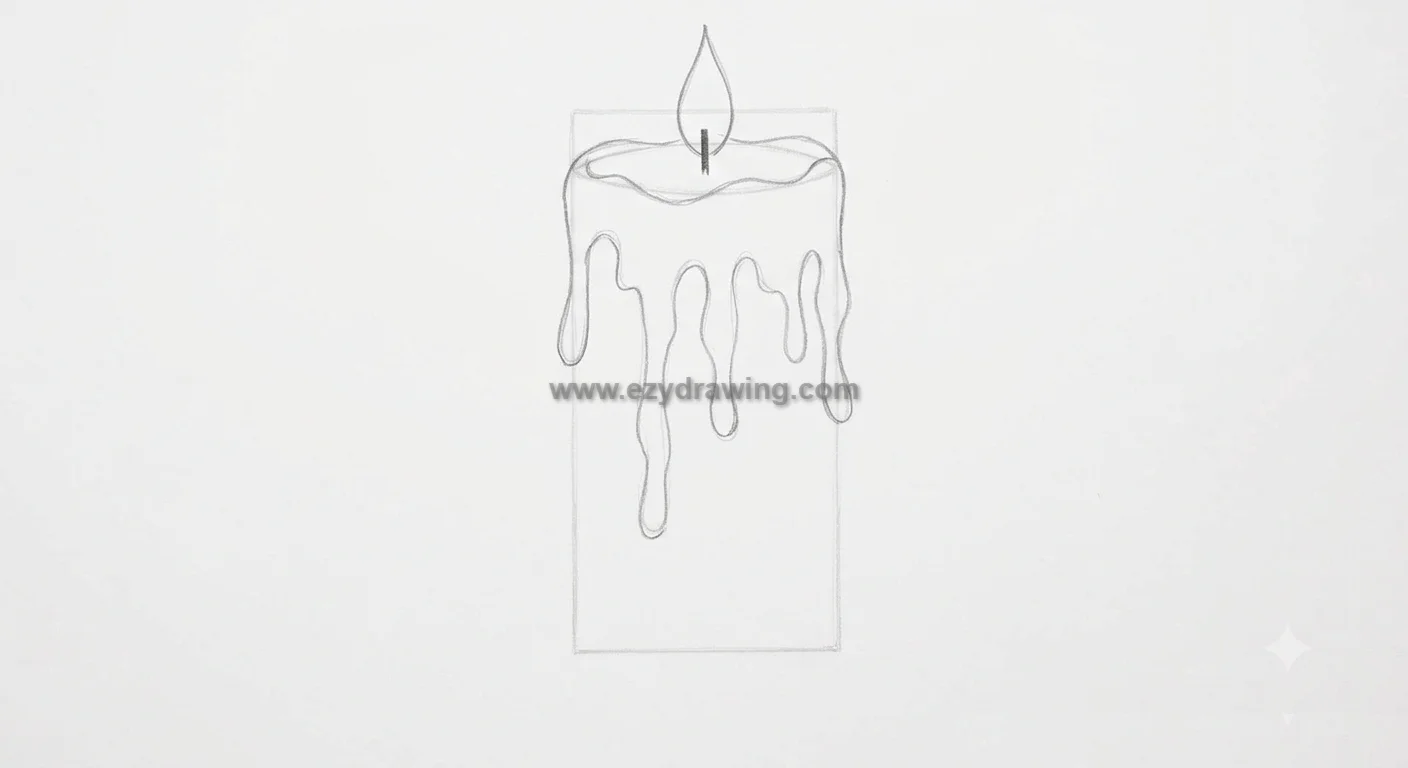
A pristine candle is nice, but adding melted wax makes it realistic.
We must make the top surface look uneven and “used.” Within the curved top outline (from Step 2), draw a few small, irregular, undulating lines to suggest a pool of liquid wax collecting around the base of the wick. Next, add texture to the side of the candle body (the original rectangle from Step 1). Draw two small, cascading, irregular drip shapes moving down the front surface. This simple addition gives the candle history and texture, all while maintaining the strict frontal perspective.
Step 5: Introduce Color and Basic Shading
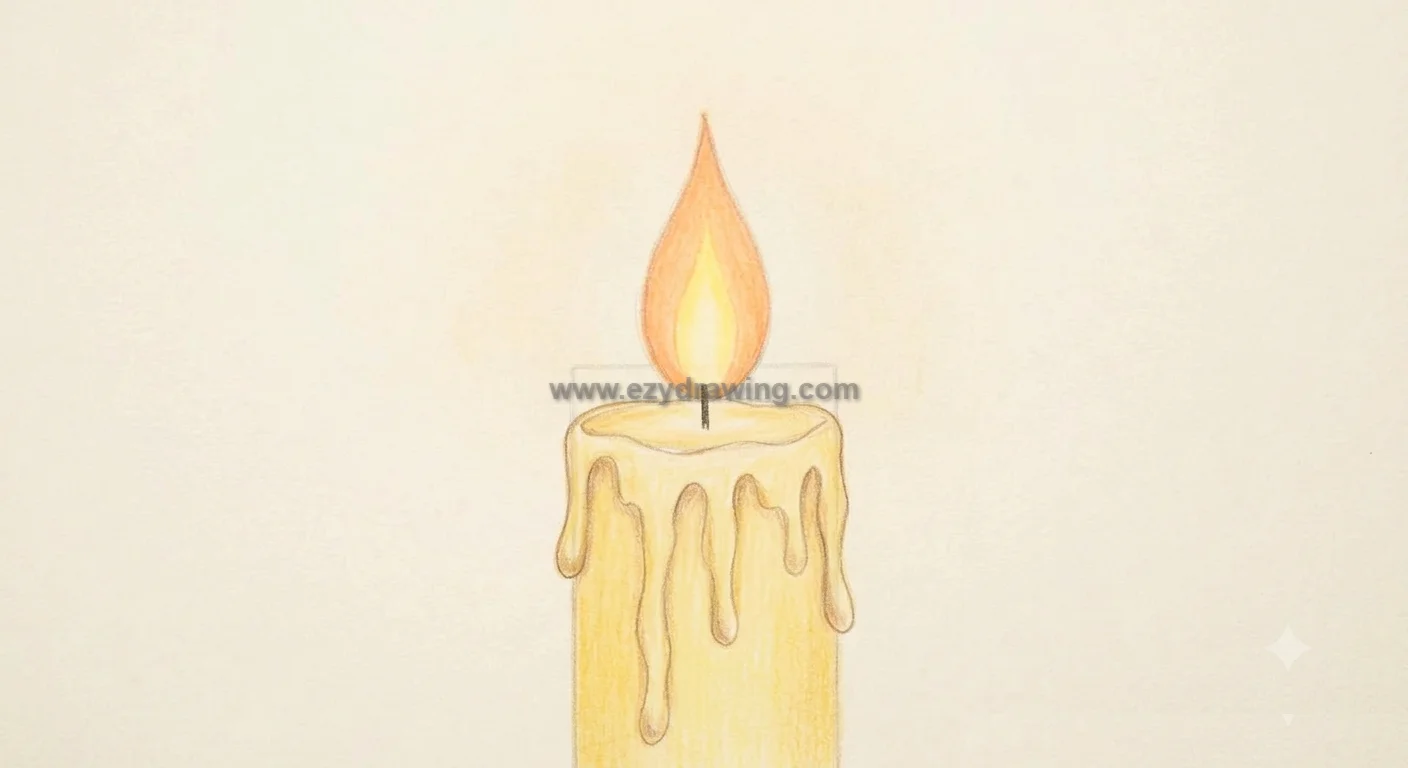
We are now moving from a simple line drawing to a colored illustration. This is where the image begins to pop.
First, fill the main candle body with a soft, warm cream or light yellow color. The drips you just added should be a slightly lighter shade of the same color, making them look dimensional. Use a warm, bright yellow for the flame. Now, apply simple shading: use a soft light-orange or light-brown colored pencil to add gentle, vertical shadows along the right side of the candle body. This shading makes the cylinder look rounded and helps the how to draw a candle process look more realistic.
Step 6: Finalize Shading and Define the Glow
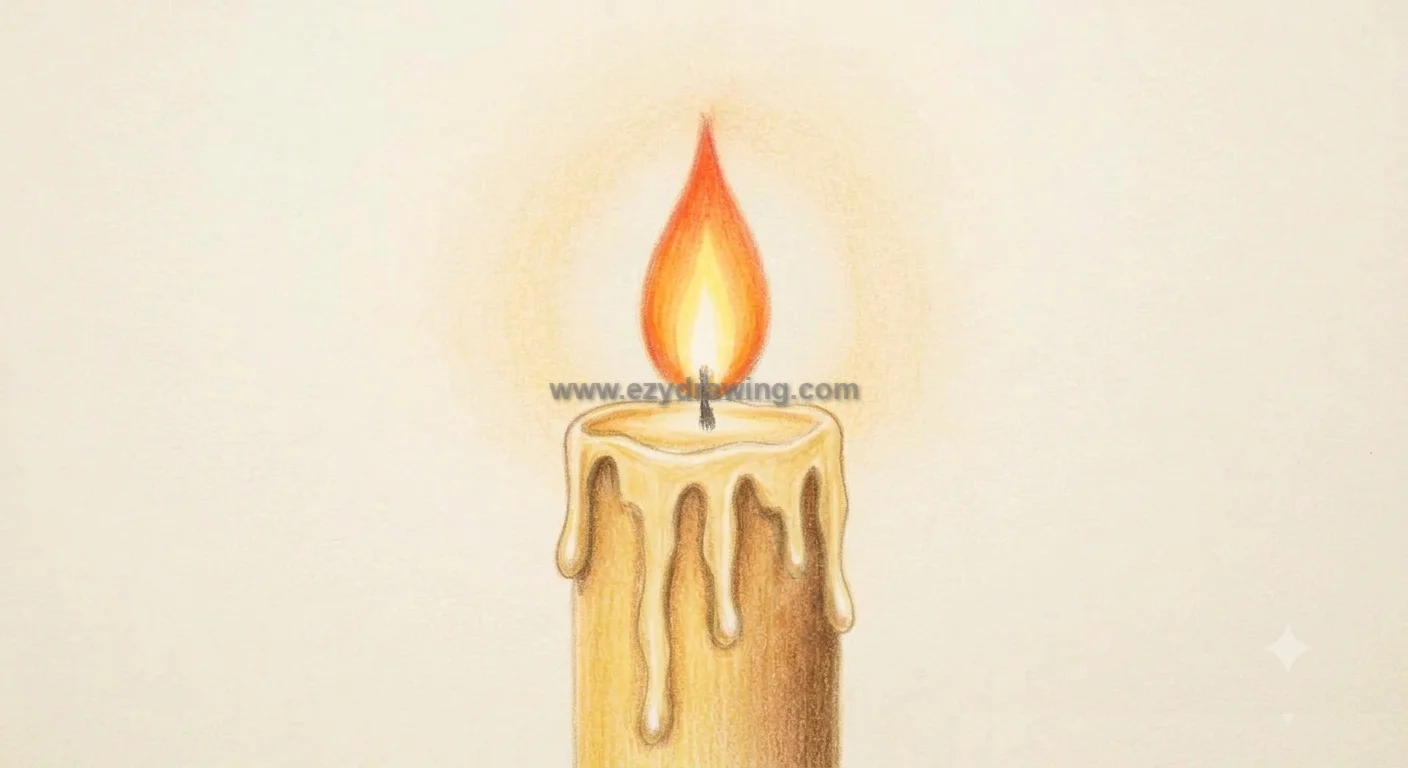
The final step is to refine the contrast and add the atmosphere.
Darken the shadows on the right side of the candle and the right edge of the drips using a warm brown pencil. This increases the three-dimensional effect and makes the how to draw a candle process feel more realistic. Refine the flame by making the base a deep orange and the center a very bright, almost white, yellow. Finally, draw a subtle, soft, wide circle of very pale yellow or peach around the entire flame. This represents the light being emitted, the glow. Your candle is now defined by both its form and its light.
Conclusion
Congratulations! You have successfully completed this guide on How To Draw a Candle. By breaking the process down into six simple steps—starting with a basic cylinder and gradually building the structure, adding realistic drips, and finally mastering the lighting and color—you have learned how to construct a simple but effective illustration. Shading and the final glow are essential for adding depth and atmosphere. Keep practicing these fundamentals, and enjoy your new drawing skills!
Summary: All 6 Steps
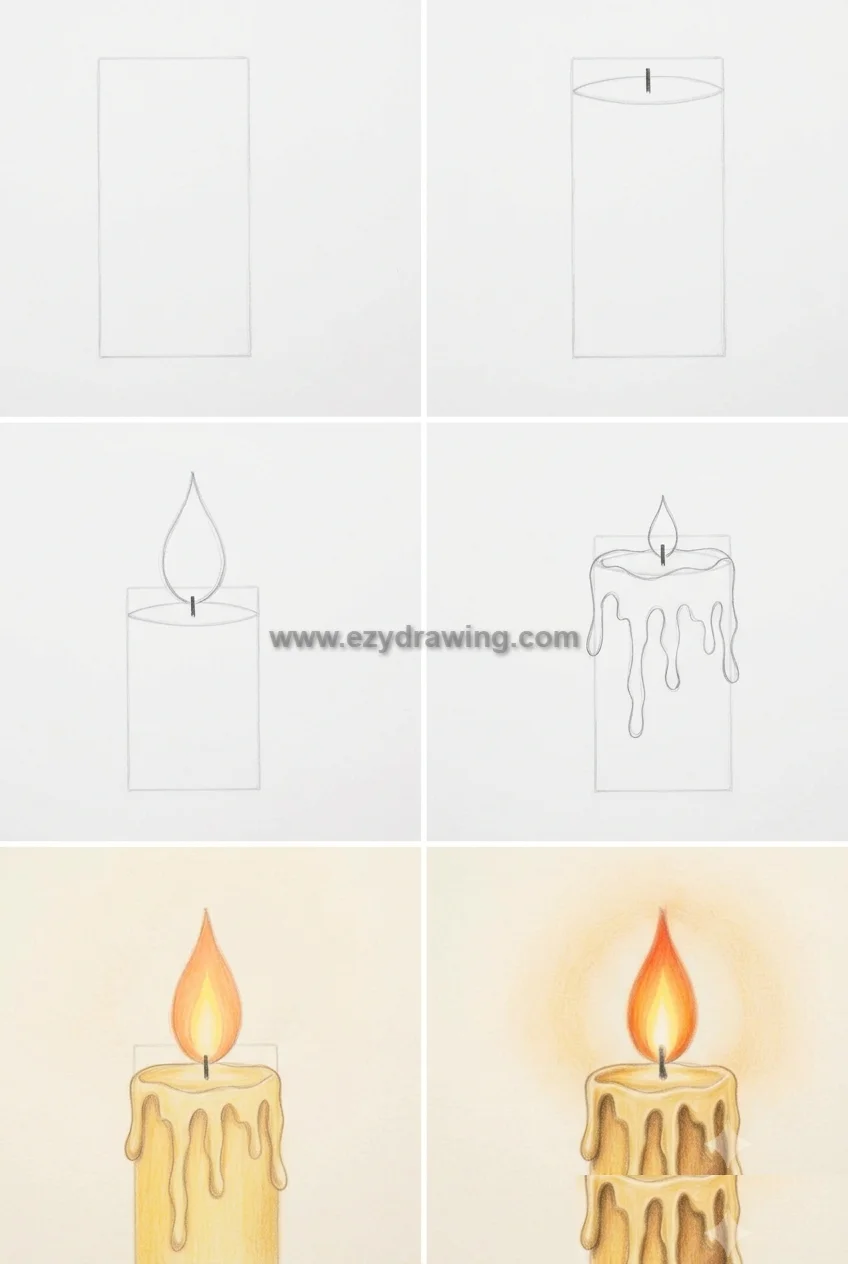
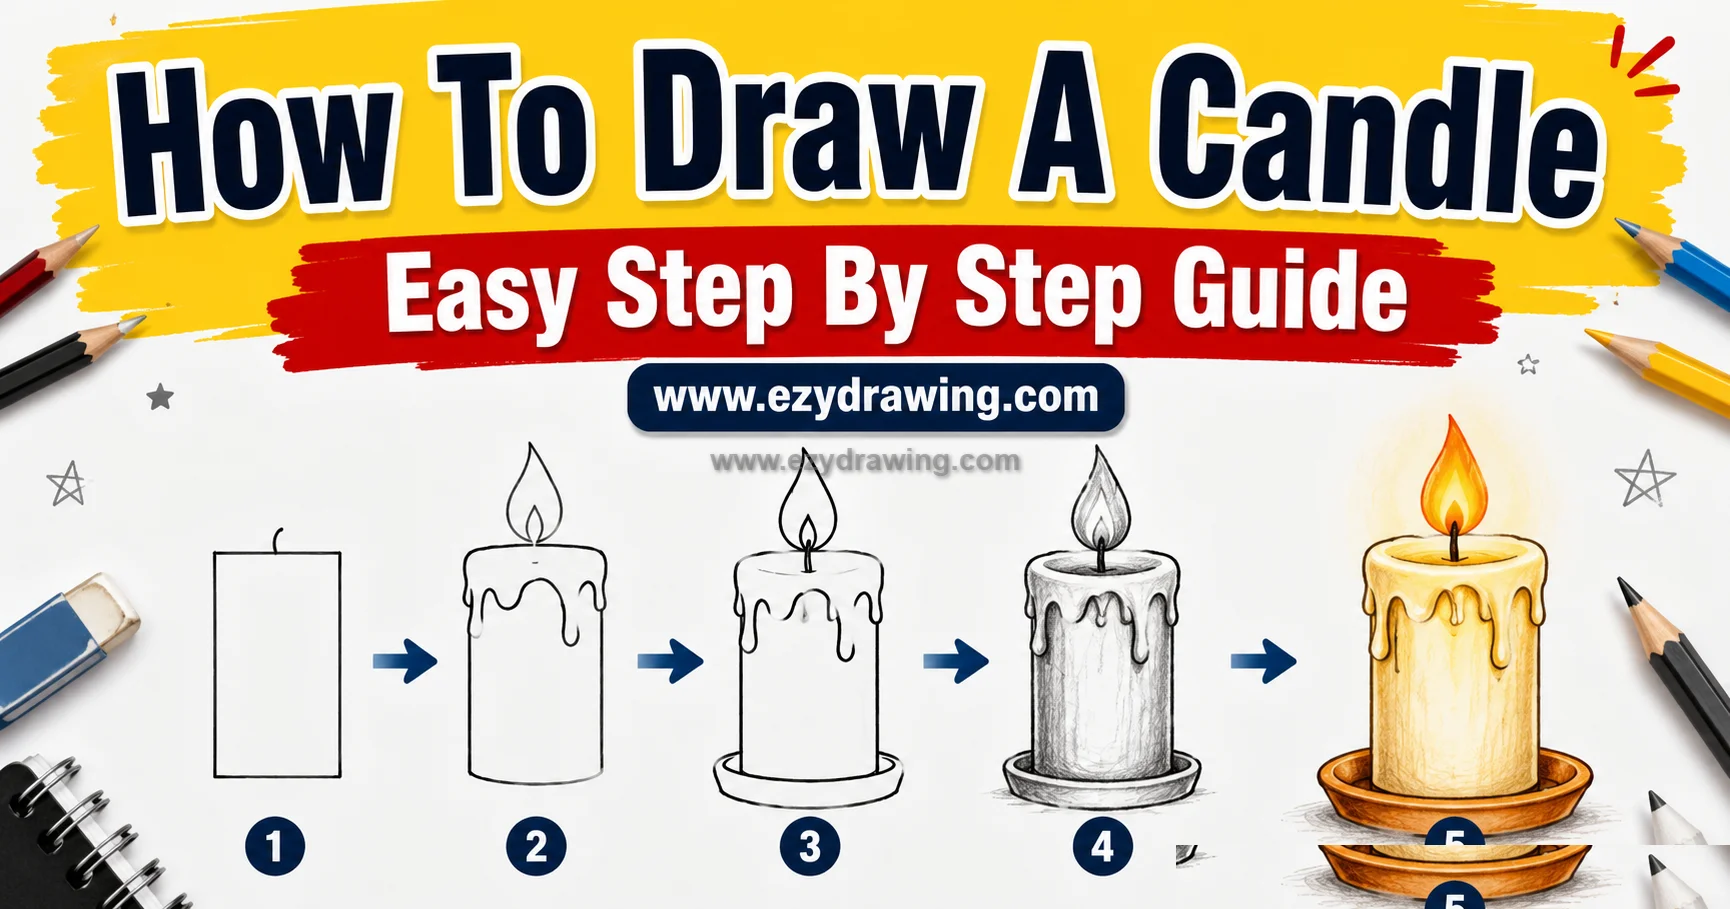
This composite image displays the entire progression from Step 1 to Step 6, allowing you to quickly visualize how the simple rectangle evolves into the final, glowing candle.