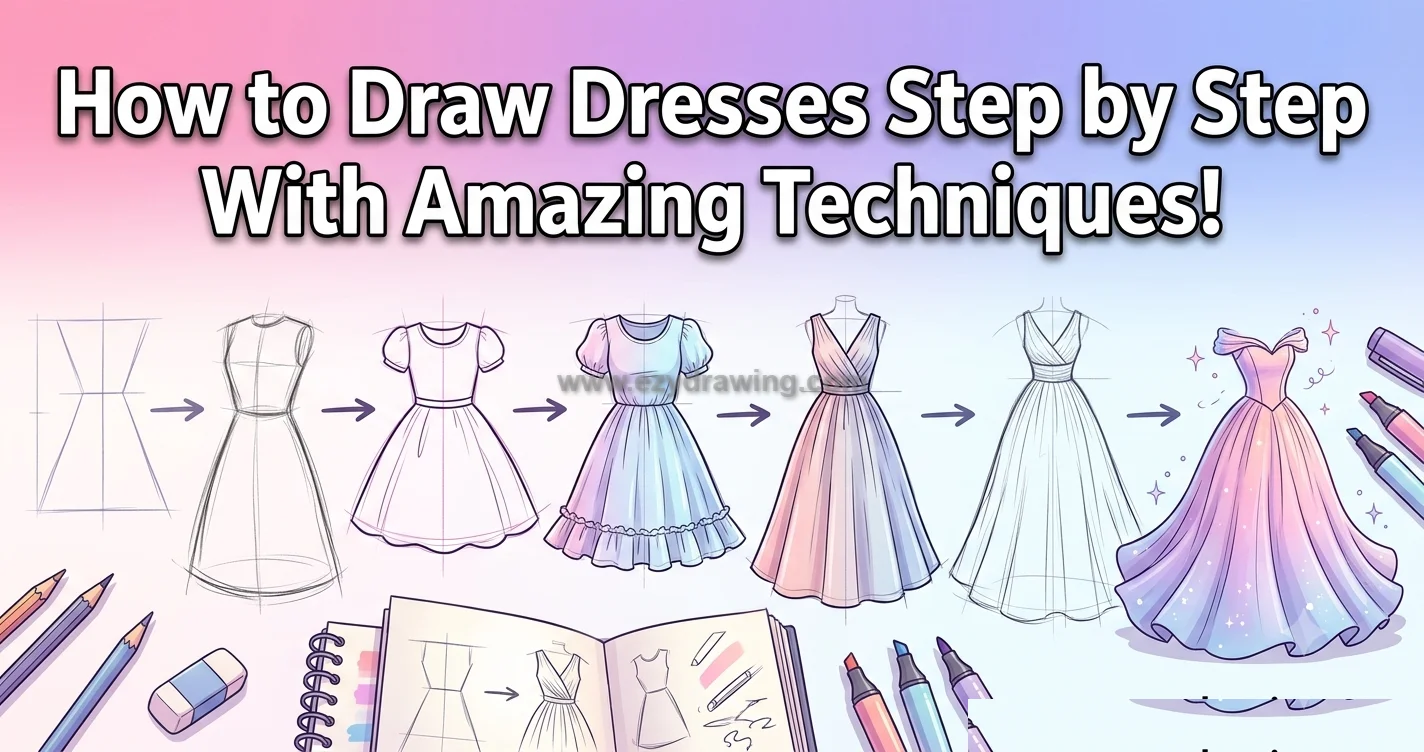
How to Draw Dress Step by Step With Amazing Techniques
Learning how to draw dress designs is a fundamental skill for aspiring fashion illustrators and designers. Whether you want to create a chic cocktail dress or a flowy evening gown, understanding the basics is key.
This tutorial will guide you through the process of how to draw dresses with a simple, step-by-step approach, making dress drawing easy step by step for beginners.
You’ll learn how to build the structure of a dress and then add details like folds and ruffles. Learning how to draw a dress becomes easier when you follow each stage carefully.
This is a great dress drawing tutorial for anyone, including kids, who wants to start their journey into fashion sketching. We’ll cover everything from the basic silhouette to the final rendering of a long dress drawing. Let’s get started on your path to creating beautiful dress drawing sketches.
Step 1: The Basic Blueprint Building the Torso
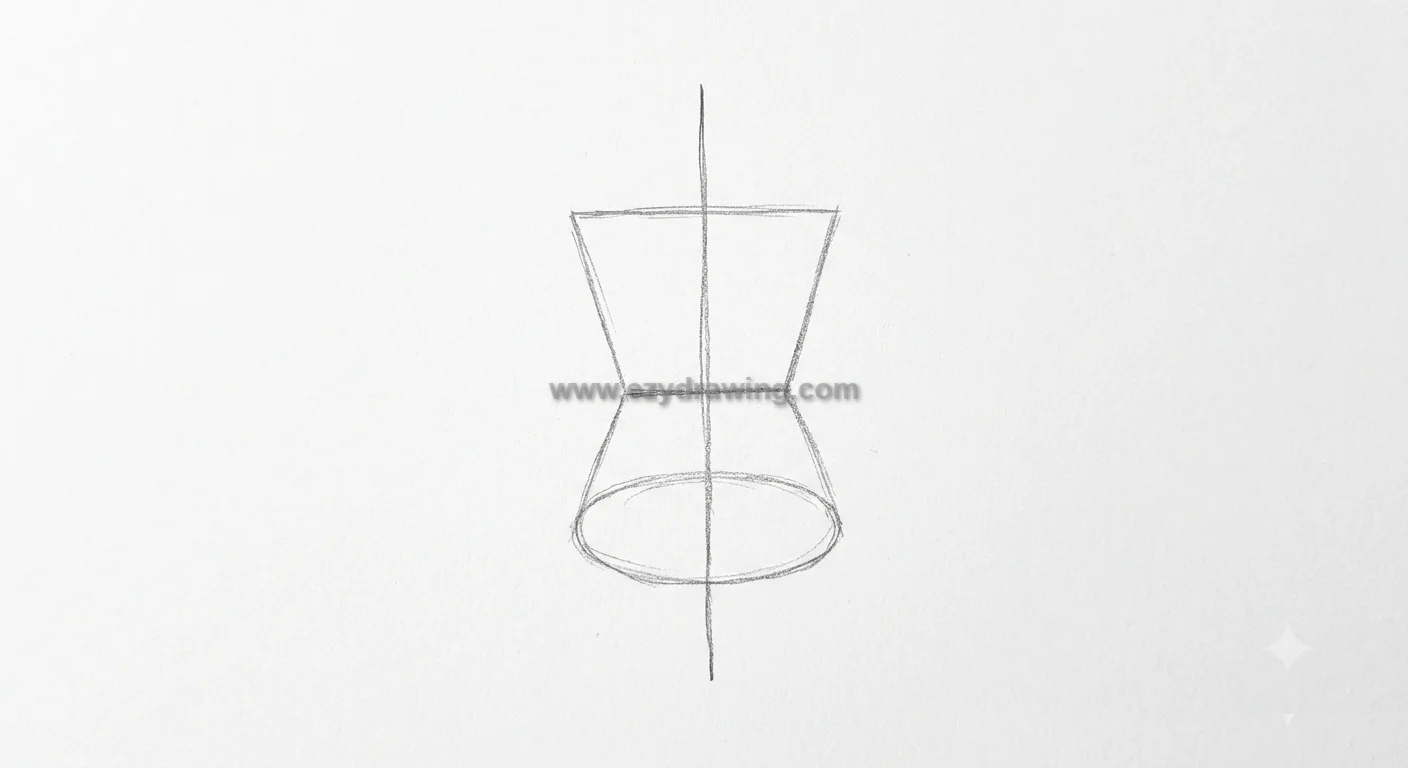
To begin any dress drawing, we must establish the base upon which the fabric hangs: the mannequin or human torso. Since this is a step-by-step guide on how to draw a dress for beginners, we will start simple.
First, lightly sketch a central vertical line to maintain symmetry. Then, draw a basic trapezoid or inverted triangle to define the ribcage (the upper bodice). This simple foundation makes an easy dress drawing more balanced and helps you build the remaining shape with confidence.
Below that, connect a smaller oval for the waist, and then a larger, wider oval for the hips. This structure forms the foundation of your dress design drawing. Think of it as a simplified dress reference drawing to ensure everything remains aligned.
Step 2: Defining the Neckline and A-Line Silhouette
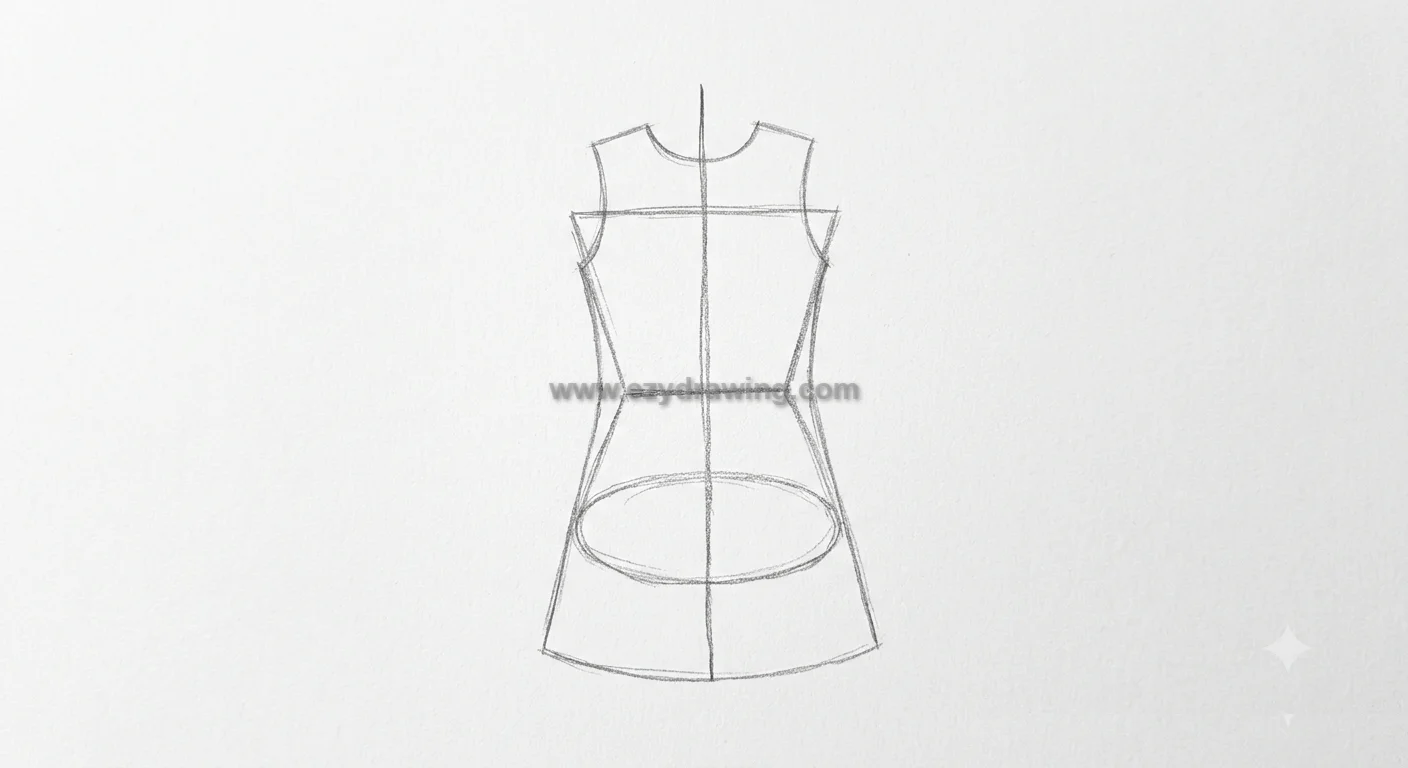
Once the underlying structure is in place, we can define the dress’s general shape and its connection to the neck. Using the structural blueprint from Image 1, we now establish the boundaries of the garment.
In this step, we sketch the curve of the neck. We connect the upper torso trapezoid to the neck and then, moving downward, define the “A-line” silhouette.
This means the dress will flare out gradually from the waist, a common feature in many simple dress drawing styles. The pencil lines are still light and sketchy as we transition from structure to garment outline.
Step 3: Introducing Movement with Dress Folds
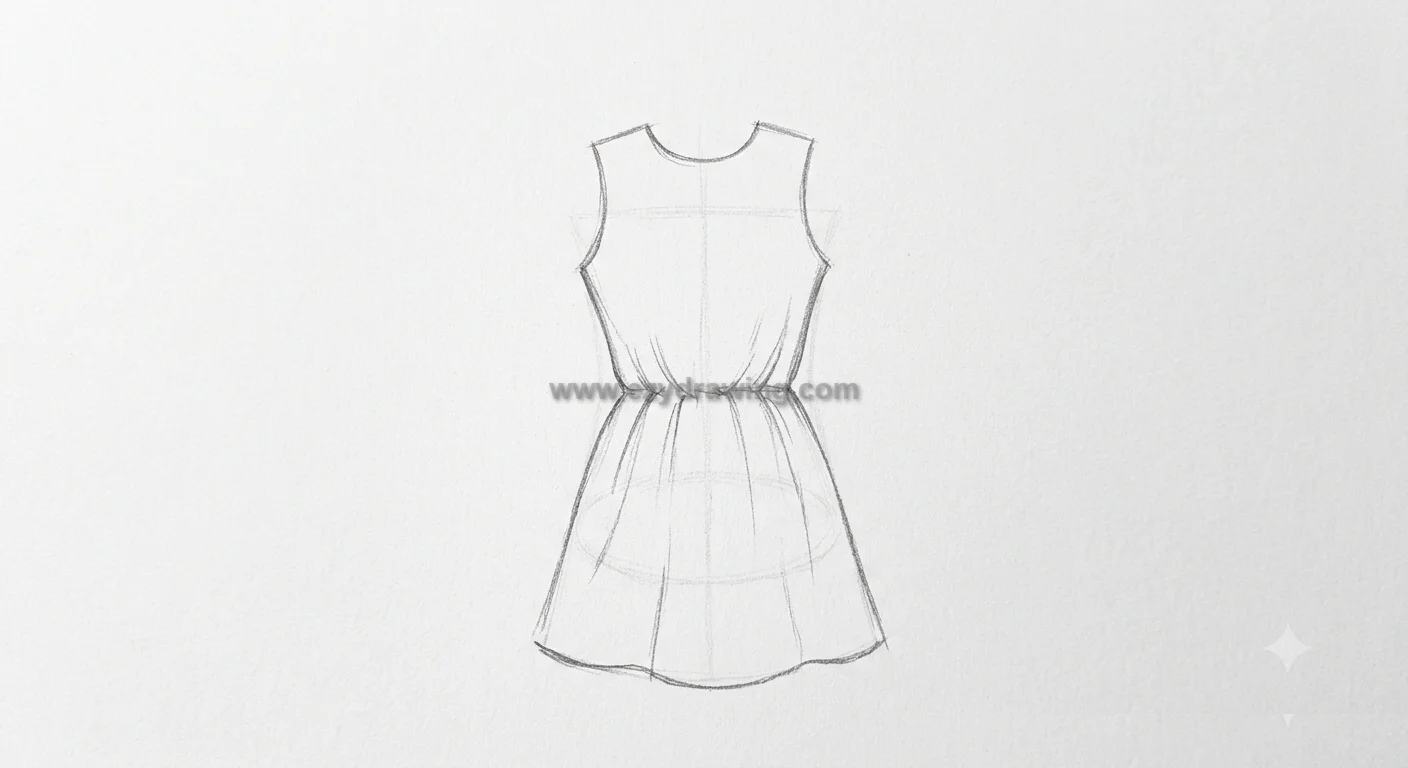
Fabric rarely hangs perfectly flat. To make your dress drawing sketches look realistic, you must learn how to draw dress folds. Folds convey volume, texture, and movement.
Building on the established silhouette from Image 2, we begin to introduce subtle dress folds and soft gathers at the waist.
Notice how the pencil lines change in quality—they are less rigid and more organic, showing the soft pleats forming on the A-line skirt. This step begins to transform the flat shape into a cute dress drawing that feels dimensional.
Step 4: Elaborating the Design with Ruffles and Hemlines
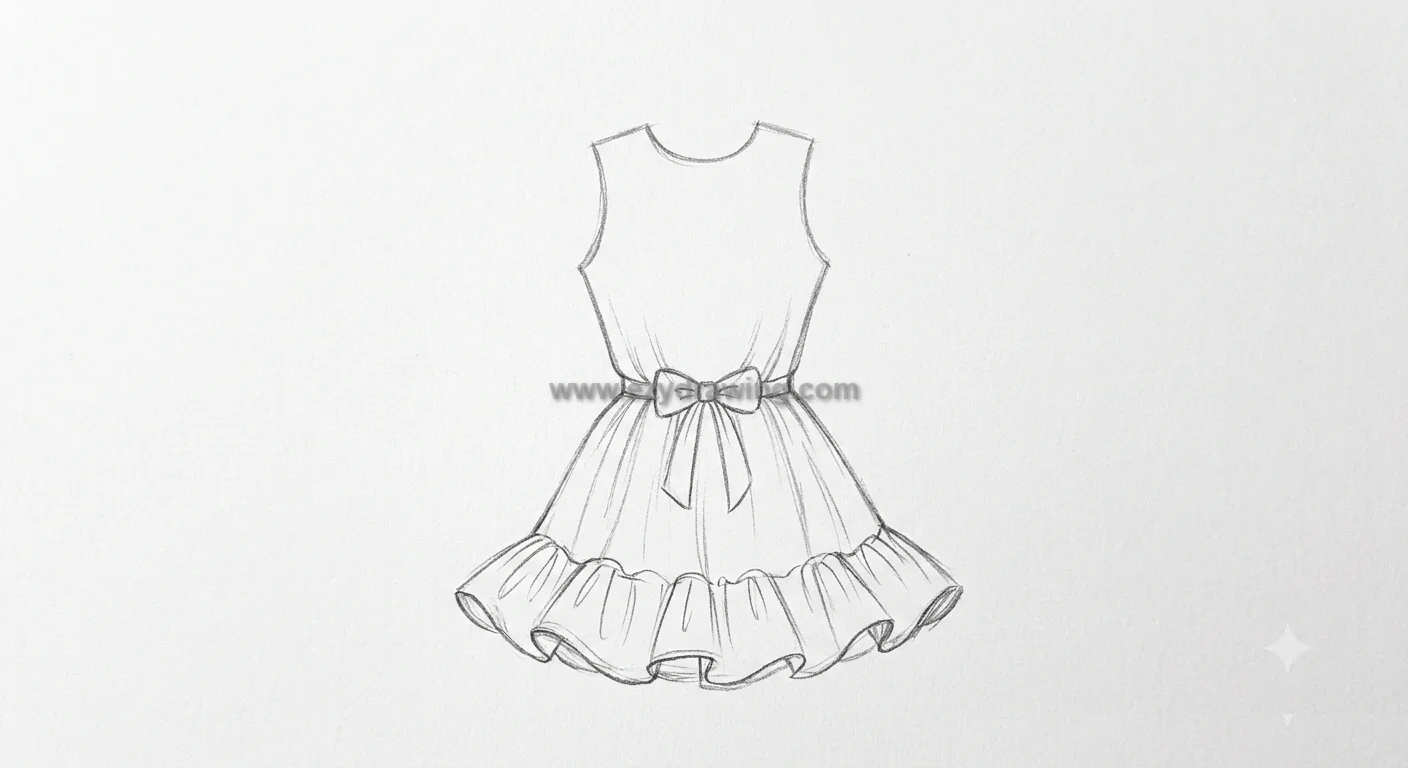
Now that we have established movement with folds, let’s take the dress design drawing further by adding more complex details. Step 4 focuses on how to draw ruffles on a dress.
We expand the skirt silhouette we created in Image 3, and add a wide, gathered ruffle to the entire hemline. The curves used to draw the ruffles are more playful and complex than the simple folds, showcasing how to manipulate fabric shape.
To make this a truly flowy dress drawing, we add corresponding gathers where the ruffles meet the main skirt. This technique is essential for any long dress drawing that requires texture and depth.
Step 5: Finalizing the Outline and Adding Depth
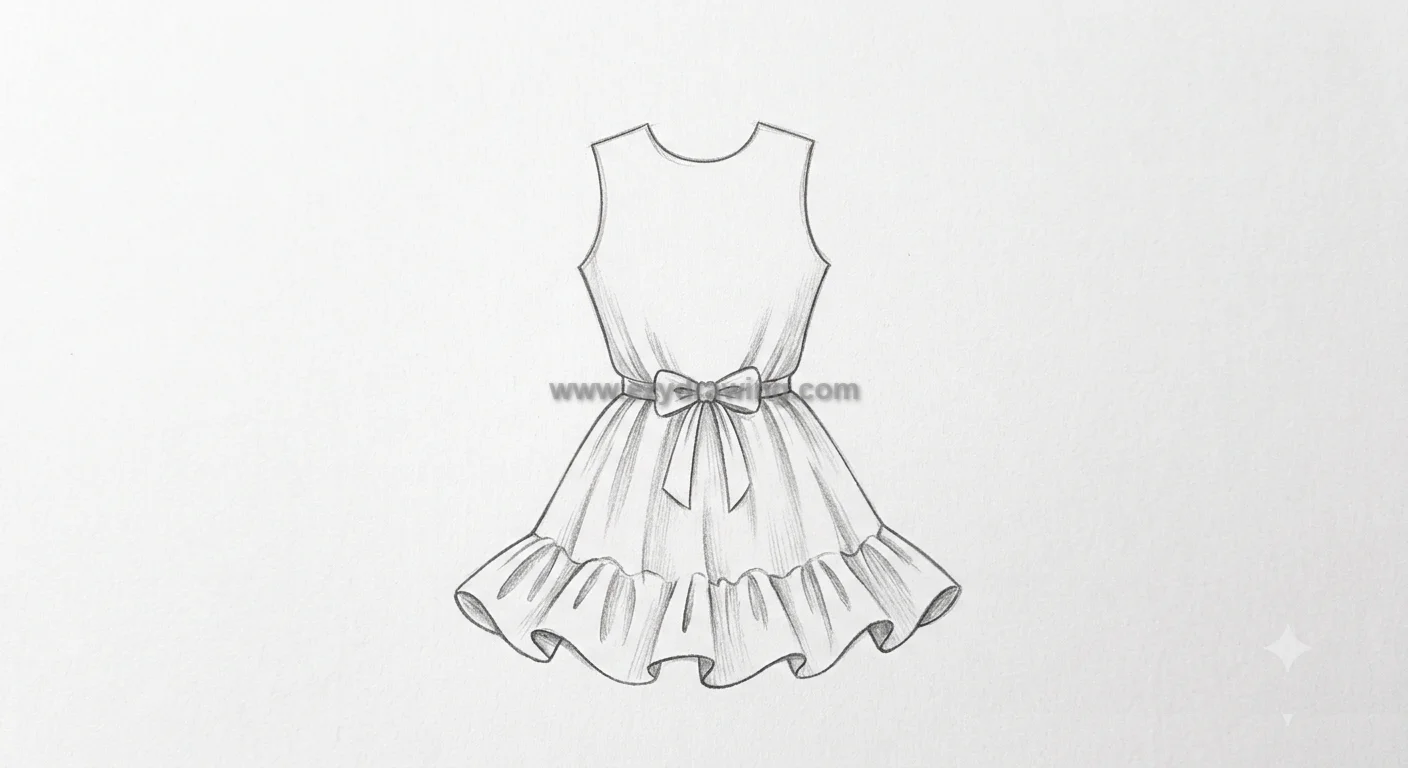
The dress structure is complete, and the design details (folds, ruffles) are sketched in. Now it is time to clean up the drawing and make the lines crisp. This step is crucial for finalizing any dress drawing tutorial.
Using a finer pencil or darker graphite, we go over the final contours of the dress, solidifying the shapes of the bodice, the waist, and the complex ruffled hem from Image 4.
We refine the internal dress folds, making them softer and more defined. We also begin adding very subtle pencil shading to the deepest parts of the folds and under the waistline, giving the illustration its first sense of true depth. This defines the overall look of your dress reference drawing.
The smooth line control and gentle shading practiced in candle drawing can also help make the fabric folds appear cleaner and more realistic.
Step 6: Rendering: Color and Texture
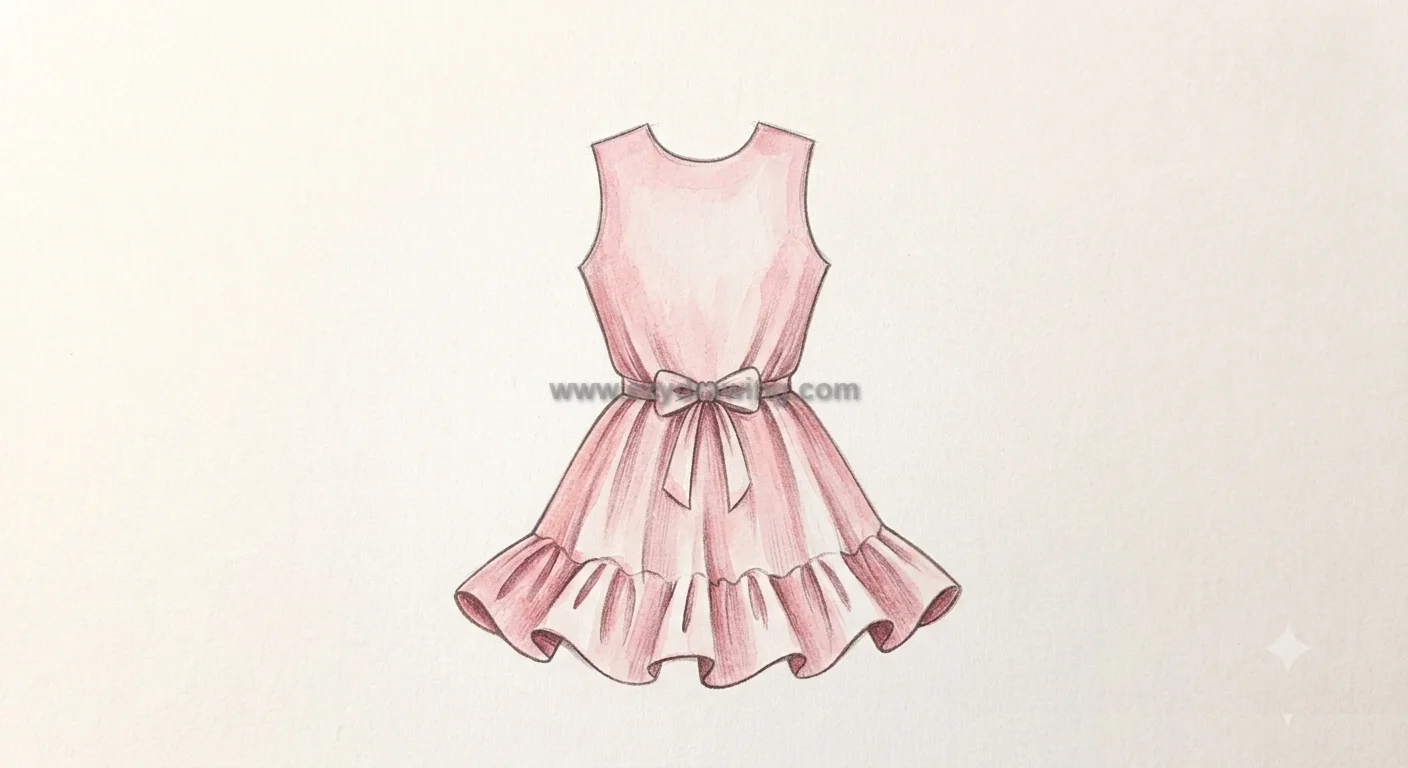
In the final step, we move from a linear sketch to a fully rendered fashion illustration. Building on the clean graphite work and shading from Image 5, we introduce color and final texture.
We apply soft, pink watercolor washes to the dress, allowing the established graphite lines to show through. This watercolor application provides a soft, “cute dress drawing” aesthetic.
Once the wash is dry, we add fine, cross-hatch lines in a slightly darker rose hue to suggest fabric texture, and apply final, deeper shadows (like the ones defined in Step 5) with a colored pencil. The background remains light, focusing attention entirely on the rendered dress design drawing.
The same gentle shading and rounded line control used in balloon drawing can help create smoother fabric highlights and a more polished finish.
Summary: The 6 Stages of Dress Drawing
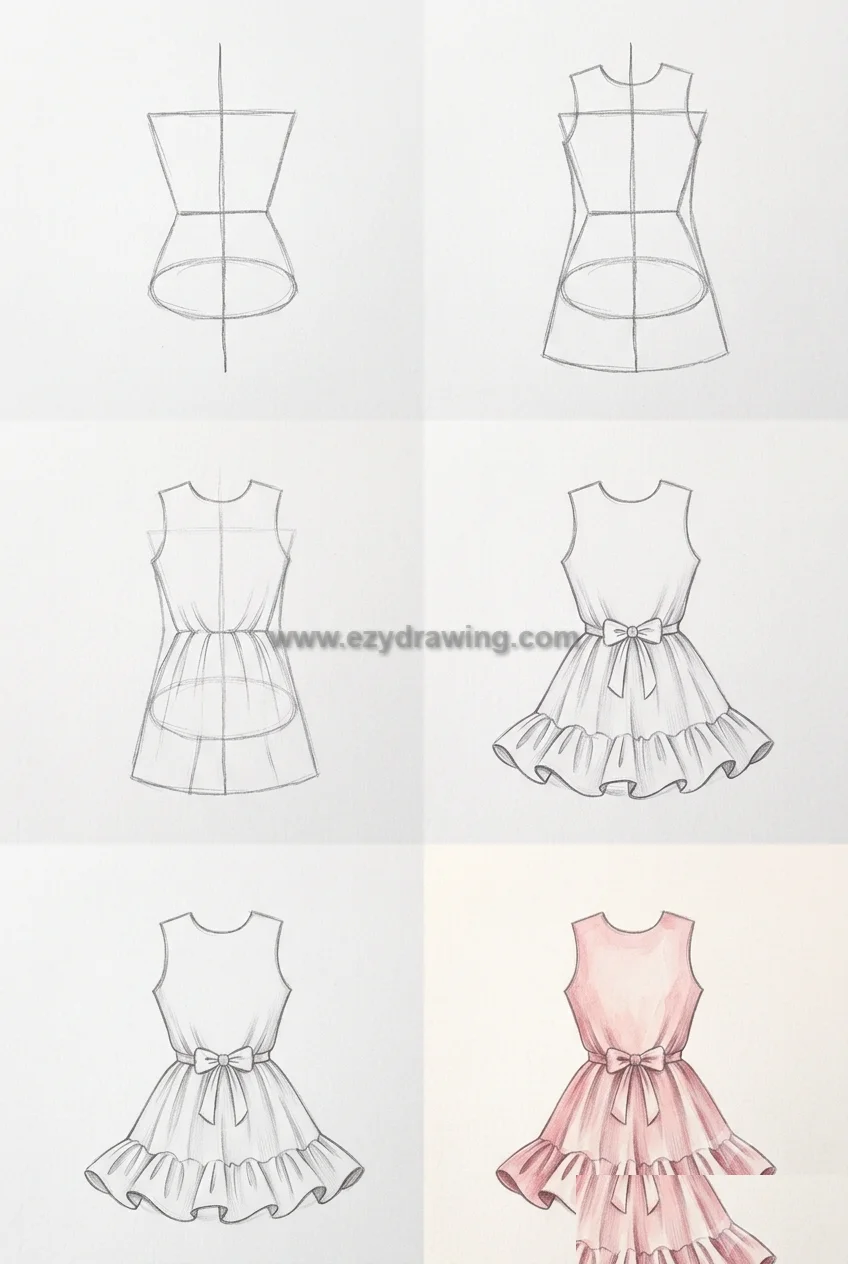
This tutorial followed a standard, foundational progression for fashion illustration. We started with the internal armature (the torso blueprint), built the external silhouette, introduced movement with basic folds, complexified the structure with ruffles, refined the linework and shading for dimension, and finished with a colored, textured rendering.
Practicing smooth curves and controlled shading through mouth drawing can also help improve the precision needed for detailed fashion illustrations.
Conclusion: Your Journey in Fashion Sketching
Congratulations on completing this tutorial! You have learned the foundational steps of how to draw dress designs, transforming simple geometric shapes into a fluid, volumetric fashion illustration.
By mastering the structure of the torso and understanding how to apply dress folds and ruffles, you can now create your own unique dress drawing sketches. This method makes dress drawing simple and accessible, allowing you to explore endless dress drawing ideas.
Keep practicing these steps, and soon you will be illustrating everything from a basic silhouette to a complex, long dress drawing with confidence. Happy sketching!
How to Draw Cake
How to Draw Fox
How To Draw Doodles
How to Draw Portrait
How To Draw Fish