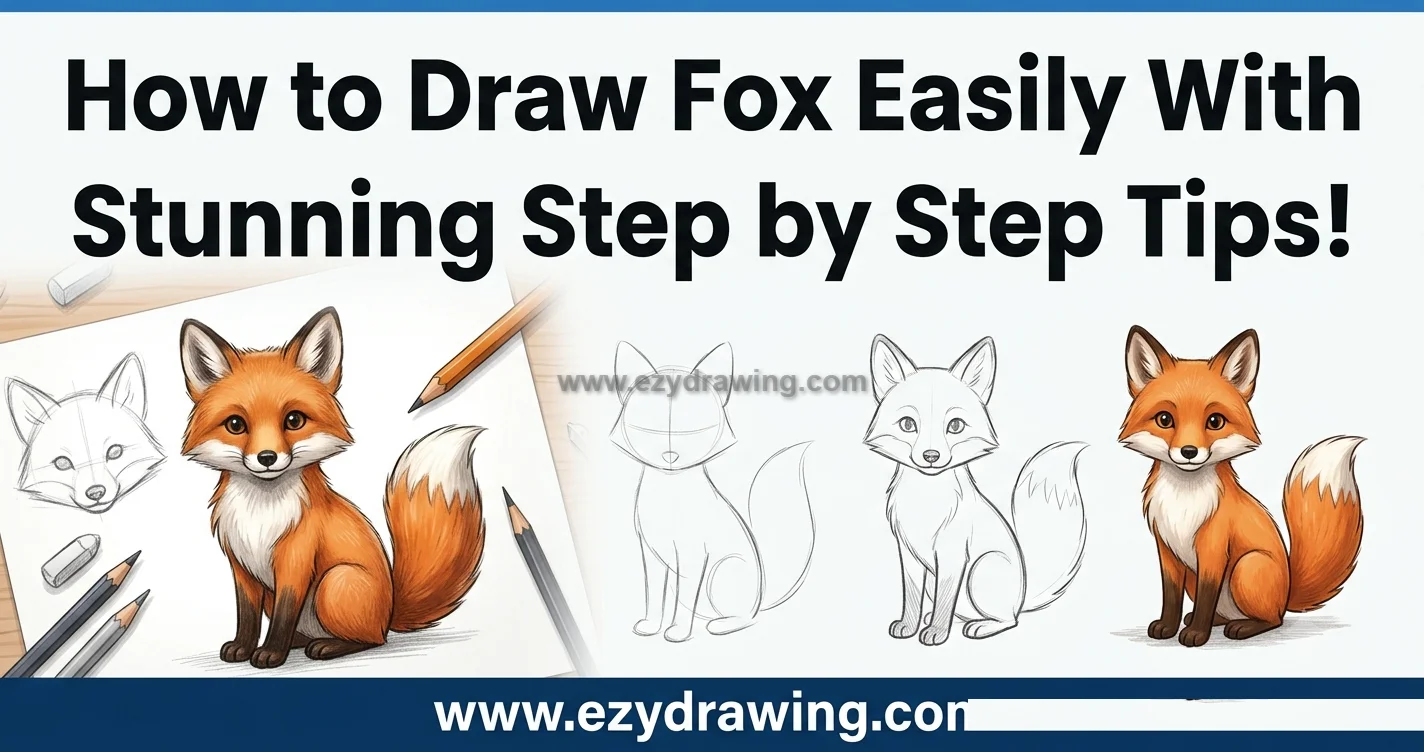
How to Draw Fox Easily With Stunning Step by Step Tips
Welcome to this easy-to-follow guide on how to draw fox! Foxes are captivating creatures, and capturing their likeness on paper is a rewarding experience. This tutorial is designed for beginners and experienced artists alike, focusing on creating a charming, simple fox drawing.
We will break down the process into clear, manageable steps, providing a visual reference for each stage to help you along the way as you learn How to Draw
Whether you’re looking for a cute fox drawing for a cartoon character design, a fundamental structure for a more realistic fox drawing, or just a relaxing activity, this guide covers the essentials of fox art drawing. So, grab your pencil and paper, and let’s explore how to draw fox together!
Step 1: Laying the Foundation – The Basic Fox Head and Body Shapes
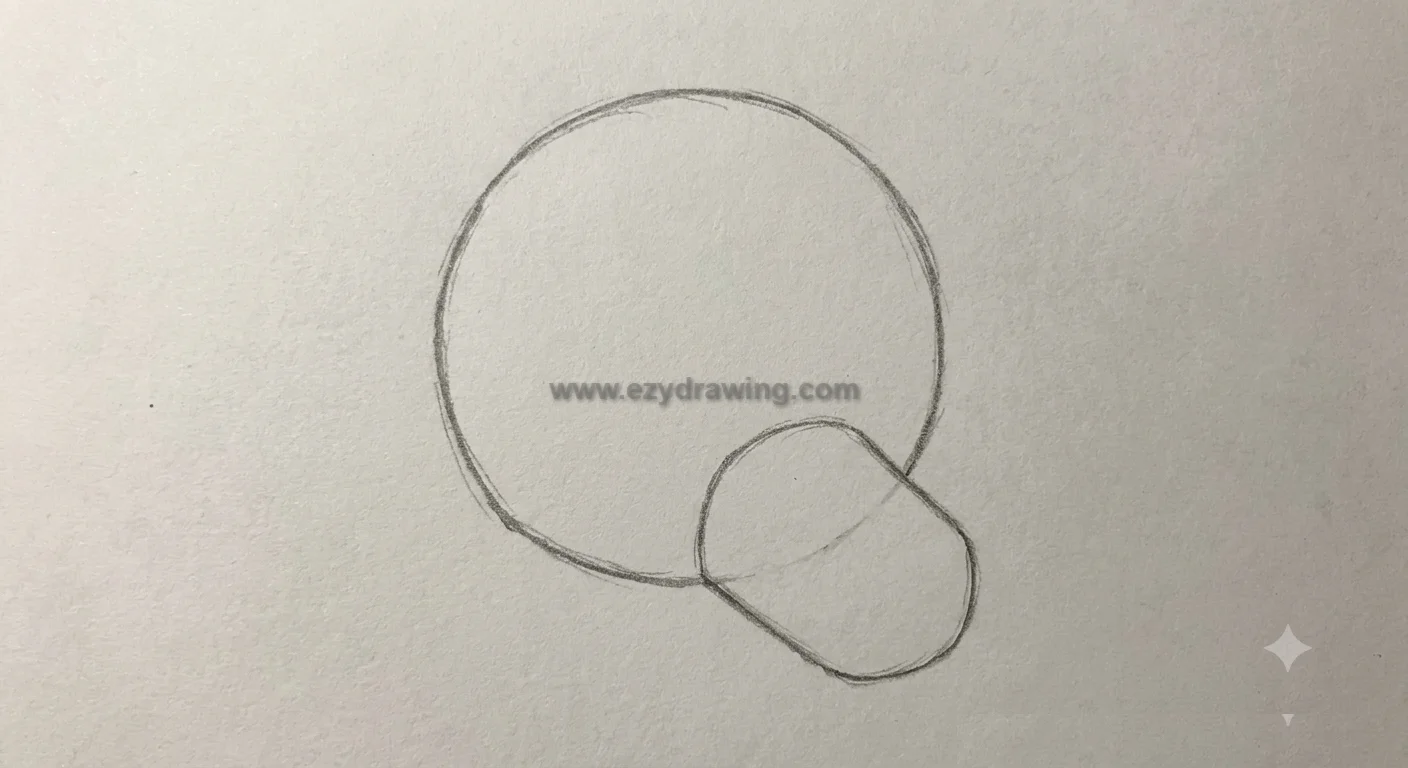
We’ll begin by establishing the primary structures. Don’t worry about details yet; we’re just blocking in the main components of our fox head drawing. Start by sketching a slightly flattened oval or a soft pentagon shape. This will serve as the skull, the foundation for the entire fox face drawing.
Next, attach a smaller, somewhat rounded snout to the lower front of the head shape. Think of it as a small, gentle muzzle extending outwards to create a soft and friendly appearance.
This forms the basis of the fox anatomy drawing we are building and helps achieve a cute fox easy sketch that beginners can follow with confidence. The combination of these shapes is a common starting point in many fox drawing references.
This step creates the essential “block” that you can adapt for various types of fox drawings, whether it’s a fennec fox drawing with its characteristic larger ears (to come later!) or a classic red fox.
Keep these initial fox pencil drawing lines light, as they will be built upon and refined in subsequent steps. This simple foundation is also perfect if you are aiming for a cartoon fox drawing style.
Step 2: Defining the Profile and Features
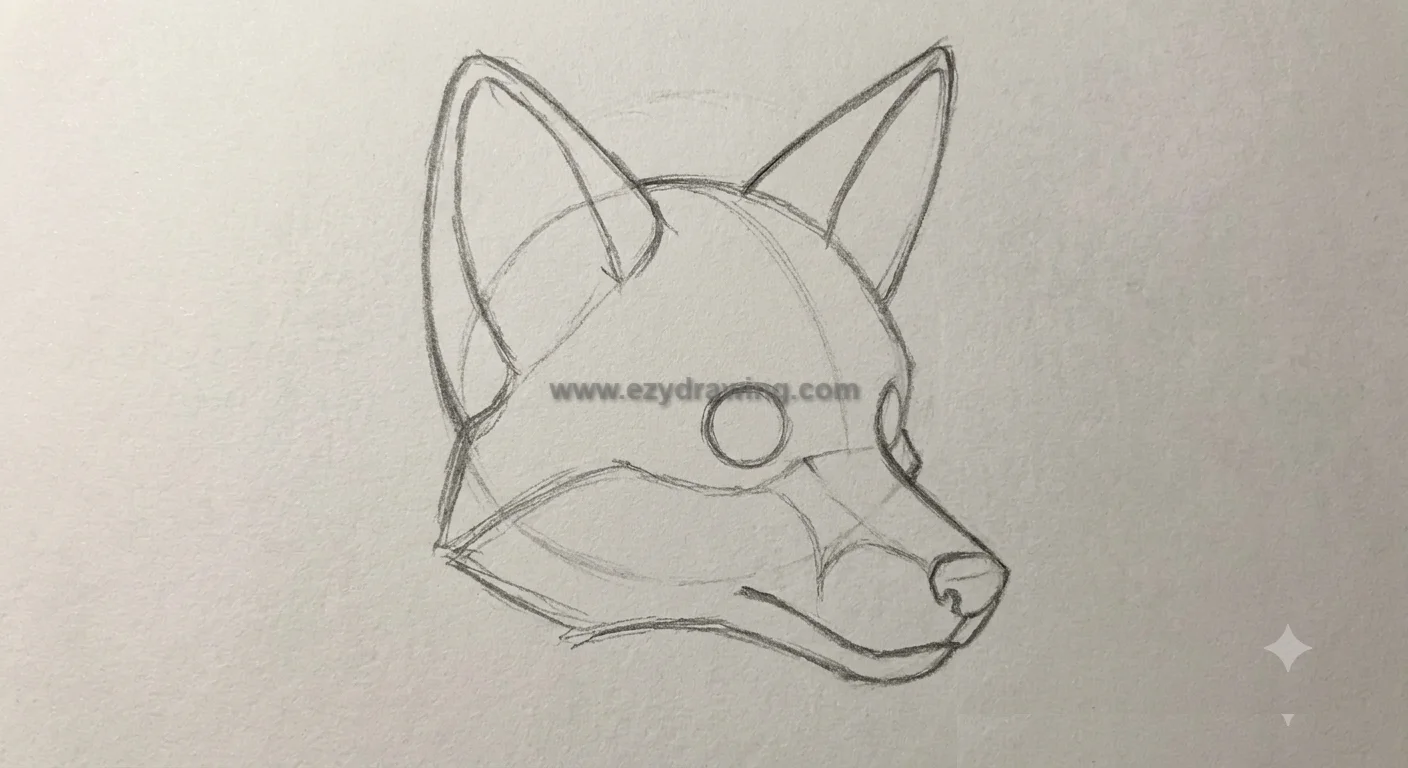
Building directly upon the foundational shapes established in Step 1, we are now going to transform those simple forms into a clear fox profile. Start by refining the outer contours, smoothing the lines that connect the main head oval and the snout.
Now, add the large, triangular fox ears drawing. Place them high on the head, angled slightly outward. This is crucial for establishing the classic fox silhouette, especially for species like the fennec fox drawing known for their oversized ears.
Within the refined snout area, draw a small, dark nose (a simple circle or oval will do). Extend a gentle curve downwards from the nose to define the mouth, shaping the fox face drawing.
Finally, place a small, expressive eye just above the snout line, bringing your character to life. These simple additions begin to define the unique character of your cute fox drawing.
Step 3: Structuring the Sitting Body and Fluffy Tail
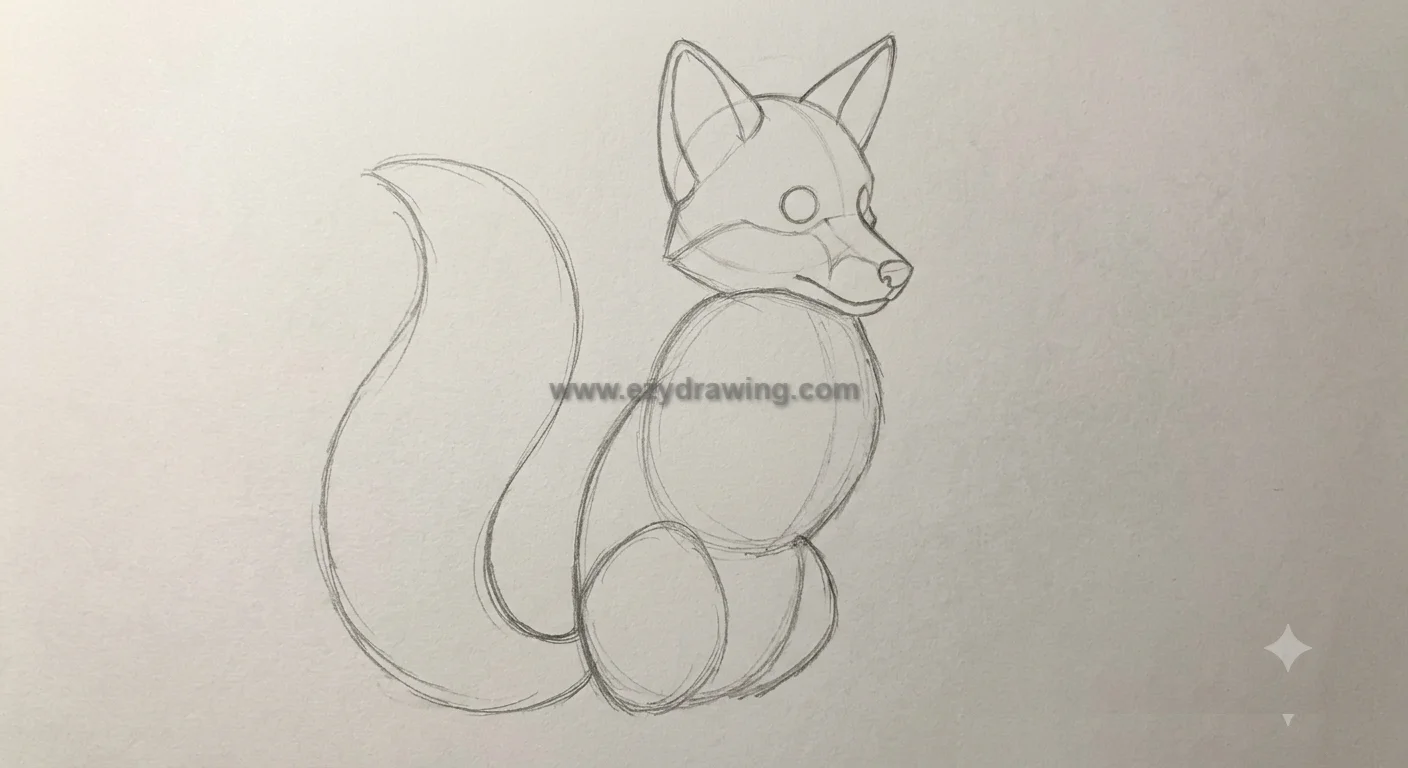
Now that we have the defined fox head, we need to establish the pose. We will create a sitting fox drawing. Start by adding a large, soft oval shape extending downwards and slightly backwards from beneath the fox’s head.
This will be the main mass of the ribcage and torso. Below this, sketch a smaller, rounded shape to define the hips and hindquarters of the sitting animal.
This is also the perfect moment to plan the most iconic feature: the tail. Sketch in the long, sweeping curve of the fox tail drawing. It should originate from the simplified hip shape and flow dramatically behind the fox.
This initial structure defines the fox poses drawing as seated. This method works well for both a simple fox drawing and as a structural base for a detailed, realistic fox drawing. The resulting sketch clearly defines the anatomy of a sitting fox, built upon the previous refined head.
Step 4: Adding Limb Structure and Defining the Paws
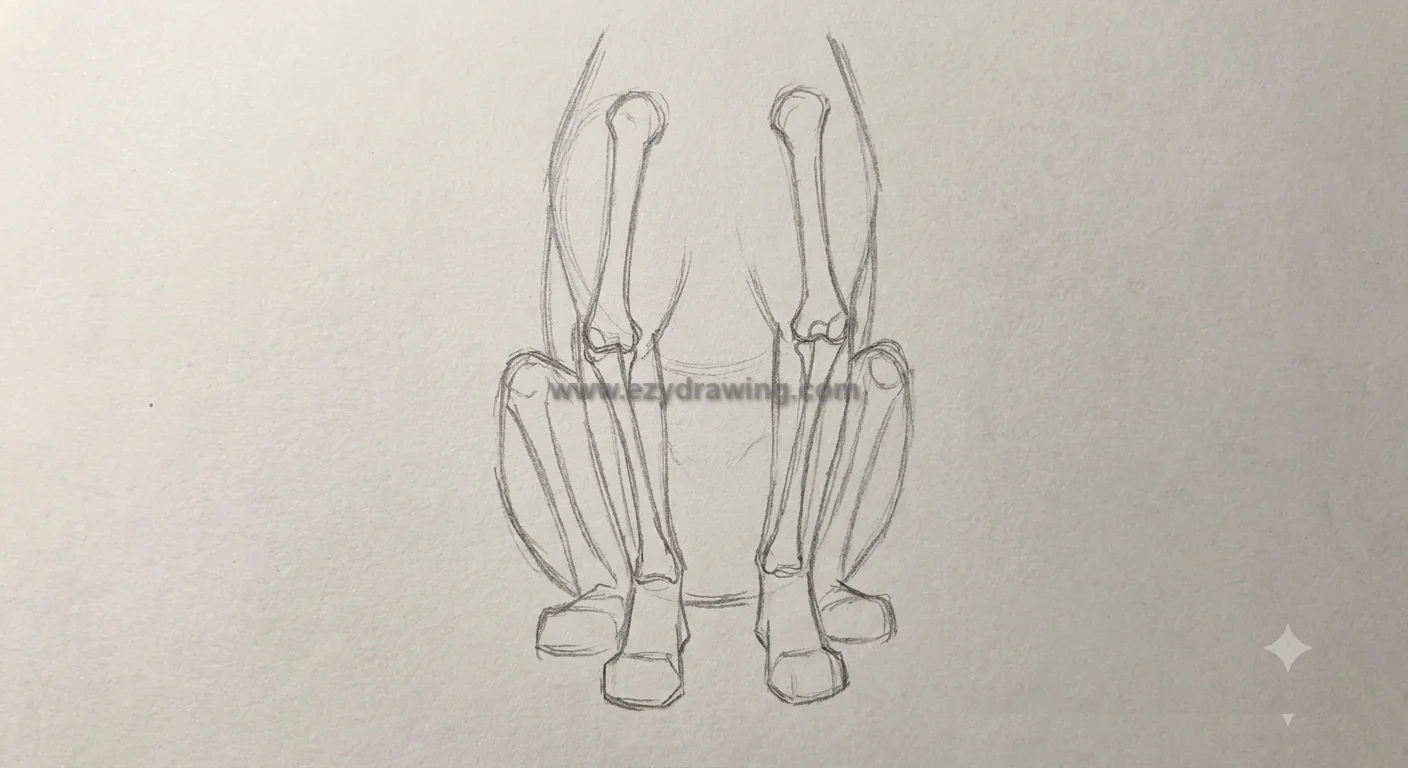
Building on the established seated pose , we can now add the limbs. In a front-facing sitting pose, the forelegs are highly visible.
Sketch two simple, angled lines extending downwards from the chest area, breaking them at the ‘elbow’ to define the upper and lower arm segments. These structural lines are key to understanding fox anatomy drawing and defining the skeletal structure.
At the end of these lines, draw small, simplified oval shapes to block in the paws. The rear legs are mostly hidden in this pose, but you can suggest the structure of the thigh and the fox paw drawing peeking out from beneath the hip form established in Step 3.
This approach keeps the drawing process simple and manageable. As you sketch these structural lines, remember they are the framework for a sitting fox drawing, anchoring the animal and providing the essential support for the forms you will define later. Keep your fox pencil drawing light during this construction phase.
Step 5: Detailing Features and Introducing Texture
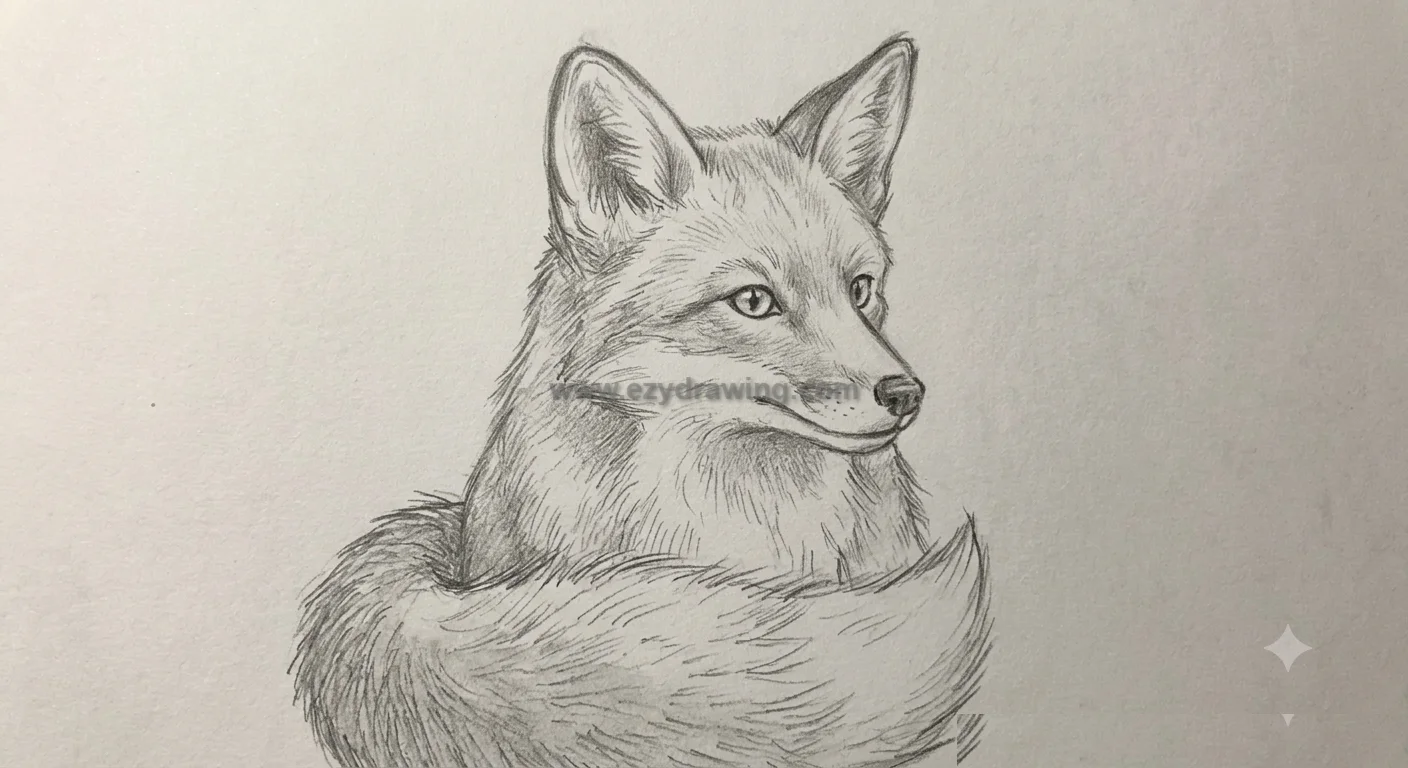
Now that the complete structure—head, body, tail, and limbs—is established , we can focus on adding detail and fur texture. Use short, soft, overlapping pencil strokes (the “directional fur” technique often seen in fox pencil drawing) to define the contours of the body. Focus this texture on the chest, cheeks, and the voluminous fox tail drawing.
Refine the fox eyes drawing, making them dark and alert. Add definition to the inner fox ears drawing with subtle shading and tufts of fur. Define the fox paw drawing by outlining the toes. You should now erase many of the foundational construction lines from earlier steps.
This crucial step transitions your sketch from a structural study to a softer, more dimensional, and cute fox drawing. The resulting fox head drawing and body now possess character and depth, preparing it for the final defining lines.
Step 6: Finalizing with Clean Lines and Contrast
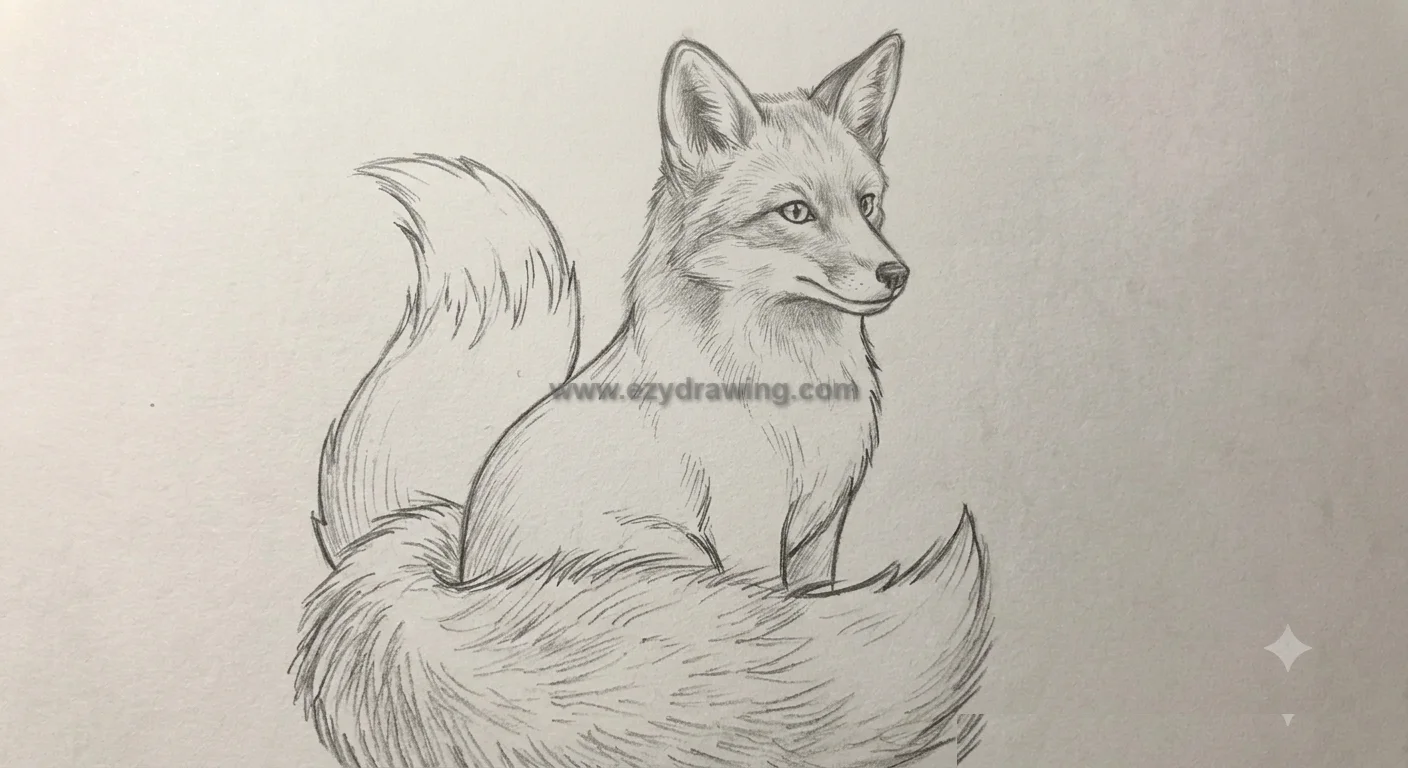
The final step is to refine your sketch into a finished fox line drawing. Take a sharp pencil or a fine-liner pen and confidently trace over the most important contours of your fox. These lines should be clean and smooth, defining the final shape of the fox head drawing, the alert ears, the body, and the voluminous tail.
Incorporate contrast: make the main outlines slightly thicker than the internal fur details. This technique is common in fox cartoon drawing and helps the figure ‘pop’ from the page.
Darken the pupils of the eyes and the nose completely. Erase any remaining messy sketch lines. This produces a polished, elegant, and simple fox drawing.
It serves as a beautiful standalone piece of fox illustration drawing or as a clean base if you decide to add color later. Your final image is now complete!
Summary and Conclusion
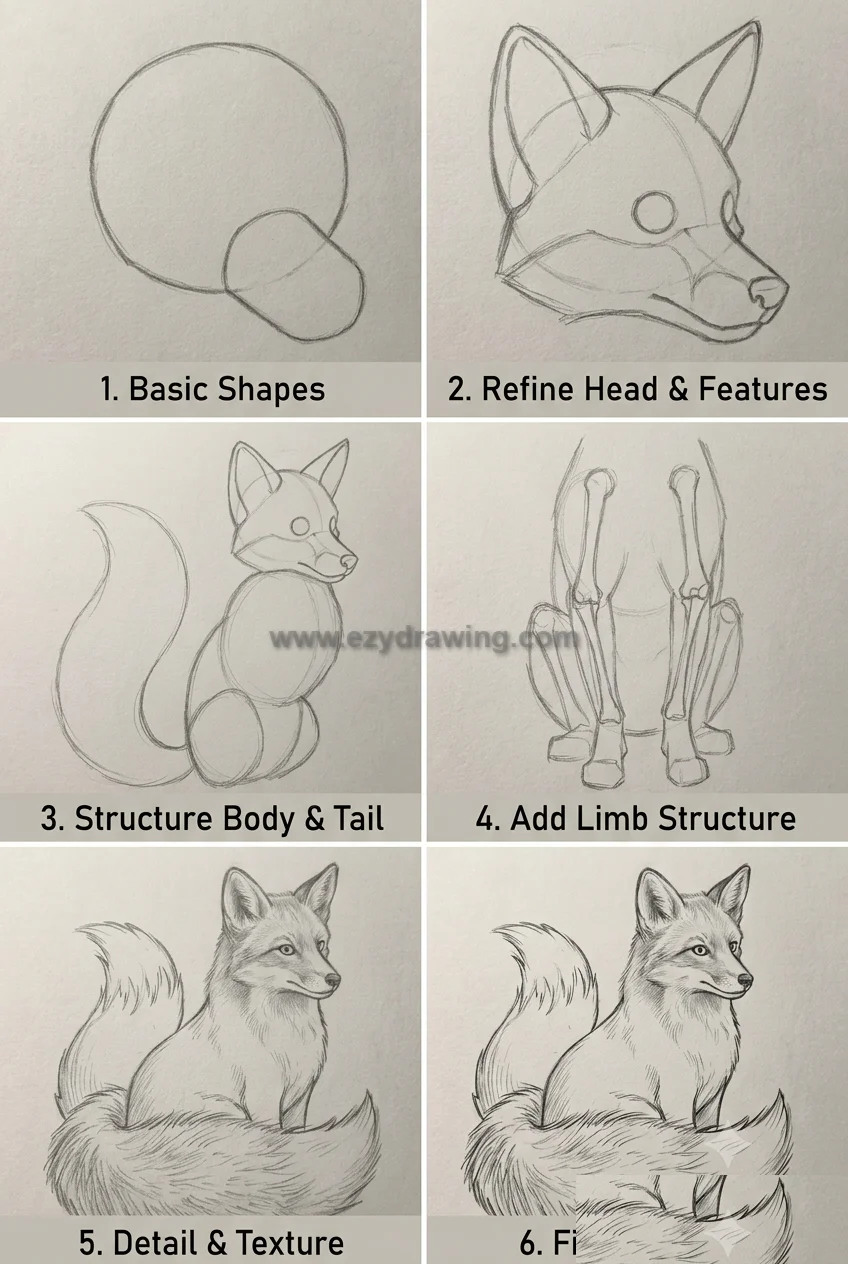
Congratulations on completing this guide! You have successfully journeyed through the entire process, learning how to draw fox from scratch. We started with basic geometric building blocks, refined those shapes into a recognizable profile, and established a seated pose.
We then explored fox anatomy drawing by structuring the limbs, adding texture with pencil techniques, and finally, finalizing the drawing with clean lines. You now possess a solid foundation to create a range of styles, from a simple fox drawing to a detailed fox pencil drawing.
We hope this tutorial has been a helpful and inspiring resource. Remember that drawing is a skill developed through patience and practice. Feel free to return to any step of this guide as you continue to explore how to draw fox and develop your unique artistic style. Keep sketching!
How To Draw Doodles
How to Draw Portrait
How To Draw Fish
How To Draw Mouth
How To Draw Balloon