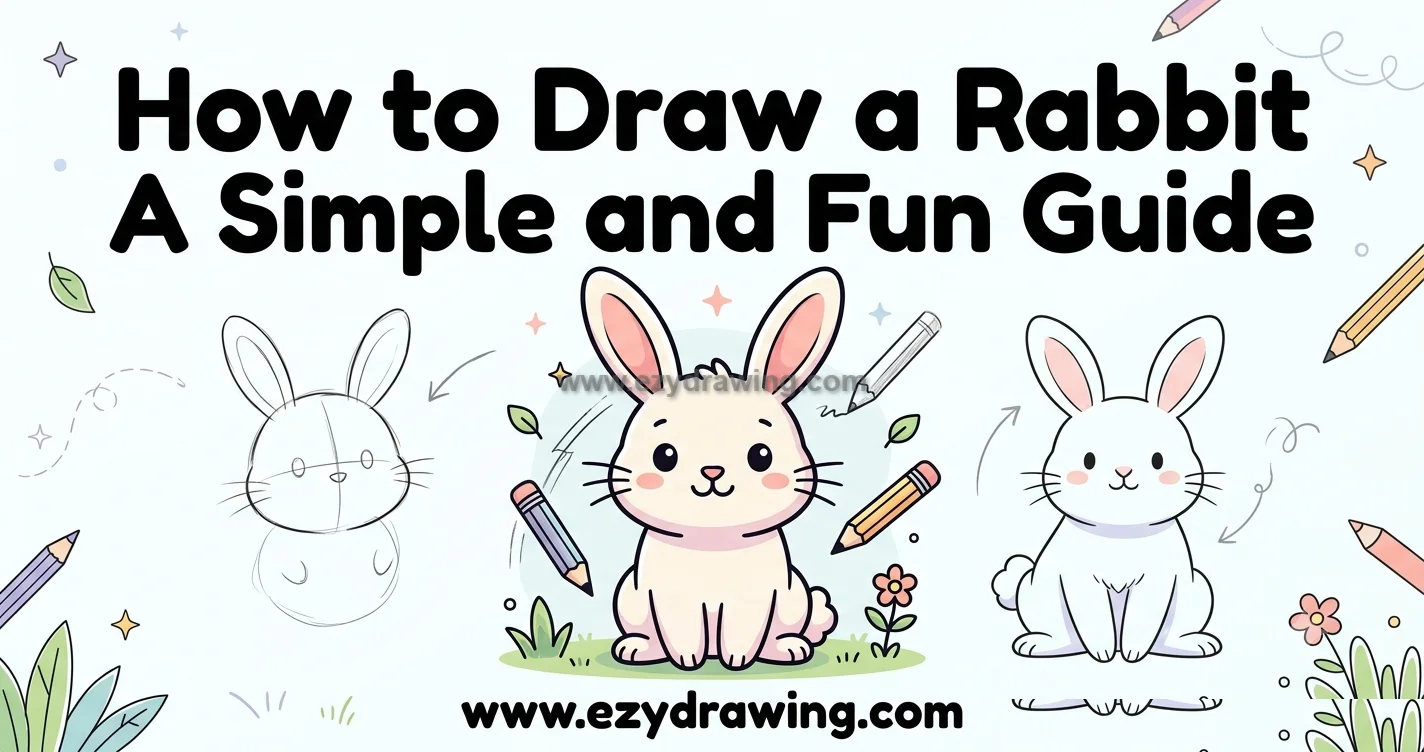
How to Draw a Rabbit A Simple and Fun Guide
Rabbits are incredibly cute creatures, and learning how to draw a rabbit is a fantastic and rewarding experience for artists of all ages and skill levels. Whether you’re a complete beginner or an experienced sketcher, capturing the fluffy essence of a bunny on paper is a joyful process.
This step-by-step tutorial will guide you from simple basic shapes to a finished, adorable rabbit while helping you understand how to draw each feature with confidence. Let’s get started and explore the world of rabbit drawing!
Materials Needed for a Simple Rabbit Drawing
Before you begin your bunny rabbit drawing, gather these essential and easy-to-find supplies. This simple kit is perfect for rabbit drawing for kids step by step as well.
- Pencil: A light pencil (like HB or 2H) is ideal for sketching the initial guidelines, as they are easy to erase.
- Paper: Any clean drawing paper or even a page from your sketchbook will work perfectly.
- Eraser: Crucial for cleaning up guide lines and making corrections.
- (Optional) Fine-tip Black Pen or Marker: Once you are happy with your pencil sketch, you can use this to create a clean, final outline.
- (Optional) Colored Pencils or Crayons: If you want to color your creation, a cute rabbit drawing looks great in classic whites, browns, and grays.
Step-By-Step Written Tutorial And Visual Steps for Drawing a Rabbit
Learning How to Draw a Rabbit is much easier when each stage is explained with both clear written instructions and matching visual references.
Instead of trying to complete the entire drawing at once, you will build your rabbit one simple step at a time, starting with basic shapes before adding the ears, face, body, paws, fluffy tail, and final shading.
Every illustration is designed to show exactly what your sketch should look like at that point, making it easy for beginners, kids, and anyone who enjoys drawing.
Follow each step carefully, take your time, and by the end of this tutorial, you will have a charming rabbit drawing that you can confidently color, personalize, and improve with practice.
The skills you develop here will also make dress drawing and other beginner-friendly sketches easier as you continue practicing.
Step 1: Draw the Rabbit Head
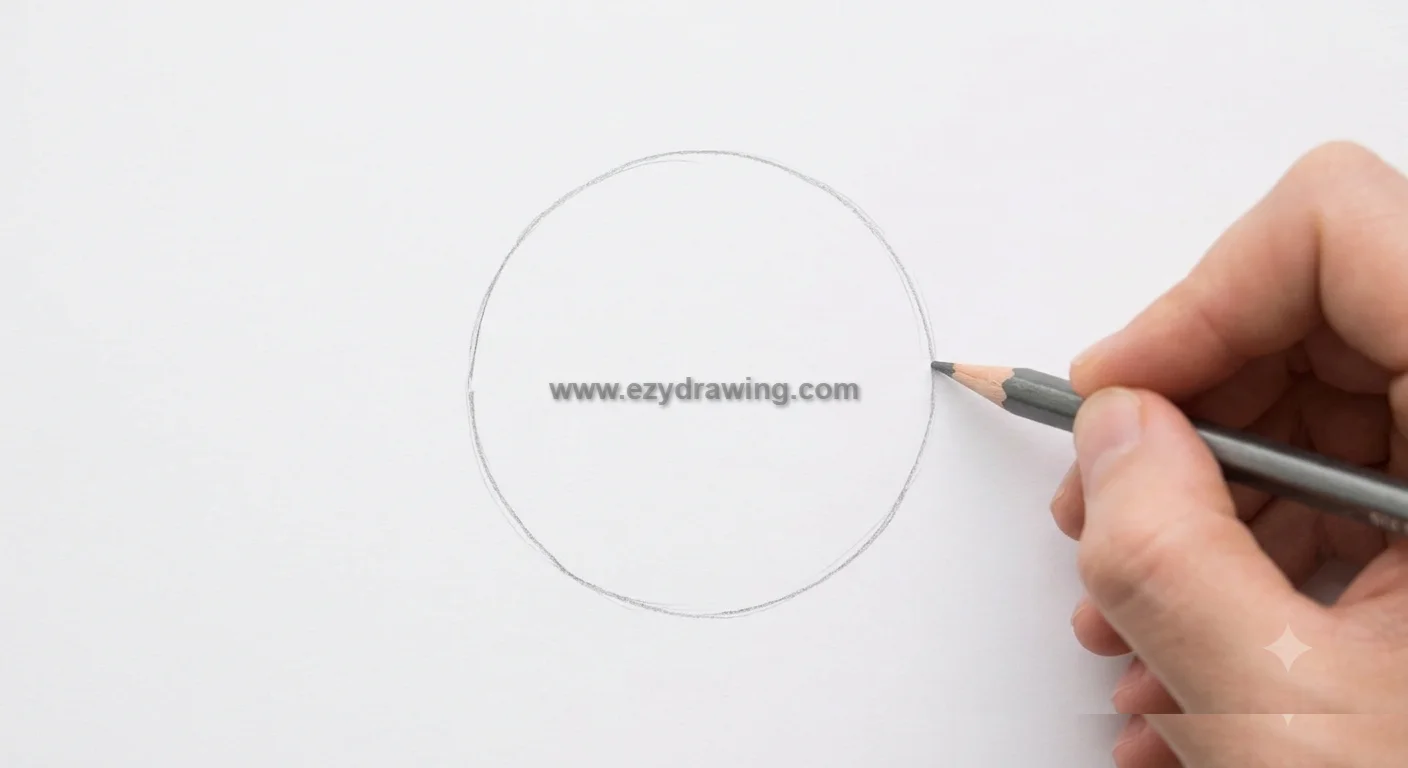
The foundation of any great rabbit head drawing is a simple shape. Start by lightly sketching a large circle or a slightly squashed oval in the upper center of your paper.
This circle doesn’t need to be perfect; it will form the main structure of the rabbit’s head. This is the first essential step in how to draw a rabbit step by step. Keep your pencil pressure light, as this same approach is also useful when practicing cake drawing and other beginner-friendly sketches.
Step 2: Add the Rabbit Ears
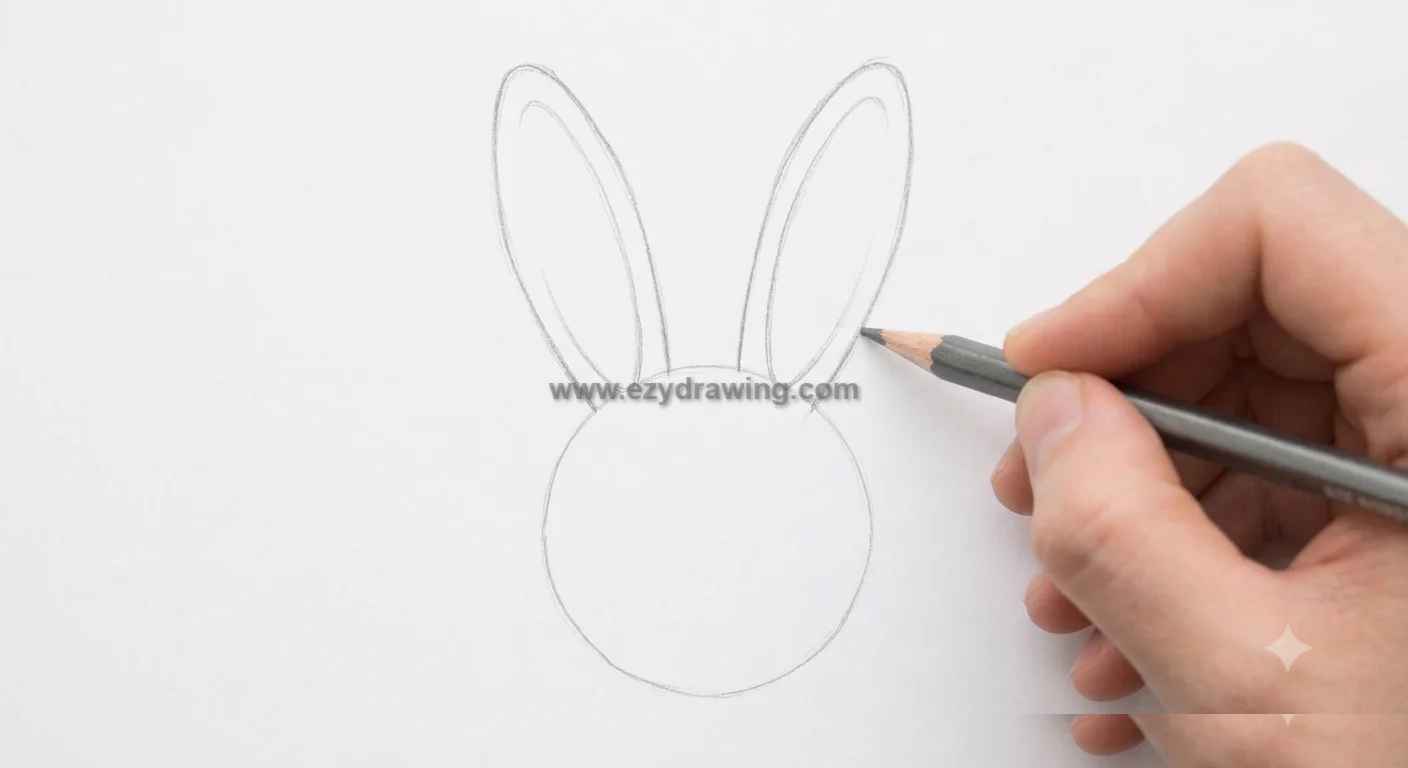
Next, we move to the most iconic feature: rabbit ears drawing. From the top of the circle you just drew, attach two long, tall, and slightly curved oval shapes.
They should point upwards and outwards, looking like two long petals or leaves. Rabbits have excellent hearing, so make sure these ears are prominent! Keep the base of the ears slightly narrower than the middle, similar to the careful shape-building used in fox drawing.
Step 3: Draw the Rabbit Face
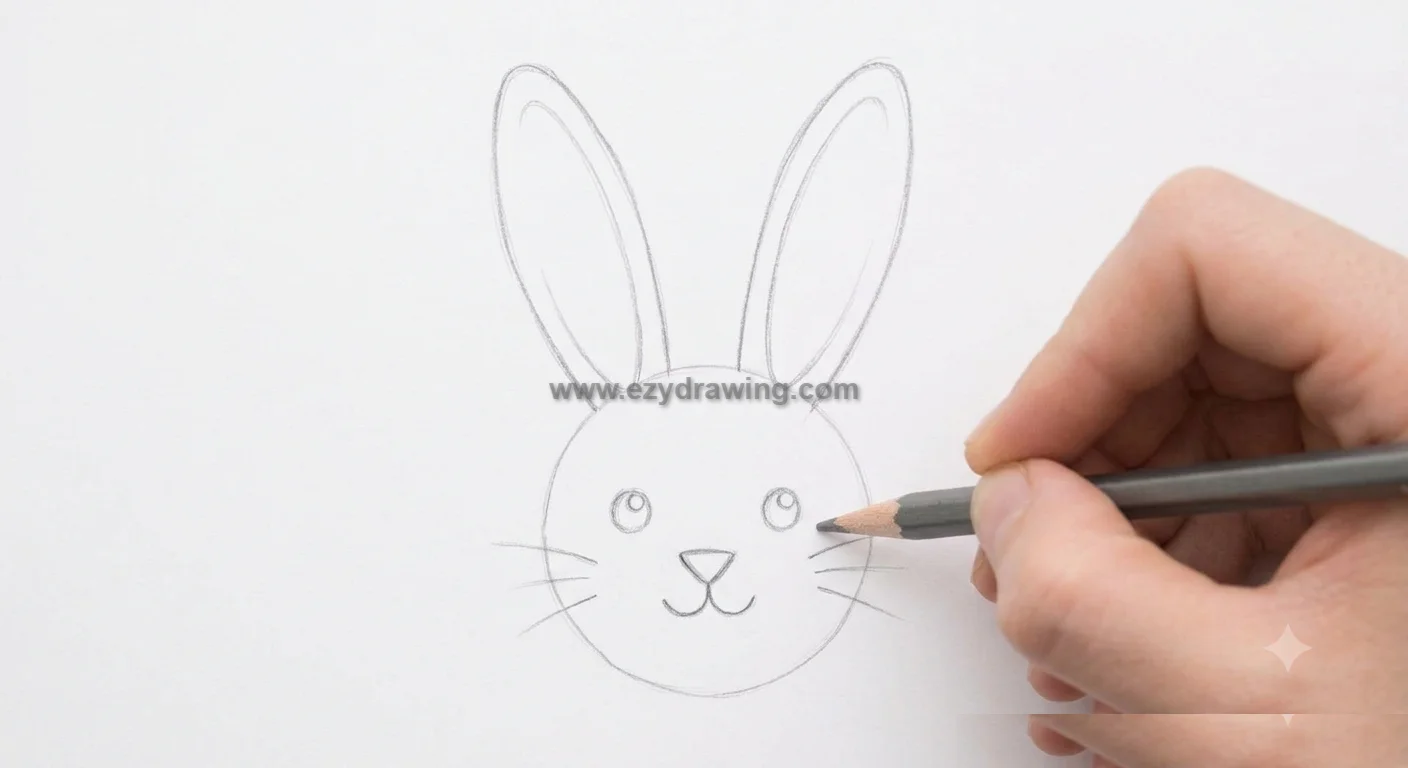
Now it’s time to give your bunny some personality with a rabbit face drawing. Inside the lower half of the main circle, draw two small circles for the eyes.
Add a tiny vertical oval inside each eye and shade it, leaving a small white highlight. Below and between the eyes, draw a small, upside-down triangle for the nose. From the bottom point of the nose, draw a “W” shape for the mouth. Finish by adding a few light whisker lines extending from the cheeks.
Step 4: Sketch the Rabbit Body and Paws
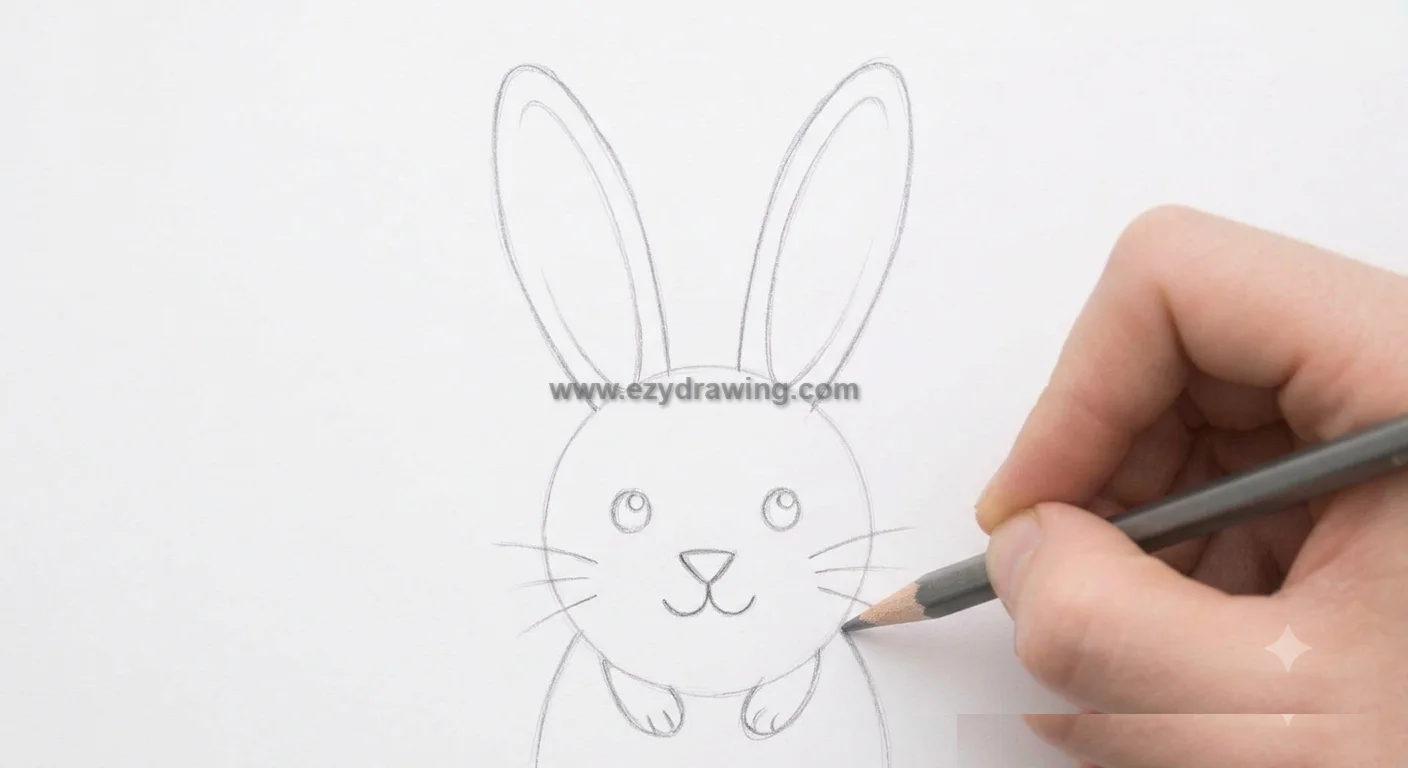
With the head and face complete, let’s connect the body. This is a key part of how to draw rabbit step by step. Extend a large, curved oval downwards from below the head, like a rounded bean shape or an egg. Make the body significantly larger than the head.
Below the front of this new body shape, draw two small, curved paws. Since we are using a front camera angle, these paws will be visible near the bottom of the body, slightly overlap. This step establishes the main pose.
Step 5: Add a Cute Rabbit Tail
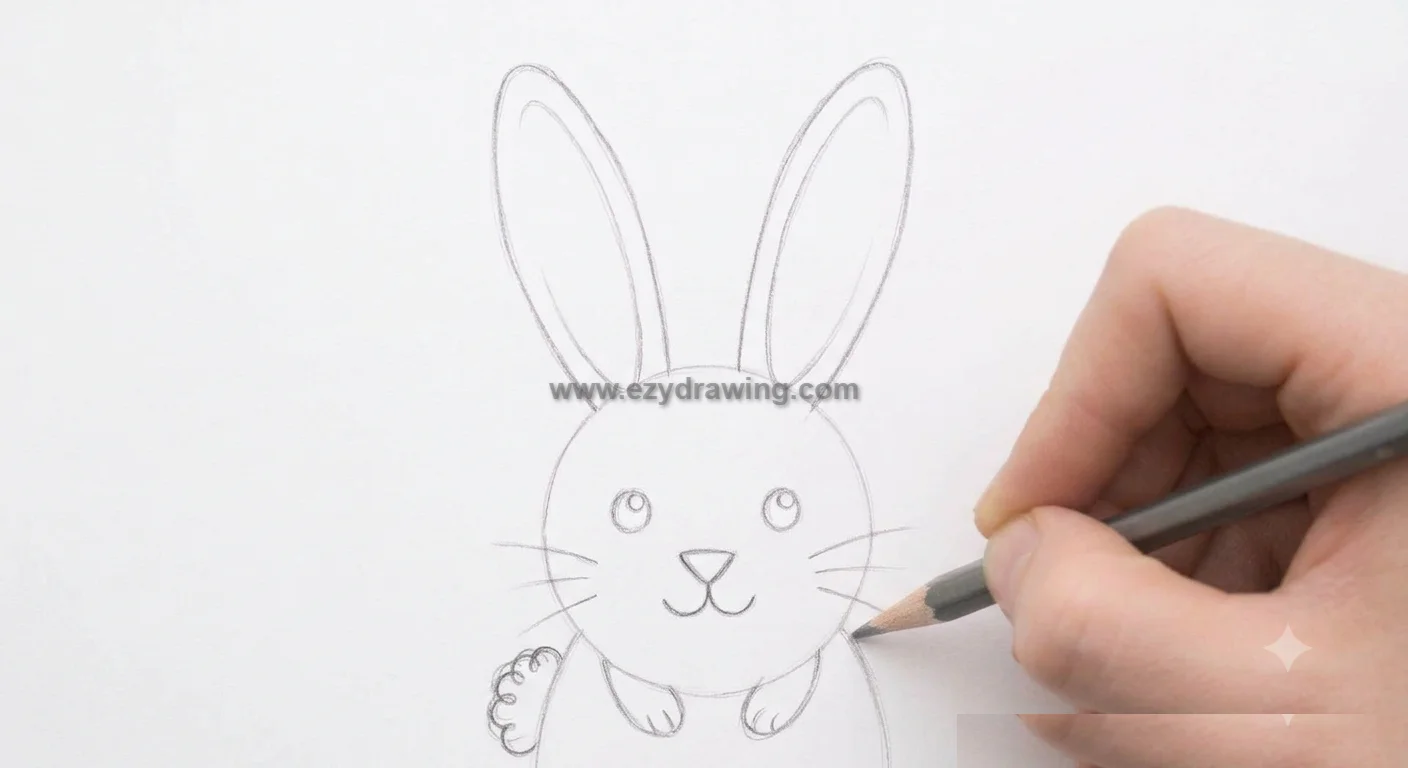
The bunny rabbit drawing is almost complete! To finish the main structure, we need to add a tail. Since our rabbit is facing us from a front camera angle, the tail will be barely visible.
Add a small, fluffy, and very round shape or a series of tiny, tight C-curves, located low on the main body, peeking out slightly from one side near the bottom of the body curve. This tiny, fluffy addition is a crucial element for a cute rabbit drawing.
Step 6: Finish the Rabbit Drawing
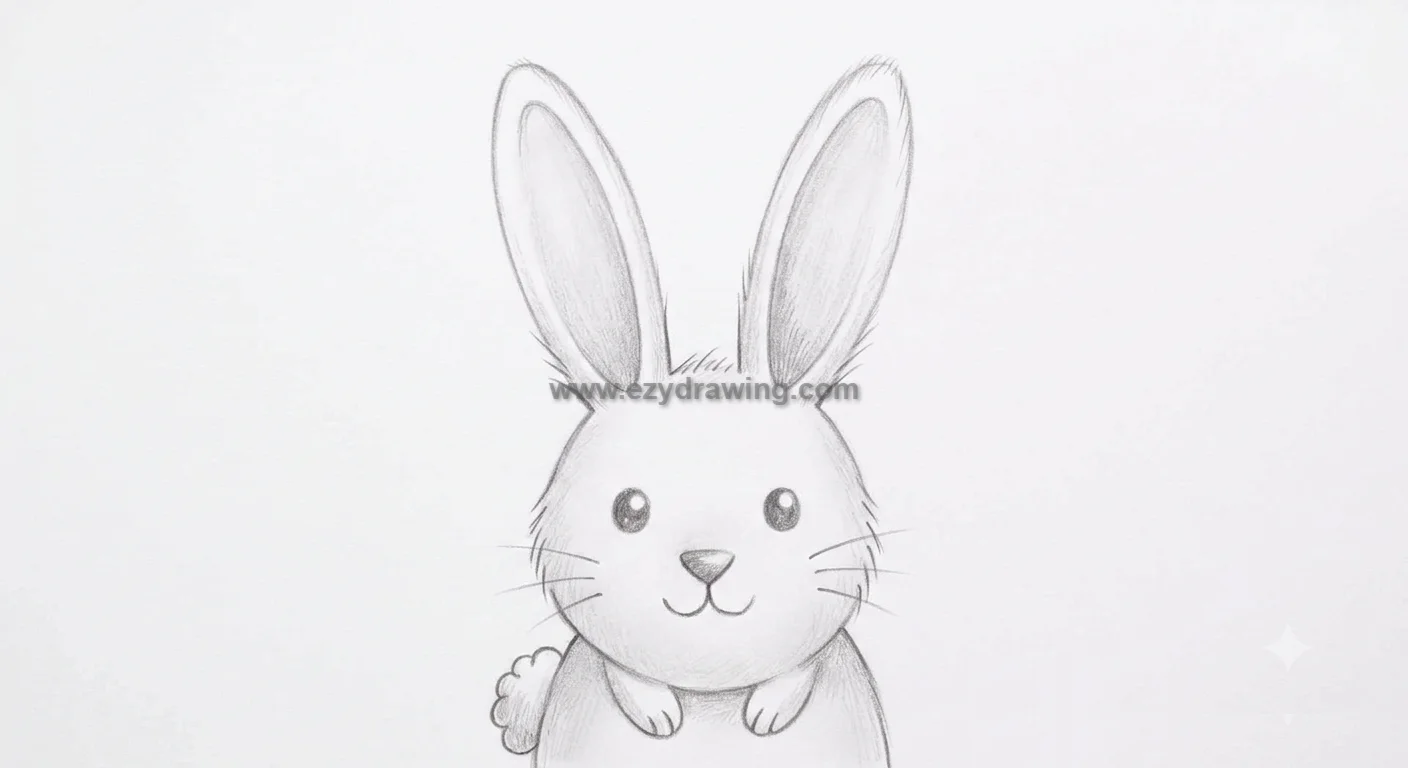
This is the final step where you refine and clean up your sketch. Grab your eraser and carefully remove any overlapping or unnecessary guidelines (like the internal parts of the circles from Steps 1 and 4).
If you are creating a rabbit outline drawing, go over your final lines with a darker pencil or a fine-tip black pen. For a cute rabbit drawing, you can add light texture lines on the ears, cheeks, and body to suggest fur.
You can also lightly shade the inside of the ears and the main body. Congratulations, you’ve mastered how to draw rabbit!
Easy Rabbit Drawing Tips for Kids
If you are working on a rabbit easy drawing for kids or looking for how to draw a rabbit for kids, keep these simple points in mind:
- Focus on the Core Shapes: The most important part of a rabbit drawing simple is getting the basic head and body circles right. Don’t worry about perfect lines; the goal is just placement.
- Keep it Simple: Use fewer lines to define features, which is essential for a cartoon rabbit drawing style. Two dots for eyes and a small triangle nose are often enough.
- Start Large: Draw your basic shapes larger on the page so that it’s easier to add the smaller face and tail details later.
- Practice makes perfect: Don’t get discouraged! Draw the head and ears several times until you feel comfortable with the shapes before moving on to the body.
Cute Rabbit Drawing Ideas to Try
Once you are comfortable with this basic structure, you can customize your cute rabbit drawing:
- Change the Pose: Instead of a strict rabbit face drawing from the front, try drawing the rabbit in profile (from the side) hopping or standing on its hind legs.
- Add Accessories: To make a kawaii rabbit drawing, add a simple bow to one ear, or maybe a small flower crown.
- Contextual Scenes: Give your rabbit a setting! Draw it in a grassy meadow with simple flowers, or make a rabbit and carrot drawing where it’s happily nibbling on a snack.
- Try Different Styles: While this guide focuses on a classic approach, you can easily adapt the steps for a kawaii rabbit drawing by giving it extra-large eyes and a tinier nose, or a realistic rabbit drawing by using detailed graphite shading for fur rather than smooth cartoon lines.
How to Draw a Rabbit With a Carrot
This is a classic request! To make a rabbit and carrot drawing, follow Steps 1 through 4 to get the main body and head in place. Then, before adding the paws in Step 4, draw a large carrot shape (an elongated triangle with a rounded top) vertically positioned where the rabbit’s front paws would be.
Then, draw the small paws overlapping the carrot, making it look like the bunny is holding it. Add some quick green leafy lines to the top of the carrot and finish with Step 5 (the tail) and Step 6 (cleanup).
Frequently Asked Questions About Rabbit Drawing
My rabbit ears always look too floppy. How can I fix this?
Rabbit ears are highly mobile, but they do have structure. Make sure the base of the ear is attached firmly to the skull circle. For perky ears, draw the main lines pointing straight up and keep the internal curved line (from Step 2) defining the edge of the ear canal, not the outer boundary of the ear itself.
Where do the whiskers go in a rabbit face drawing?
Look closely at rabbit anatomy drawing references. Whiskers do not sprout directly from the nose. They grow from the whisker pads, which are the slightly puffy areas on the cheeks, just above the mouth. Place your whisker lines there.
How do I draw the back legs from the front view?
In this specific front-facing, seated pose, the large back legs are often tucked completely against the body, with only the feet visible near the very bottom of the main body oval. You can draw two large, flat teardrop shapes (the feet) extending from under the main body shape, visible below the front paws. For simplicity in a simple rabbit drawing for kids, we focused just on the two front paws.
Total Summary: A Visual Guide to Drawing a Rabbit
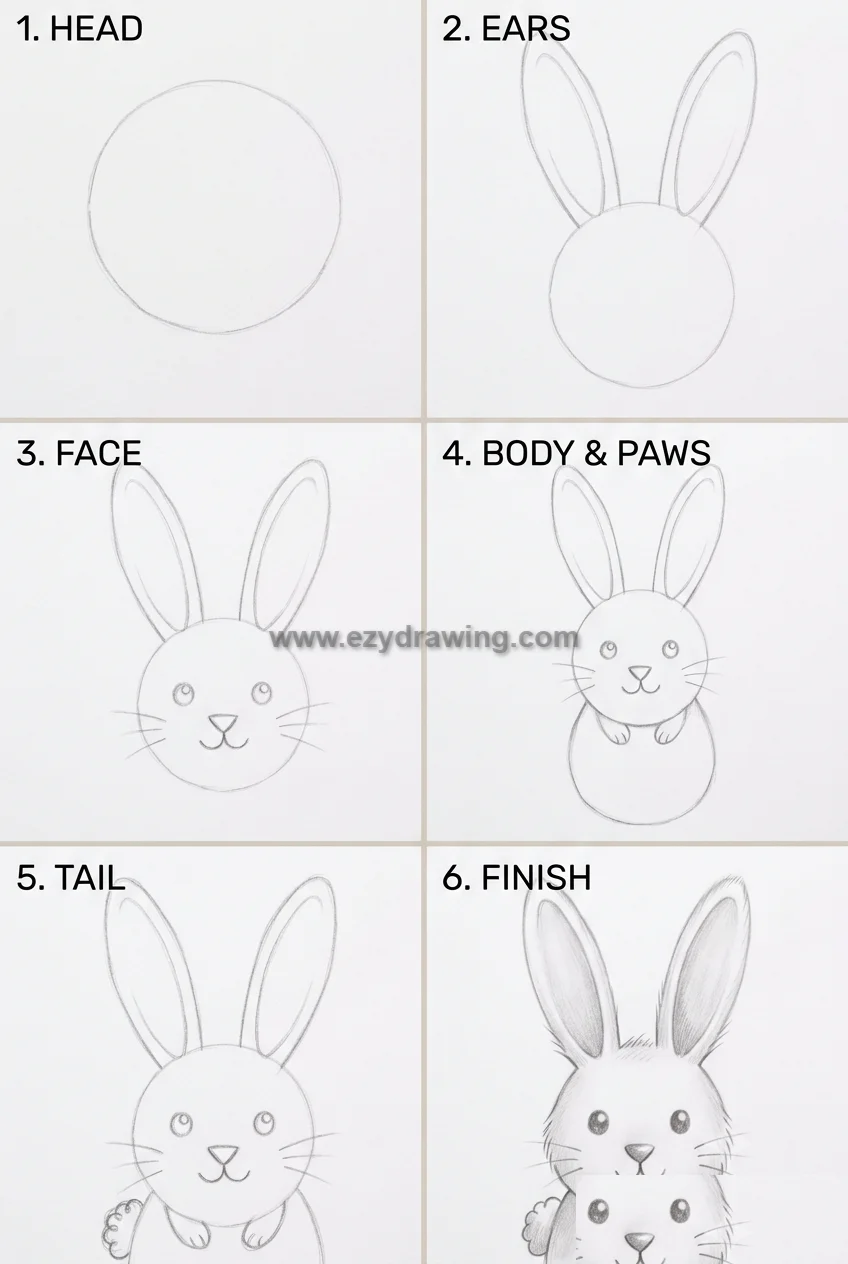
This image provides a quick, visual overview of all six steps discussed above. It’s an ideal reference tool for how to draw rabbit easy step by step. By observing how simple shapes are transformed, you can quickly master rabbit drawing.
Conclusion
Learning how to draw a rabbit is a fun and straightforward process when you break it down into manageable steps. By starting with basic circles and ovals, you can build up the structure of the head, body, and iconic ears before refining the facial features and adding fluffy textures.
This tutorial on rabbit drawing tutorial is designed to build your confidence and your skills. Remember to keep your initial lines light and to practice regularly.
With patience and creativity, you’ll be able to create charming cute easy rabbit drawings and perhaps even complex realistic rabbit drawings. Grab your pencil and enjoy how to draw rabbit!
How To Draw Doodles
How to Draw Portrait
How To Draw Fish
How To Draw Mouth
How To Draw Balloon