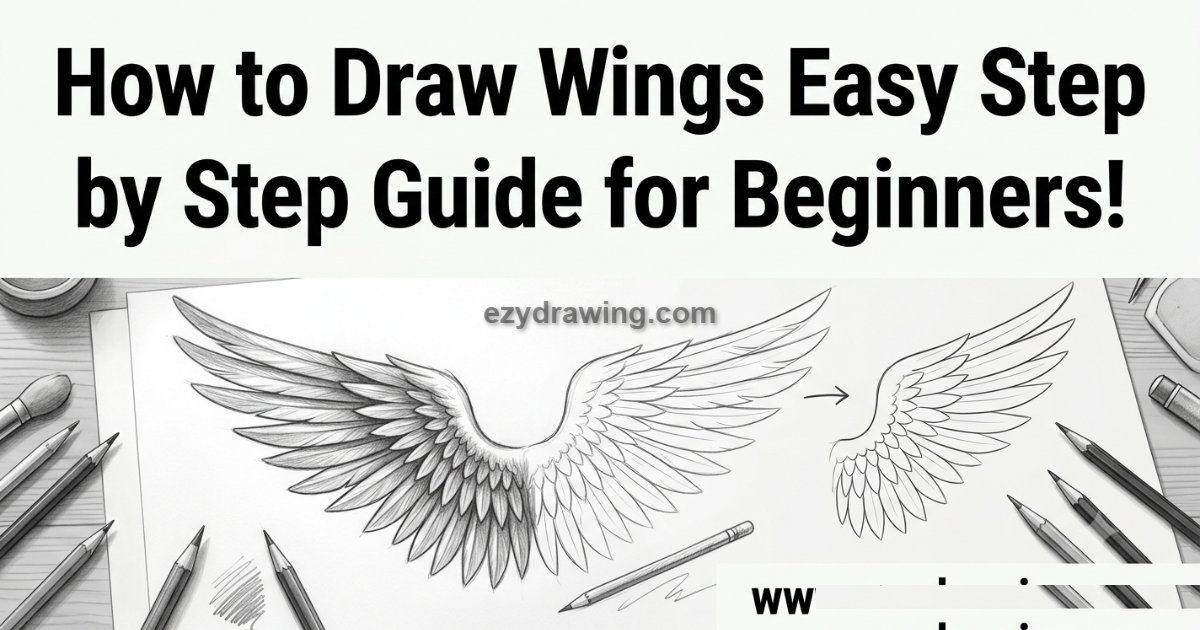
How to Draw Wings Easy Step by Step Guide for Beginners
Welcome to this tutorial! Learning how to draw wings is an essential skill for any artist wanting to add a touch of fantasy, divinity, or mythology to their characters.
Whether you’re working on a person with wings drawing reference, a majestic angel wings drawing, or a powerful man with wings drawing, mastering the basic structure of a wing is key.
This tutorial will break down the process of a feathered wings drawing into simple, manageable steps, providing you with a solid wing drawing reference. We’ll focus on an open, easy wings drawing suitable for a woman with wings drawing or even complex flying poses drawing wings.
Let’s get started on your journey to creating stunning realistic wings drawing with this simple and clear how to draw tutorial
Tips to Make Your Wing Drawings More Realistic
If you want to master how to draw wings, focus on observing real bird or angel wing references to understand feather placement and natural movement. Build your drawing in layers, starting with the largest flight feathers before adding the smaller coverts.
Keep your feather sizes varied instead of making them identical, as this creates a more natural appearance.
Use soft shading to add depth where feathers overlap, and leave subtle highlights on the feather edges to create dimension in your drawing portrait. Finally, take your time refining the details, because patience and careful observation are the keys to learning how to draw wings that look realistic and full of life.
Step 1: Laying the Foundation Basic Structure
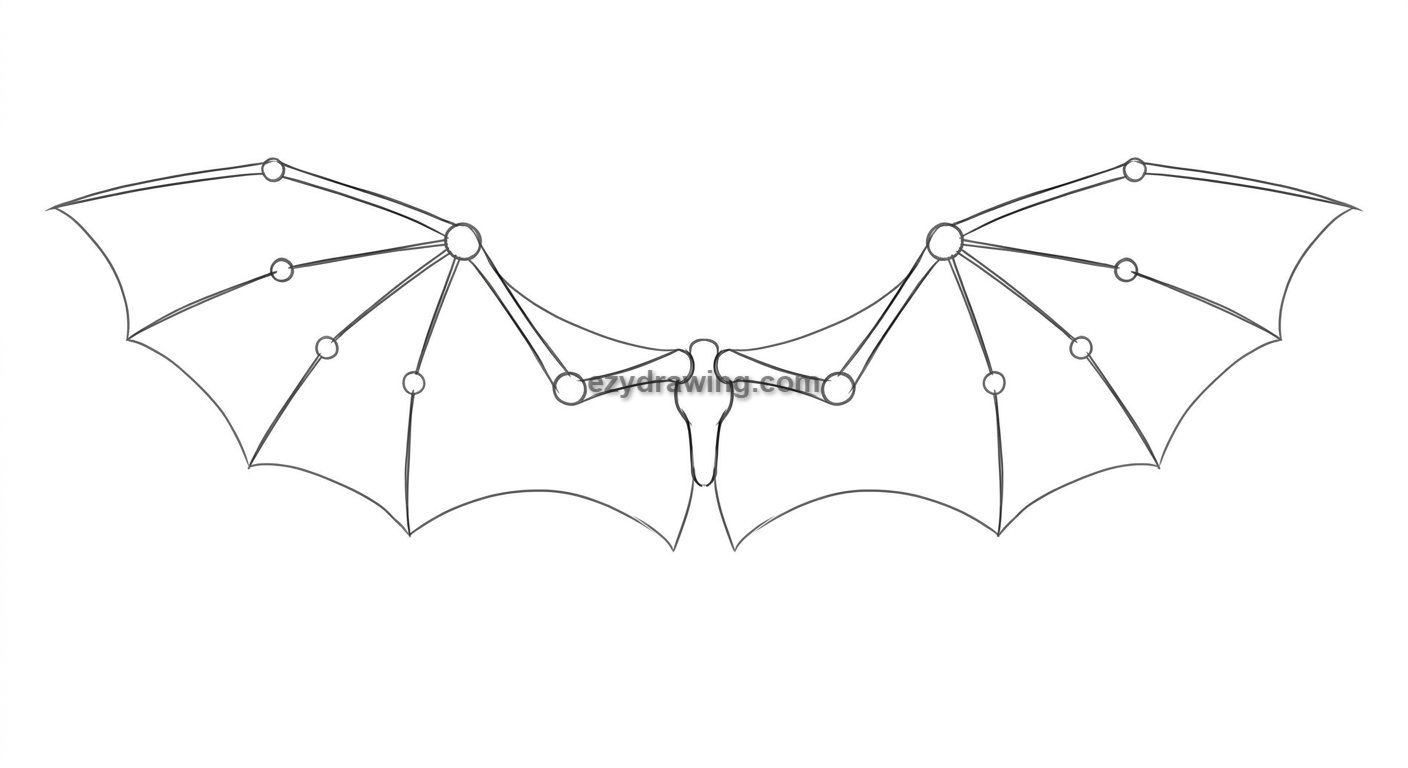
image_0.png)Every great drawing starts with a good structure. To begin our how to draw wings step by step process, we will draw the core skeletal form. This is your essential wing drawing reference for the bones. Think of it like an outstretched arm, but for a bird. We’ll use simple lines and small circles for joints.
- Action: Draw two simple, angular lines that look like a “V” or the first two segments of an outstretched arm, stemming from a central point (like the back of your character). Add small circles at the “shoulder,” “elbow,” and “wrist” joints.
- Significance: Understanding this basic wing anatomy drawing ensures your wings have a realistic foundation and won’t look like they’re just attached to the surface. It’s the skeleton upon which we’ll build everything else.
Step 2: Defining the Shape The Coverts
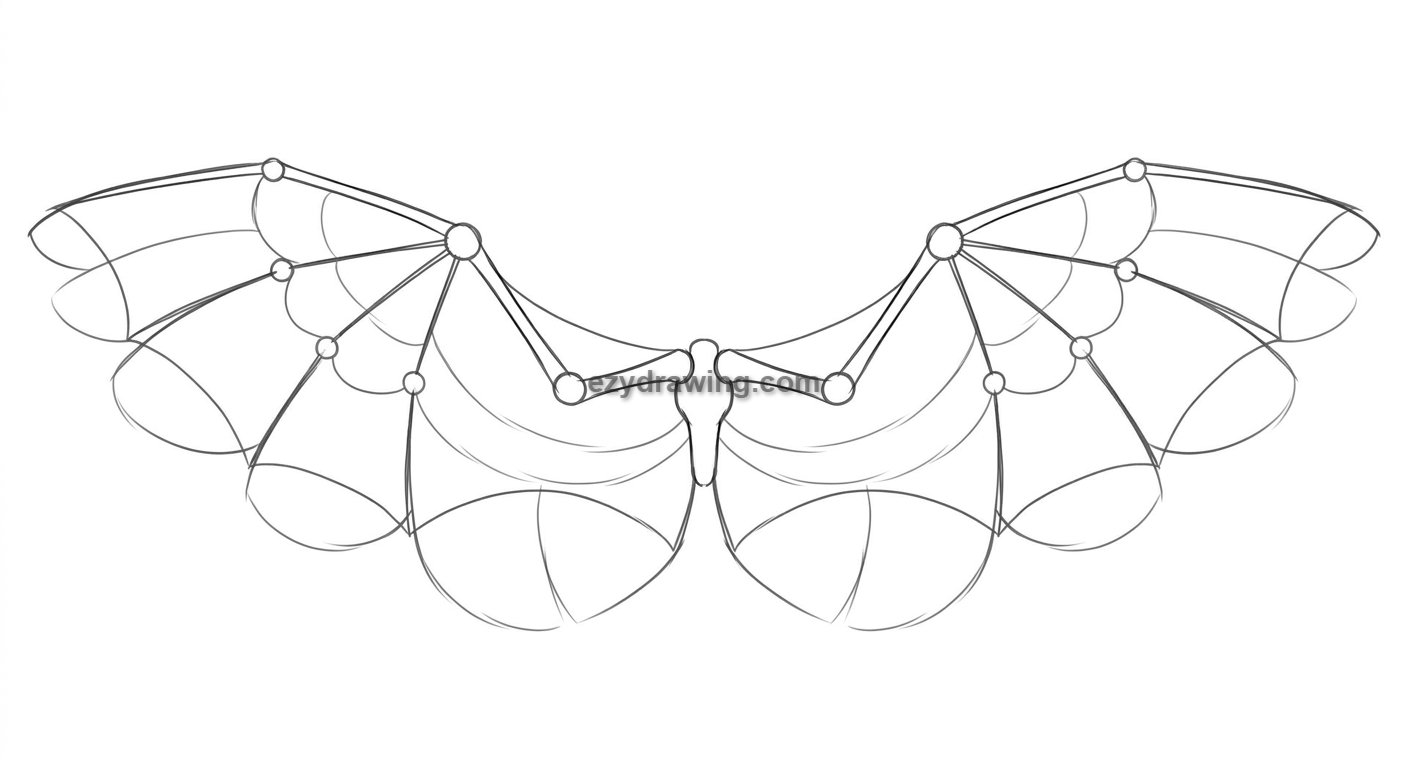
image_0.png)Now that we have the bones, we need to define the primary shape and volume of the wing. This involves blocking out where the first major groups of feathers will sit. We are working on the angel wings drawing shape, which means layered feathers.
- Action: Build upon the skeleton from Step 1 . Use large, simple, curved shapes (like large rounded petals) to define the leading edge and the upper “shoulder” area. Draw concentric curved lines within these shapes to indicate where the rows of covert feathers will be placed.
- Significance: This step transforms the abstract skeleton into a recognizable wing form, preparing it for the detailed feather work. It makes the subsequent steps much easier, keeping the overall structure accurate and providing an easy wings drawing roadmap. This structure is common for both open and folded wings drawing.
Step 3: Adding Flight Feathers The Primaries and Secondaries
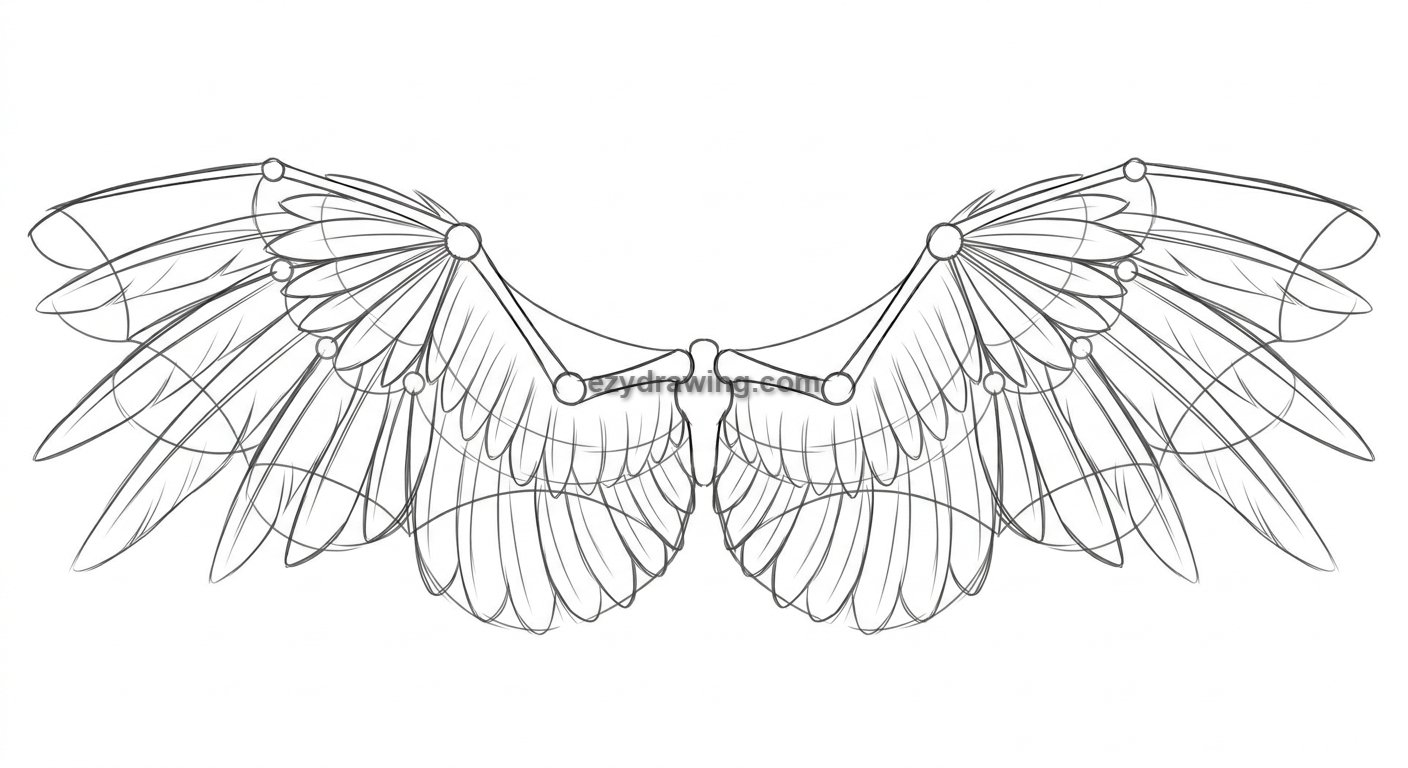
image_0.png and image_1.png)This is where the wing really starts to take flight! We will now add the long feathers responsible for propulsion: the Primaries and Secondaries. This is a crucial step for achieving a convincing feathered wings drawing.
- Action: Starting from the structural curves established in Step 2 , draw the long, distinct primary feathers (the longest ones at the wingtips) and the secondary feathers (filling the gap between the primaries and the body). These feathers should be long, slightly curved, and overlap cleanly, radiating outward from the “wrist” and “elbow” joints of the original skeleton.
- Significance: Adding these large feathers defines the length and breadth of the wing, instantly making the drawing look flight-capable. This is the stage where your simple shapes start looking like a true angel wings drawing.
Step 4: Detailing and Layering Feathers
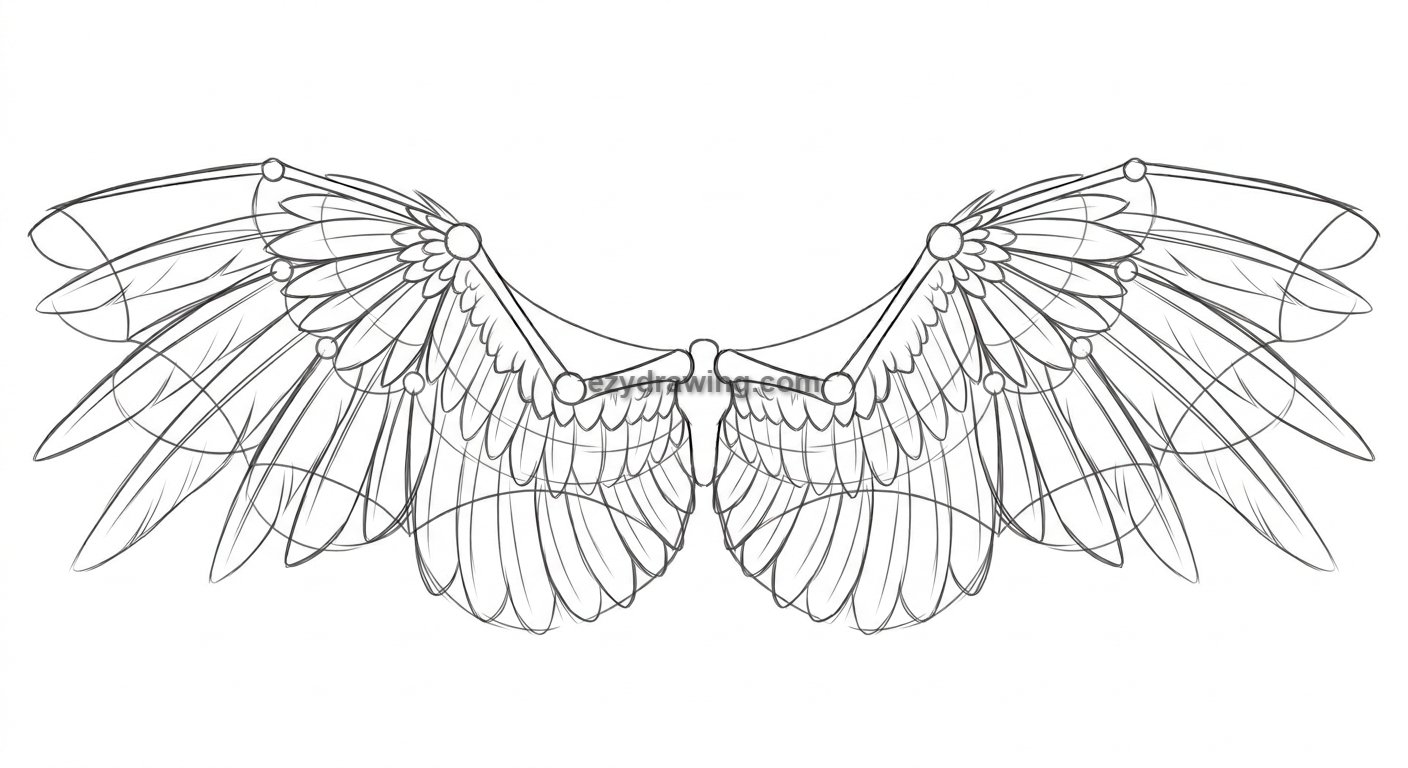
image_2.png)We have the main feathers; now we must add depth and volume by defining the smaller feather groups, similar to adding layered details in a drawing fish illustration. This is where we move closer to a realistic wings drawing
- Action: Take the construction from Step 3 . On the leading edge and the upper surface, draw layers of smaller, rounded feathers (the Median and Lesser Coverts). Think of them as scales overlapping in concentric rows, decreasing in size as they get closer to the top edge. These layers must sit nicely over the structural shapes from Step 2.
- Significance: Adding these complex, nested layers provides the soft, full volume characteristic of large, healthy feathered wings drawing. It bridges the gap between the skeletal simple wings drawing and a highly detailed rendering, offering a great wing anatomy drawing lesson.
Step 5: Finalizing Linework and Shading
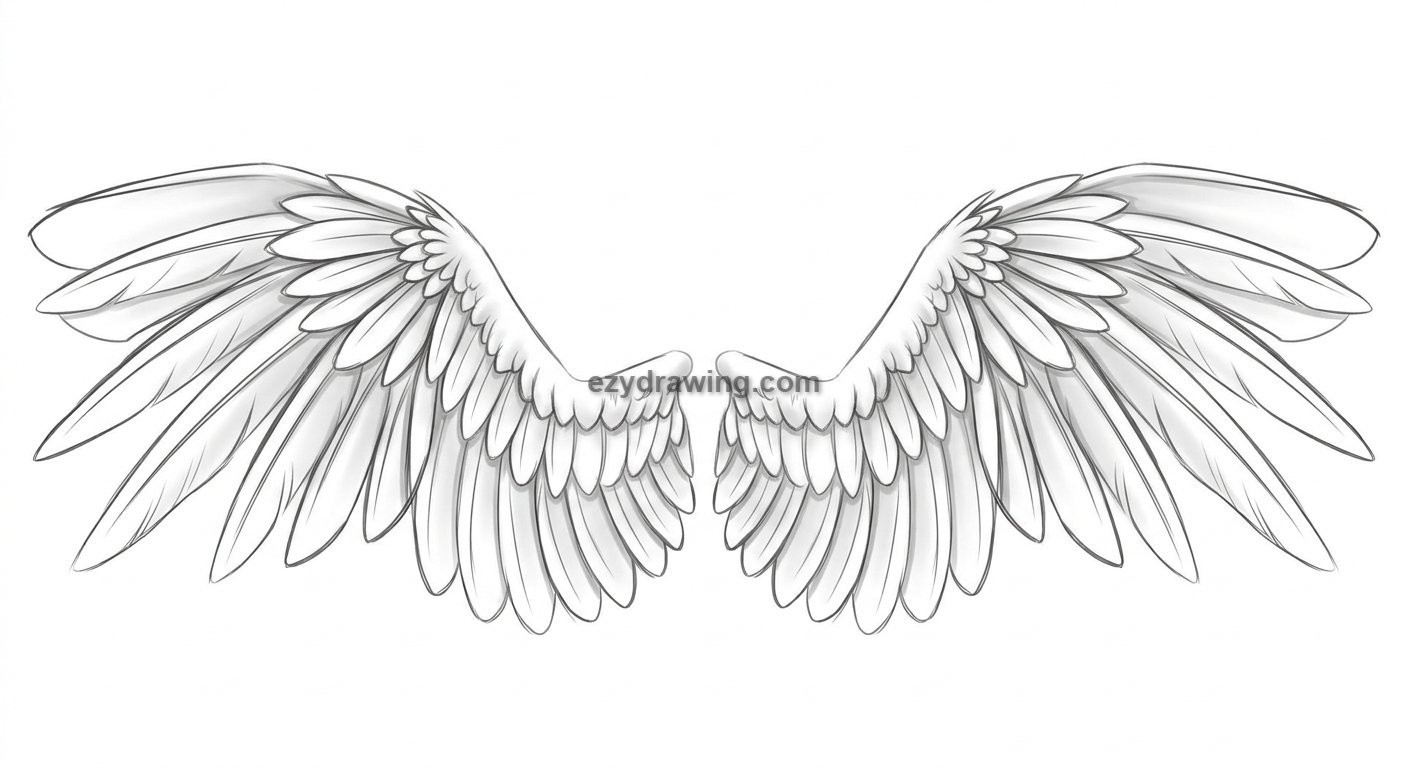
image_3.png)With all the feather groups in place, we are ready to clean up the drawing and define its texture using light and shadow. We are aiming for a finished angel wings drawing look.
- Action: Refine the entire drawing by darkening the contours of the primary feathers and the main layers of coverts. Use lighter, softer, sketchy lines within the feathers to suggest texture without defining every single barb. Most importantly, apply soft, gradient shading to create depth, particularly under the overlapping layers and on the underside of the wing. This step is essential for making it a realistic wings drawing.
- Significance: Good shading differentiates the layers, adding three-dimensional volume. It moves your sketch from a flat outline to a textured, feathered form, elevating the quality of your feathered wings drawing.
Step 6: Adding Color and Light
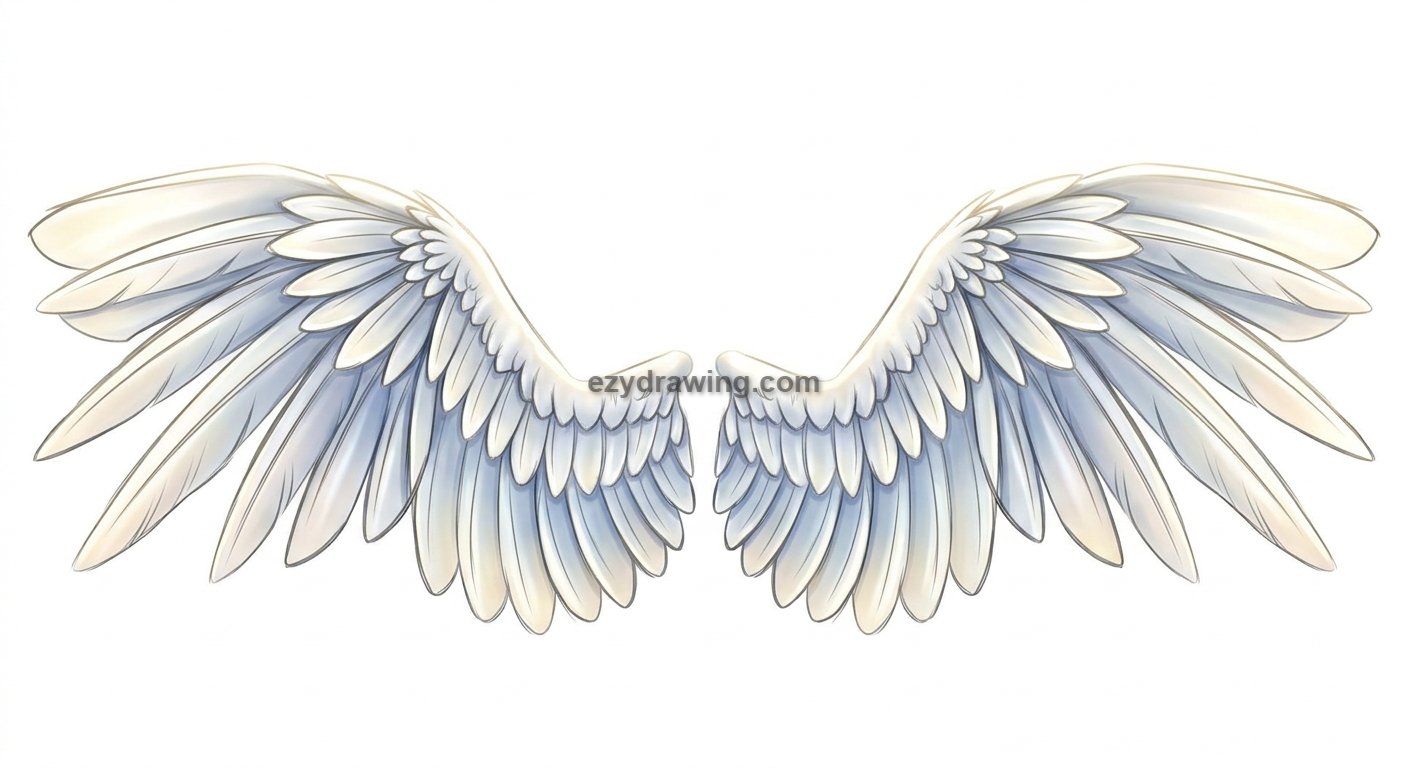
image_4.png)The final step is to bring the wings to life with color! This is your chance to customize them, perhaps making them pristine white for an angel wings drawing easy or adding complex patterns.
- Action: Take your clean, shaded sketch . Apply a base color (e.g., pure white). Use soft, celestial blue or subtle gold tones in the shadowed areas (the undersides and deep between layers, defined by your shading in . Finally, add bright white or pale gold highlights along the top edges and tips to catch the light.
- Significance: Color and lighting create atmosphere. By using cool shadows and warm highlights, you enhance the three-dimensional form and give your finished feathered wings drawing a sense of divine radiance or powerful presence, perfect for any person with wings drawing reference.
Summary of the Wings Tutorial Drawing
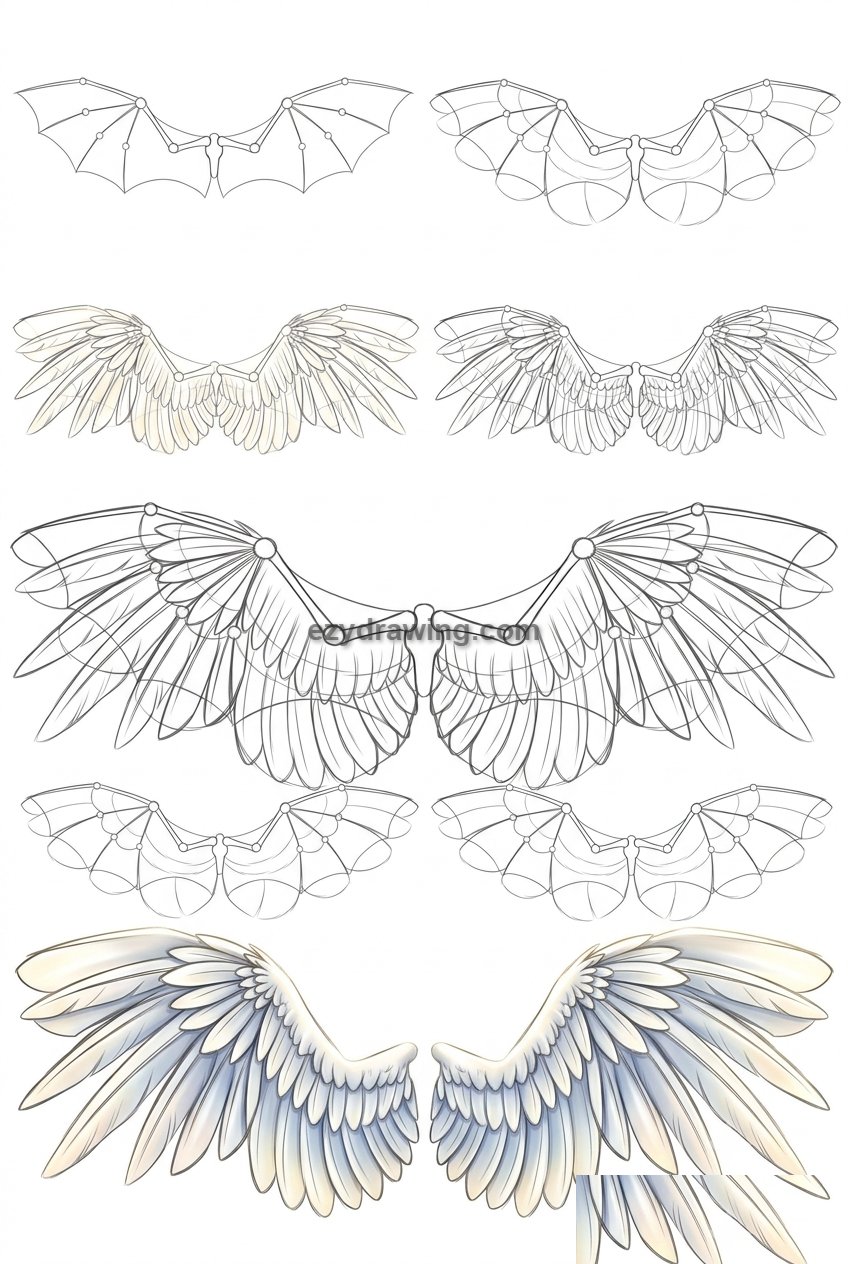
The image below shows the complete six-step progression side-by-side, from the initial skeletal framework to the final illuminated masterpiece.
This is your visual wing drawing reference for the entire process. Remember that the structure established in Step 1 is fundamental for maintaining the anatomy and perspective as you add the layers of simple shapes , large flight feathers , dense detailed layers , refined shading ,and finally, color.
Conclusion
Congratulations! You have completed the wings tutorial drawing. By following these structured steps—from the skeletal wing anatomy drawing and volumetric shaping to detailed layering, shading, and coloring—you now have the tools to create a wide variety of wings.
This foundation will serve you well whether you’re drawing a simple sketch, a realistic wings drawing, or dynamic flying poses drawing wings for your characters. Keep practicing this method, and you’ll soon find that how to draw wings naturally becomes a fluid part of your artistic skill set, allowing you to easily add majestic angel wings drawing or intricate feathered wings drawing to any piece. Happy drawing!
How to Draw Sun
How to Draw a Rabbit
How to Draw Dress
How to Draw Cake
How to Draw Fox