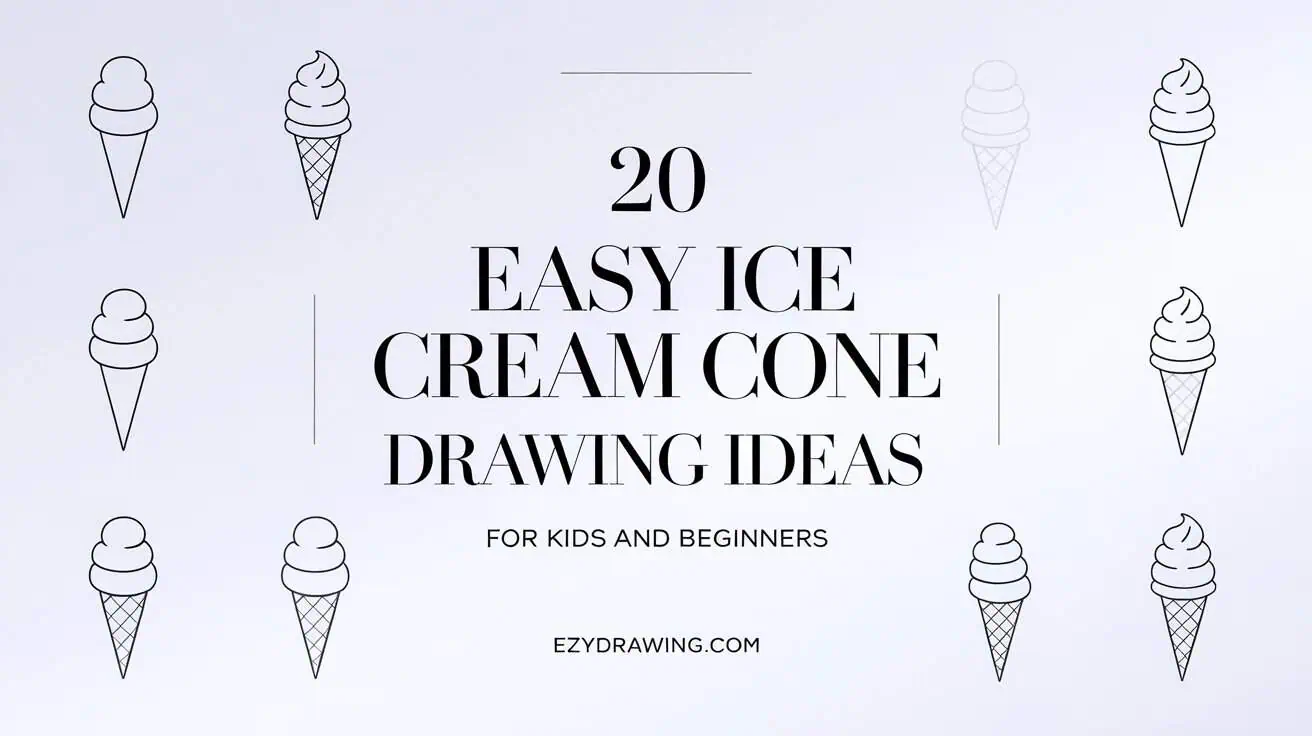
20 Easy Ice Cream Cone Drawing Ideas for Kids and Beginners
Ice Cream Cone Drawing Ideas offer a fun and creative way for kids to practice their art skills with a sweet twist. From a classic waffle cone to playful sketches featuring double scoop cone drawing, melting cream, and cheerful sprinkles, there’s plenty of inspiration for young artists. Whether they go for a traditional cone or experiment with heart-shaped scoops and smiling faces, the possibilities are both imaginative and delicious.
In this article, we’ve gathered 20 exciting prompts—from simple cone outline to more detailed styles like dripping ice cone and 3 scoop ice cream cone scketing. These ice drawing ideas encourage children to explore textures, patterns, and decorative elements while having fun with a delightful theme.
1. Classic Ice Cream Cone Drawing

One of the charming Ice Cream Cone Drawing Ideas is a classic black-and-white sketch featuring a smooth swirl on top of a crisp cone. The textured base and clean lines highlight the simplicity of a simple cone, perfectly capturing the joy of a summer treat in a minimal yet delightful way.
Steps – Classic Ice Cream Cone Drawing
- Draw the Swirl:
- Start with a small curved shape at the top for the tip of the swirl.
- Gradually widen the lines as you go down to create a layered swirl effect.
- Add the Cone:
- Draw two lines slanting downward from the base of the ice cream to form the cone shape.
- Add crosshatch lines on the cone for texture to make it look like a waffle cone.
Tips for Kids – Drawing a Classic Cone
- Draw the ice cream swirl with a light hand, so you can easily adjust the curves.
- Use a ruler for the cone lines if you want them perfectly straight.
- Try shading or coloring to make it look even more delicious.
- Start with a pencil, so you can erase and refine the shape.
- For more ideas, check out creative scketing inspiration.
2. Double Scoop Cone

This fun concept from our Ice Cream Cone Drawing Ideas shows a playful sketch with two scoops stacked on top of a textured cone. Featuring a crisp crisscross pattern and soft, rounded edges on the scoops, this drawing reflects the charm of a simple in a clean and minimalistic style.
Steps – Double Scoop Cone
- Draw the Cone:
- Start with a small triangle for the cone shape.
- Add a crisscross pattern inside the cone for texture.
- Create the Scoop:
- Draw a rounded top for the scoop, giving it a fluffy edge.
- Add small curves and lines to show details on the scoop.
- Add Extra Layers (Optional):
- Draw another scoop if desired, slightly overlapping the first one.
- Keep the same fluffy edges for consistency.
- Final Touches:
- Add small dots or lines on the scoop for texture.
- Double-check symmetry and details for a balanced look.
Tips for Kids – Drawing a Double Scoop Cone
- Use a ruler to create a neat crisscross pattern on the cone sketch.
- Try scketing the scoop in a single, flowing line to achieve smooth, rounded curves.
- Begin with a pencil so you can easily adjust your dessert-themed drawing as needed.
- Light, short strokes will help you form a soft, fluffy edge around the scoop.
3. Melting Ice Cream Cone

A charming black-and-white drawing of an ice cream cone with a single scoop that’s beginning to melt. The design features playful drips coming down from the scoop and a light crisscross pattern on the cone, creating a relaxed, fun illustration that’s simple for kids to replicate. For more creative ideas, explore fun drawing inspiration.
Steps – Melting Ice Cream Cone
- Draw the Cone:
- Start by drawing a triangle for the cone’s base.
- Add crisscross lines within the triangle to create the cone’s waffle texture.
- Add the Scoop:
- On top of the cone, draw a large, rounded scoop shape.
- Create a slightly curved line along the bottom of the scoop to show the melting ice cream.
- Add Drips:
- Draw small curved lines extending from the scoop to mimic melting drips.
- Add details like a few dots or extra curves to give the ice cream a soft, creamy texture.
Tips for Kids – Drawing a Melting Cone
- Use a pencil first to sketch, then outline in pen when satisfied with the shape.
- Try using short, curved lines to make the ice cream look soft and creamy.
- Draw the waffle pattern carefully; you can even use a ruler for straight lines.
- Make the drips as big or small as you want for a personalized touch.
4. Smiling Ice Cream Cone

This cheerful entry from our Ice Cream Cone Drawing Ideas features a black-and-white cream drawing with a smiling scoop that brings instant joy. The cone includes a classic crisscross pattern, while the expressive face adds a lighthearted, fun vibe. It’s a great option for anyone looking for a simple cone scketing that radiates happiness with every line.
Steps – Smiling Ice Cream Cone
- Draw the Cone:
- Start with a triangle shape for the cone.
- Add a crisscross pattern inside the cone to mimic a waffle texture.
- Create the Ice Cream Scoop:
- Sketch a curved top for the scoop above the cone.
- Add small details like a smile, eyes, and cheeks on the scoop.
- Add Expressions and Details:
- Outline the eyes with simple ovals or circles.
- Include curved lines for the cheeks to make it appear friendly.
- Finalize and Enhance:
- Trace over the design with a black pen for neatness.
- Erase any rough pencil marks to reveal your clean illustration.
Tips for Kids – Drawing a Smiling Ice Cream Cone
- Use a ruler to make straight lines for the cone pattern.
- Draw lightly with a pencil first so you can easily erase mistakes.
- Practice the facial expression separately before adding it to the scoop.
- Color the ice cream scoop with your favorite shades to bring it to life.
- Make the smile as big as you like to give it extra cheer!
5. Ice Cream Cone with Sprinkles

A delightful ice cream cone pencil drawing in black and white features a scoop topped with sprinkles. The cone has a textured waffle pattern, while the scoop is adorned with small dots or ovals representing toppings. This minimalistic ice cream cone drawing captures the charm of a favorite frozen treat.
Steps – Ice Cream Cone with Sprinkles
- Draw the Cone:
- Start with a triangle with a slightly rounded bottom for the cone.
- Add crisscross lines inside the triangle to create the waffle pattern.
- Add the Ice Cream Scoop:
- Sketch a cloud-like shape above the cone for the scoop.
- Decorate the scoop with small dots or ovals for sprinkles or toppings.
- Draw the Details:
- Outline the edges of the cone to make it stand out.
- Add subtle curves or a swirl to the scoop for texture.
- Finalize the Design:
- Ensure the top of the scoop has a neat, rounded finish.
- Add shading or small lines to enhance the design.
Tips for Kids – Drawing an Ice Cream Cone with Sprinkles
- Use a ruler to keep the cone’s edges straight.
- Practice the cloud shape for the scoop on a separate paper.
- Experiment with sprinkle patterns like stars or tiny hearts.
- Outline with a black marker for a bold finish after drawing with a pencil.
- Have fun by coloring your ice cream with your favorite flavors!
6. Ice Cream Cone with Cherry on Top

A delightful black-and-white ice cream cone drawing topped with a cherry. The cone has a crisscross waffle texture, while the scoop is smooth and rounded. A small cherry with a thin stem adds charm and whimsy to the design.
Steps – Ice Cream Cone with Cherry on Top
- Draw the Cone:
- Draw a triangle with a rounded top to create the base of the cone.
- Add crisscrossing diagonal lines inside the triangle for a waffle texture.
- Add the Scoop and Cherry:
- Sketch a circle on top of the cone for the ice cream scoop.
- Draw a small oval or circle on top of the scoop for the cherry and add a thin stem extending upward.
Tips for Kids – Drawing an Ice Cream Cone with Cherry on Top
- Start with light pencil strokes and trace over them with darker lines once you’re happy with the shape.
- A ruler or straightedge can help draw clean lines on the cone drawing for better structure.
- Practice circular shapes for scoops using everyday objects like coins or bottle caps.
- Get creative by adding sprinkles or decorative patterns to your dessert sketch.
- Try different cherry sizes or toppings to make your drawing of ice cream one of a kind!
7. Three Scoop Tower Cone

This charming piece from our Ice Cream Cone Drawing Ideas features a 3 scoop cone drawing in a clean black-and-white style. Each scoop is soft and rounded, stacked high above a cone detailed with a classic crisscross pattern. It’s a joyful sketch that captures the fun of indulging in a tall, refreshing treat.
Steps – Three Scoop Tower Cone
- Draw the Cone:
- Start by sketching a triangle for the cone base.
- Add a crisscross pattern inside the triangle to give it texture.
- Add the Scoops:
- Draw the bottom scoop as a rounded shape on top of the cone.
- Stack two more scoops above it, gradually decreasing in size.
- Refine the Details:
- Add slight curves to the edges of each scoop to show drips or texture.
- Highlight the cone’s edges with bold lines.
- Complete the Design:
- Shade or add sprinkles if desired for extra flair.
- Ensure all lines are neat and clean. For creative tips, check out simple drawing ideas.
Tips for Kids – Drawing a Three Scoop Tower Cone
- Use a pencil for the initial sketch to easily erase mistakes.
- Try drawing the scoops with round objects like bottle caps for perfect circles.
- Keep your hand steady while scketing the crisscross pattern on the cone.
- Experiment with adding tiny sprinkles or cherries on top for fun details.
- Make your ice cream unique by coloring each scoop a different flavor.
8. Ice Cream Cone with Heart Pattern

A delightful black-and-white drawing of an ice cream cone featuring heart patterns on the cone. The scoop is soft and swirled, while the cone is decorated with small hearts, symbolizing sweetness and love.
Steps – Ice Cream with Heart Pattern
- Draw the Cone:
- Start with a triangle shape for the cone.
- Add crisscross lines to create a waffle texture.
- Add the Ice Cream and Hearts:
- Draw a swirl or scoop shape on top of the cone.
- Decorate the cone with small heart shapes throughout the waffle lines.
- Enhance with Details:
- Add a few curved lines on the ice cream for depth.
- Include tiny accents to the hearts for a decorative look.
Tips for Kids – Drawing an Ice Cream with Heart Pattern
- Use a ruler to make straight crisscross lines on the cone.
- Draw hearts with a pencil first to get the perfect shape.
- Add color to the hearts for a creative pop.
- Keep your strokes light while sketching to make erasing easy.
- Experiment with different sizes of hearts for variety.
9. Dripping Ice Cream Cone with Two Scoops

A delightful black-and-whie cone drawing with two scoops and a playful drip effect on each scoop. The cone features a classic crisscross waffle pattern, while the scoops are soft and slightly irregular, adding a touch of fun.
Steps – Dripping Cone with Two Scoops
- Draw the Cone:
- Draw a wide “V” shape for the cone’s outline.
- Add diagonal crisscross lines to form the waffle pattern.
- Add the First Scoop:
- Draw a large rounded shape on top of the cone.
- Add a few wavy edges for the dripping effect.
- Draw the Second Scoop:
- Add another rounded shape above the first scoop.
- Ensure this scoop is slightly smaller to create a stacked effect.
- Top with Soft Serve:
- Add a spiral shape starting from a narrow point and widening into a swirl.
- Finish with a small curve at the top for the swirl tip.
Tips for Kids – Drawing a Dripping Cone with Two Scoops
- Begin with light pencil lines so you can easily adjust shapes while sketching.
- A ruler helps keep the crisscross cone lines neat and evenly spaced in your cone drawing.
- Practice smooth, rounded scoop shapes on scrap paper before finalizing your dessert-themed art.
- Add fun details like sprinkles or cherries to personalize your drawing of ice cream.
10. Cone with Swirled Soft Serve

A delightful black-and-white soft serve ice cream drawing features smooth, curvy layers atop a textured ice cream cone drawing. The design highlights a clean, minimalist style with a subtle waffle cone drawing base, making it an inviting illustration that’s easy to replicate and perfect for young artists.
Steps – Cone with Swirled Soft Serve
- Draw the Cone:
- Start with a triangle shape for the base cone.
- Add crosshatch lines to create the waffle pattern.
- Add the Ice Cream Swirl:
- Begin at the top of the cone and draw curving lines for the soft-serve.
- Create a pointed swirl at the top for the finishing touch.
- Detailing:
- Add smooth lines to define the swirl layers.
- Optionally, add shading or texture to the cone.
Tips for Kids – Drawing a Cone with Swirled Soft Serve
- Use a pencil first to sketch the cone and ice cream for easier corrections.
- To make perfect swirls, practice drawing curvy, flowing lines on a separate sheet.
- Use a ruler to create even crosshatches on the cone.
- Experiment with adding fun toppings like cherries or sprinkles for extra creativity.
- Make it colorful with crayons or markers after completing the outline!
11. Ice Cream Cone Drawing with Tiny Stars

A magical black-and-white drawing of an ice cream cone with a scoop decorated with tiny star shapes. The cone features a light crisscross waffle texture, while the stars on the scoop add a whimsical, playful vibe.
Steps – Ice Cream with Tiny Stars
- Create the Cone:
- Draw a long, narrow triangle for the cone.
- Add a horizontal curved line at the top for the rim.
- Draw the Scoop:
- Sketch a dome-shaped scoop above the cone.
- Add small star shapes scattered across the scoop.
- Add Details:
- Draw a crisscross grid on the cone.
- Make sure the stars are evenly spaced for a magical effect.
- Finalize:
- Add outlines and clean up extra lines.
- Enhance the stars with tiny dots or sparkles.
Tips for Kids – Drawing an Ice Cream with Tiny Stars
- Use a ruler for the cone lines if you find it tricky.
- Try using a stencil or practice drawing stars beforehand.
- Experiment with more stars or sparkles to make it unique.
- Add a swirl to the top of the scoop for extra flair.
- Color your stars with glitter pens for a sparkling touch!
12. Ice Cream Cone with Two Scoops and a Straw

A playful black-and-white drawing of an ice cream cone with two scoops and a decorative straw sticking out from the side. The cone features light diagonal lines for texture, while the scoops and straw add charm and fun to the design.
Steps- Cone with Two Scoops and a Straw
- Draw the Cone:
- Start by sketching a triangular cone.
- Add crisscross lines for the waffle texture.
- Add the Scoops:
- Draw a rounded scoop on top of the cone.
- Sketch a swirled scoop above the rounded one.
- Draw the Straw:
- Add a diagonal rectangle on the top corner of the swirled scoop.
- Add two parallel lines to indicate the straw’s width.
Tips for Kids – Cone Drawing with Two Scoops and a Straw
- Draw lightly with a pencil first to perfect your lines.
- Use a small round object to trace for the scoop’s shape.
- Keep your straw slightly tilted for a natural look.
- Experiment with extra decorations like sprinkles!
13. Simple Ice Cream Cone

A black-and-white, minimalistic ice cream cone drawing with a single scoop on top. The design features a simple cone and scoop, with slightly imperfect lines to create a handmade look. This child-friendly illustration keeps the details minimal and approachable.
Steps – Simple Ice Cream
- Draw the Cone:
- Sketch a triangle shape for the cone.
- Add light diagonal lines to create a subtle waffle pattern.
- Add the Scoop:
- Sketch a rounded scoop on top of the cone.
- Add a wavy bottom line to give the scoop a playful appearance.
- Enhance the Details:
- Outline the edges of the scoop and cone for clarity.
- Add subtle curved lines to the scoop for texture if desired.
Tips for Kids – Drawing a Simple Ice Cream
- Use light pencil strokes to make corrections easy.
- Practice scketing the scoop’s rounded shape separately.
- Use a ruler to keep the cone lines straight.
- Add a few sprinkles or a small cherry for fun customization.
- Experiment with coloring the scoop your favorite flavor!
14. Smiling Ice Cream Cone

A playful ice cream cone drawing featuring a soft scoop with a smiling face on top. The cone has a lightly textured waffle pattern, while the scoop has simple, cheerful facial features, making it a fun and approachable design for kids.
Steps – Smiling Cone
- Draw the Cone:
- Sketch a triangle for the cone.
- Add diagonal crisscross lines to create the waffle texture.
- Add the Scoop:
- Draw a rounded shape above the cone for the ice cream scoop.
- Add a slightly wavy bottom line for a soft, fluffy look.
- Add the Smile:
- Draw two small circles for the eyes.
- Add a curved line for the smile and small ovals for cheeks.
- Finalize the Design:
- Outline your drawing with a black pen for a clean finish.
- Erase any unnecessary pencil marks.
Tips for Kids – Drawing a Smiling Cone
- Use a pencil to sketch the smile before finalizing it.
- Add fun accessories like sunglasses or a hat to the face.
- Keep the waffle pattern lines light and even.
- Practice the facial expression on a separate sheet first.
- For more ideas, check out pencil drawing inspiration.
15. Heart-Shaped Cone Drawing

A delightful black-and-white drawing of an ice cream cone with a heart-shaped scoop on top. The design features a soft, rounded cone and a heart-shaped scoop that radiates sweetness and love.
Steps – Heart-Shaped Cone
- Draw the Cone:
- Start with a triangle shape for the cone.
- Add crisscross lines to create a light waffle pattern.
- Add the Heart Scoop:
- Draw a large heart shape on top of the cone.
- Make the edges of the heart slightly rounded for a softer look.
- Finalize the Details:
- Outline the edges of the cone and heart for clarity.
- Add tiny details like sprinkles or dots on the scoop for decoration.
Tips for Kids – Drawing a Heart-Shaped Cone
- Practice scketing heart shapes before adding them to the cone.
- Use light pencil strokes to adjust the scoop’s shape easily.
- Add small hearts or stars around the scoop for extra flair.
- Color the heart in your favorite shades to make it vibrant.
- Keep your lines soft and organic to mimic a handmade feel.
16. Double Scoop Cone

A fun black-and-white illustration of a double scoop ice cream cone drawing with two soft, fluffy scoops stacked neatly on top. The base features a classic textured cone drawing, bringing a whimsical and approachable design that’s ideal for creative sketching practice.
Steps – Double Scoop Cone
- Draw the Cone:
- Sketch a triangle shape for the cone.
- Add diagonal lines for the waffle pattern.
- Add the First Scoop:
- Draw a rounded shape on top of the cone.
- Make the edges slightly uneven to mimic fluffy ice cream.
- Add the Second Scoop:
- Draw another scoop on top of the first, slightly smaller.
- Add a few wavy lines for texture.
- Finalize the Design:
- Outline the cone and scoops for neatness.
- Add details like sprinkles or drips if desired.
Tips for Kids – Drawing a Double Scoop Cone
- Use a pencil to sketch both scoops before finalizing.
- Practice stacking the scoops evenly on a separate sheet.
- Use a ruler for the cone’s waffle pattern.
- Add fun details like cherries or sprinkles for a creative touch.
17. Star Sprinkle Ice Cream Cone Drawing

A whimsical black-and-white ice cream cone drawing with a scoop covered in small star-shaped sprinkles. The cone has a light waffle pattern, and the design focuses on a playful, child-friendly look.
Steps – Star Sprinkle Ice Cream Cone
- Draw the Cone:
- Start with a triangle shape for the cone.
- Add crisscross lines for the waffle pattern.
- Add the Scoop:
- Sketch a rounded scoop above the cone.
- Add a slightly wavy bottom edge for a soft look.
- Decorate with Stars:
- Draw small star shapes scattered across the scoop.
- Add tiny dots or sparkles between the stars for extra flair.
- Finalize the Details:
- Outline the design neatly and erase extra pencil marks.
- Ensure the stars are evenly spaced for a balanced look.
Tips for Kids – Drawing a Star Sprinkle Ice Cream Cone
- Practice scketing star shapes on a separate sheet.
- Use light pencil strokes for adjustments.
- Add more stars or patterns for a unique touch.
- Experiment with different sizes of stars for variety.
- Color the stars with glitter pens for a magical effect!
18. Dripping Ice Cream Cone

A charming black-and-white illustration of an ice cream cone with a scoop that has playful drips along the edges. The cone is lightly textured, and the drips add a fun, realistic touch to the design.
Steps – Dripping Ice Cream Cone Drawing
- Draw the Cone:
- Start with a triangle for the cone.
- Add diagonal crisscross lines to create the waffle texture.
- Add the Scoop:
- Sketch a rounded scoop on top of the cone.
- Add a wavy line along the bottom of the scoop for a dripping effect.
- Add Drips:
- Draw small curved lines extending from the scoop.
- Add a few dots or small curves to enhance the drips.
- Finalize the Design:
- Outline the drips and cone for a clean finish.
- Erase unnecessary pencil marks.
Tips for Kids – Drawing a Dripping Ice Cream Cone
- Use a pencil to sketch the drips before finalizing.
- Experiment with the size and placement of drips for creativity.
- Keep the cone’s lines straight with a ruler.
- Practice the wavy scoop edge on a separate sheet.
- Add fun sprinkles or toppings to personalize your design.
19. Waffle Cone Pattern

This black-and-white cone sketch features a crisp crisscross waffle pattern, perfect for practicing line work. Its minimal style makes it an ideal simple cone drawing for beginners or kids just starting with dessert-themed drawing ideas.
Steps – Waffle Cone Pattern
- Draw the Cone:
- Sketch a triangle shape for the cone.
- Add diagonal lines going in one direction for the first layer.
- Add the Crisscross Pattern:
- Draw diagonal lines going in the opposite direction to create a grid.
- Ensure the lines are evenly spaced for a clean look.
- Enhance with Details:
- Outline the cone edges for clarity.
- Add slight curves to the top of the cone for a soft touch.
Tips for Kids – Drawing a Waffle Cone Pattern
- Use a ruler to create straight, even lines.
- Sketch lightly with a pencil before finalizing.
- Practice the crisscross pattern on a separate sheet.
- Add sprinkles or a small scoop on top for creativity.
- Color the cone in light shades to enhance the waffle texture.
20. Swirled Ice Cream Cone with Sparkle

A delightful black-and-white drawing of a swirled cone with a small sparkle nearby. The design focuses on clean, soft lines, making it easy and fun for kids to replicate.
Steps – Swirled with Sparkle
- Draw the Cone:
- Start with a triangle shape for the cone.
- Add diagonal crisscross lines for the waffle texture.
- Add the Swirl:
- Begin at the top of the cone and draw curving lines for the soft-serve.
- Add a pointed swirl at the top for the finishing touch.
- Add the Sparkle:
- Draw a small star shape near the ice cream swirl.
- Add tiny dots or lines around the star for extra sparkle. For more inspiration, visit fun drawing ideas.
- Finalize the Design:
- Outline the cone, swirl, and sparkle neatly.
- Erase unnecessary pencil marks for a clean look.
Tips for Kids – Drawing a Swirled with Sparkle
- Use a straightedge to keep the lines in your waffle cone scketing clean and structured.
- Practice pattern shapes like stars and curls before adding them to your main sketch.
- Add small toppings like dots or decorations to give your work a creative twist.
- Try coloring with neon shades or pastels for a fun, bright look.
- Adjust the swirl height to create either a tall or soft-serve soft ice cream sketch.
Conclusion:
Ice cream drawing is a delightful activity that encourages creativity and builds essential artistic skills. Whether sketching ice cream cones to draw, swirling soft serve ice cream, or adding fun toppings like cherries and sprinkles, kids can personalize each piece and create their own unique versions of this beloved treat.
Encourage young artists to explore different styles, from simple cone drawing to playful variations like dripping ice cream cone drawing or even an upside down ice cream cone drawing. With regular practice and a sprinkle of imagination, they’ll gain confidence and enjoy the fun of creating sweet, whimsical illustrations!
