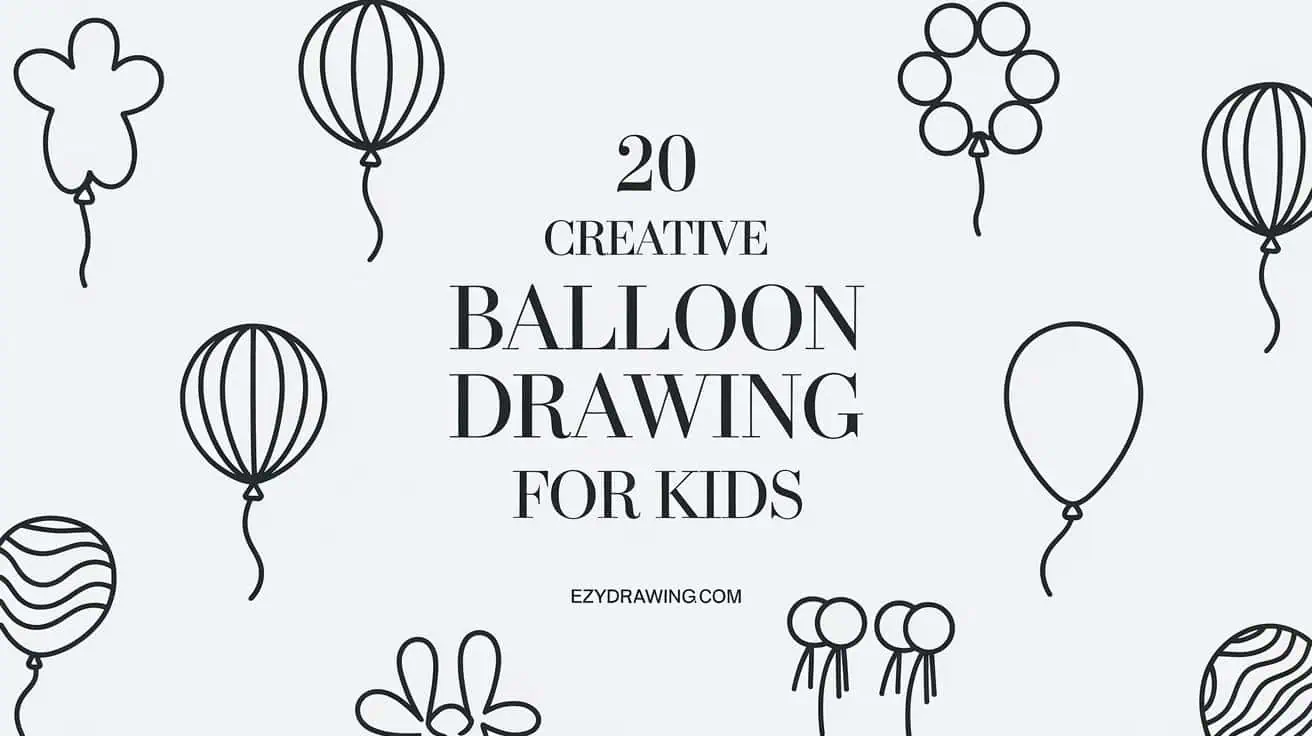
20 Creative Balloon Drawing Ideas for Kids
Balloon drawing ideas are a fantastic way for kids to develop their artistic creativity while having fun with simple, playful shapes. From clusters of whimsical designs like star Shape drawing, heart-shaped, and simple balloon dog, there’s a wide range of styles to explore. Object can be drawn in different sizes, shapes, and patterns, making them perfect for festive artwork and personal projects.
In this article, we’ve gathered 20 drawing ideas that range from basic single creative designs like smiling faces, spiral patterns, and arch. These ideas will inspire children to experiment with new details, textures, and styles to enhance their skills.
1. Simple Balloon Cluster

A black-and-white line simple drawing of balloon featuring three small shapes tied together. The a classic round form with small triangular knots at the bottom, each with a slightly curved string extending downward. The design is minimalistic, with a clean, child-friendly style — perfect for those looking for easy to draw ideas that are fun and simple to replicate.
Steps – Simple Cluster
1. Draw the First
Start with a large circle for the first inflated shape, positioned slightly to the left.
Add a small triangle at the bottom for the knot, pointing downward.
2. Draw the Second
Draw another circle slightly overlapping the first, placed to the right.
Add a knot at the bottom, similar to the first party float.
3. Add the Third
Draw a third circle, overlapping the other two shapes slightly higher or lower.
Add a triangle knot at the bottom, keeping all knots aligned.
4. Draw the Strings
From each knot, draw a long, slightly wavy line extending downward for the decorative strings.
Try to make the strings slightly different in length for a natural look. For more creative ideas, explore balloon drawing ideas.
5. Refine and Adjust
Go over your lines to ensure they are smooth and clean.
Check the spacing to make sure the cluster of floating orbs looks balanced.
Tips for Kids – Cluster
- Use light pencil strokes at the start so it’s easy to make adjustments.
- You can use a small circular object to trace each floating shape if you need help.
- Make each string unique by giving it a gentle curve to show movement.
- Have fun adding color to each air-filled decoration to personalize your cluster and make it pop!
2. Single Balloon with Bow

A simple black-and-white illustration of a classic round balloon with a tiny bow tied along the string. This minimalistic design adds a playful and charming look while remaining easy for kids to replicate.
Steps – Single Object with Bow
1. Draw the Shape
Start by sketching a perfect circle for the air-filled figure.
Add a small triangle at the bottom to represent the knot.
2. Add the First Bow
Draw a bow about halfway down the floating string, making it symmetrical.
Begin with the center knot, then sketch the loops and tails.
3. Draw the Second Bow
Add another bow closer to the bottom of the string.
Make this bow slightly larger or smaller to add variety and creativity.
4. Finish the String
Draw a straight line extending down from the knot to complete the simple party orb drawing.
Tips for Kids – with Bow
- Start with light pencil strokes to adjust the bows if needed.
- Draw each bow one at a time for balance.
- Add more bows for a unique look if you like.
- Color in each bow to make them stand out.
3. Heart-Shaped Balloon Drawing

This is a simple and cute heart-shaped balloon drawing that kids will love. With a delicate balloon string attached, it looks like it’s gently floating in the air. This easy to draw balloon design is perfect for adding a fun, uplifting touch to any artwork or festive craft project.
Steps – Heart-Shaped
1. Draw the Heart Shape
Start by drawing a large heart shape with smooth curves at the top.
Leave a small gap at the bottom where the string of the floating decoration will connect.
2. Add the Knot and String
Draw a small triangle at the bottom of the heart to represent the knot of the inflated design.
From the triangle, draw a straight or gently curved line downward to complete the decorative string drawing.
Tips for Kids – Heart Shape Drawing
- Start lightly: Sketch the heart shape gently to get the right size and balance before finalizing.
- Use curved lines: Make the string slightly wavy to show the floating decoration drifting in the air.
- Add details: Draw small lines on the knot to make it look realistic, and include shine lines on the air-filled shape for a glossy effect.
- Customize: Add your own touch by coloring or designing the heart with polka dots, stars, or other fun patterns.
- Practice makes perfect: Don’t worry if your first party puff isn’t perfect—keep practicing and you’ll improve!
- For more inspiration, visit simple drawing ideas.
4. Smiling Face Balloon

This is a simple drawing balloon idea featuring a smiley face. The round drawn balloon has a friendly expression with two dots for eyes and a curved line for a smile. It’s a cheerful design that’s easy draw balloon, perfect for kids who want to draw face and add a joyful touch to any artwork.
Steps – Smiling Face
1. Draw the Shape
Start by a large circle for the main floating orb.
Leave a small space at the bottom for the festive shape’s knot.
2. Add the Knot and String
Draw a small triangle at the base of the circle to represent the tie of the inflated object.
From the knot, extend a straight or slightly wavy line downward to create the decorative string.
3. Add the Smiley Face
Draw two small circles in the upper part of the air-filled figure for the eyes.
Add a curved line below the eyes to form a cheerful smile.
Tips for Kids – Smiley Drawing
- Use a light pencil first to get a nice round shape.
- Make it your own: Add cheeks, eyebrows, or even a fun accessory like a hat or bow for more character.
- Experiment with expressions: Change the smile to a grin or add different expressions to make it unique.
- Add color: Use bright colors for the cheeks to make it stand out and feel cheerful.
5. Star-Shaped Balloon Drawing

A simple and minimalistic black-and-white star balloon drawing featuring a fun, curly balloon string drawing. The whimsical design includes a small knot at the bottom and a wavy, playful string hanging down. It’s a great drawing on a balloon idea that’s perfect for children to sketch and personalize with their own creative touches.
Steps – Star-Shaped
1. Draw the Star Shape
Start by drawing a five-pointed star for the main shape of the floating decoration.
Keep the lines smooth and try to make each point even for a balanced look.
2. Add the Knot
Draw a small triangular shape at the bottom of the star to represent the tie of the inflated figure.
Make sure it connects neatly to the bottom point of the star.
3. Draw the Curly String
From the knot, draw a fun, wavy line that curls downward to create a floating effect.
Add small loops to make the decorative string look curly and playful.
4. Refine the Shape
Go over your lines to smooth out any rough edges and make the party star look clean and polished.
Tips for Kids – Star Balloon Drawing
- Start with light pencil strokes to get the star shape right.
- Draw one point at a time for even star points.
- Make the string as curly as you like for a unique touch.
- Try different string styles—straight, curly, or wavy.
6. Balloon with a Ribbon Bow

This is a simple balloon drawing with a cute, minimalistic touch—a bow tied around the string. The round shape, along with a little bow, makes it a charming and fun drawing to add to any artwork.
Steps – Ribbon Bow
1. Draw the Shape
Start by drawing a large circle for the air-filled decoration.
Leave a small gap at the bottom of the circle where the knot of the floating figure will be drawn.
2. Add the Knot and String
Draw a small triangle or rectangle at the base to represent the tie of the inflated shape.
Extend a line downward from the knot to create the hanging string. You can make the line straight or gently wavy to suggest movement.
3. Draw the Bow
Just below the knot, draw a small bow attached to the string.
Start by sketching two loops on each side to form the bow.
Add two short ribbon tails underneath the loops to complete the look. For more creative ideas, check out pencil drawing inspiration.
Tips for Kids – with Bow
- Practice round shapes: Balloons are round, so try to make a smooth, circular shape.
- Make the bow stand out: Draw the bow with clear loops and tails to make it look more defined.
- Add shine: Add a small curved line inside the shape to show a shine or reflection.
- Experiment with the bow: Try making the bow bigger, smaller, or adding patterns like polka dots.
7. Floating Balloons in a Row

This drawing shows three simple balloons floating side-by-side, each with a string attached. The minimalist design with a touch of shading gives the balloons a charming and stylish look. This illustration is perfect for practicing symmetry and shading techniques.
Steps – Floating in a Row
1. Draw the Shapes
- Start by sketching three large circles side-by-side, each representing a party decoration.
- Keep the circles evenly spaced and similar in size for a clean, balanced look.
2. Add the Knots and Strings
- At the bottom of each circle, draw a small triangle or rectangle to represent the knot of each inflated figure.
- Extend a line downward from each knot to form the balloon string drawing. You can make the lines slightly wavy to suggest a gentle floating motion.
3. Add Shading (Optional)
- To create a 3D effect, add light shading on one side of each balloon shape.
- Use short, curved strokes to show highlights where the light hits, giving the design a shiny and realistic touch.
Tips for Kids – in a Row
- Practice symmetry: Try to make each shape as similar in size and shape as possible.
- Add shading carefully: Lightly add shading on one side to make the balloons look more realistic.
- Try different shapes: Experiment with making the slightly oval or round for variety.
8. Animal-Shaped Balloon (Dog)

A minimalistic black-and-white line drawing of a balloon dog, created in a simple, child-friendly style. The design features rounded shapes for the head, ears, body, legs, and tail, making it playful and easy to replicate.
Steps – Animal-Shaped Balloon Dog
- Draw the Head and Ears
- Draw an oval for the head of the dog, leaving room at the top for the ears.
- Add two smaller ovals on top of the head to form the ears.
- Draw the Body and Neck
- Below the head, draw an elongated oval shape for the body.
- Connect the body to the head with a small curve to form the neck.
- Add the Legs
- Draw two oval shapes on each side of the body to represent the front legs.
- Repeat with two smaller ovals at the back for the hind legs, angled slightly upward.
- Draw the Tail
- At the back of the body, draw a curved shape for the tail, ending in a point or small curve.
- Add Details
- Draw a small oval at the front of the head for the nose.
- Add finishing lines to ensure the shapes connect smoothly.
Tips for Kids – Balloon Dog
- Use soft pencil lines so you can easily erase and adjust.
- Draw gentle, rounded ovals to create a realistic inflated figure look.
- Work on one part at a time (head, body, legs) to keep the shapes balanced.
- Try different tail styles to make your party pup more fun and unique.
9. Balloon with Confetti

A round balloon with small polka dots scattered across its surface. The playful dots give the balloon a festive and cheerful appearance, perfect for party-themed drawings or fun artwork.
Steps – Confetti
1. Draw the Balloon Shape
- Begin by drawing a large, round circle to form the main shape of the party float.
- Leave a small space at the bottom where the knot of the inflated figure will go.
2. Add the Knot and String
- Draw a small triangle or rectangle at the bottom to represent the knot.
- Extend a line downward to create the balloon string drawing — it can be straight or gently wavy for a floating effect.
3. Add Polka Dots
- Inside the air-filled decoration, draw small circles scattered randomly across the surface.
- Vary the sizes slightly to make the confetti pattern more playful and dynamic.
Tips for Kids – Confetti Balloon Drawing
- Vary the dot sizes to create a fun, random confetti effect.
- Experiment with different shapes like stars, hearts, or tiny stripes instead of just circles.
- Use multiple colors to make the inflated shape look bright and festive.
- Add a shine effect by drawing a small curved line near the top to show light reflection.
10. Group of Balloons in a Cluster

This illustration features a cluster of balloons drawing, with five grouped together, each with a balloon string drawing attached to create a fun and festive look. They appear to float upward, giving a sense of lightness and celebration — a perfect example of balloon drawing ideas for party-themed art and creative projects.
Steps – Group of a Cluster
1. Draw the Shapes
Start by drawing five large circles, positioning them close together to form a cluster of floating decorations.
Vary the height of each air-filled shape to make the arrangement look more dynamic and natural.
2. Add the Knots and Strings
Draw a small triangle or rectangle at the bottom of each inflated figure to represent the knot.
From each knot, draw a wavy line extending downward to form the decorative strings, allowing them to overlap slightly for a realistic effect.
3. Refine and Add Details
Add small, curved lines on the floating orbs to represent light reflections.
Go over the outlines to ensure they are clean, smooth, and visually appealing.
Tips for Kids – Cluster
- Keep the balloons overlapping slightly to create a more connected and realistic look.
- Vary the string lengths to give the cluster a natural floating appearance.
- Add colors by using a mix of bright shades to make the cluster look festive and fun.
11. Round Balloon with Stars Inside

A simple black-and-white line drawing of a round balloon decorated with stars. The design includes one large star at the center surrounded by smaller stars scattered around, giving a fun and festive appearance.
Steps – Stars Inside
1. Draw the Balloon Shape
Start with a large circle for the main shape of the air-filled decoration.
Keep the circle smooth and round to give it a classic floating orb appearance.
2. Add the Knot and String
Draw a small triangle or trapezoid at the bottom center of the inflated figure to represent the knot.
From the knot, extend a slightly curved line downward to form the hanging string.
3. Draw the Large Center Star
Inside the party float, draw a big star in the middle as the main decoration.
Make the star bold and five-pointed, with evenly spaced tips for balance.
4. Add Smaller Stars
Scatter several small stars around the central one to fill the space.
Vary their sizes to create a playful, dynamic design.
5. Refine and Finalize
Go over all the lines to ensure they are smooth and clean.
Add extra details or more tiny stars if there’s remaining space to enhance the overall look.
Tips for Kids – Star Balloon Drawing
- Use a circular object to trace the base for a perfect balloon shape.
- Start with the big star in the center to leave enough space for smaller stars around it.
- Vary the sizes of the stars to make your drawing look more dynamic and fun.
- Draw the string with a soft curve to create a floating effect.
- Add color to each star to make look bright and festive.
12. Balloon Arch

A simple black-and-white line drawing of a balloon arch. The arch consists of multiple round balloons arranged in a curved formation, giving a celebratory feel. The design includes individual balloons connected in a natural arch shape.
Steps – Balloon Arch
1. Draw the First Side of the Arch
Start by sketching an air-filled shape on the left side.
Add another just above it, continuing to stack in a curved pattern to form the left half of the arch.
2. Add the Right Side of the Arch
Begin drawing party orbs from the right, mirroring the left side with an upward curve.
Place each one slightly overlapping the next for a connected and seamless look.
3. Connect the Top Balloons
Add a few more inflated figures at the top to complete the arch, linking both sides together.
Adjust spacing to maintain a smooth, balanced curve.
4. Add Details (Optional)
Fill in some floating decorations with solid black for variation.
Add subtle highlights or extra lines to a few shapes for depth and dimension.
Tips for Kids – Balloon Arch
- Use light pencil strokes so you can adjust balloon positions easily.
- Draw in different sizes to give the arch a natural and fun look.
- Try mixing solid and outlined to boost creativity.
- Overlap & slightly to make the arch look more realistic.
- Add colors or patterns to personalize your arch with a festive party vibe.
13. Floating Balloon with a Cloud

A simple black-and-white drawing of a single balloon floating beside a small cloud. The balloon has a classic oval shape with a small triangle knot at the bottom and a gently curved string hanging down. For more creative inspiration, explore balloon drawing ideas.
Steps – Floating Balloon with a Cloud
1. Draw the Balloon Shape
Start with an oval to represent the air-filled figure, making it slightly wider in the middle.
Keep your lines smooth and rounded to give it a soft, floating appearance.
2. Add the Knot at the Bottom
Draw a small triangle at the base of the inflated shape to form the knot.
Ensure the knot connects seamlessly with the outer edge.
3. Draw the String
From the knot, draw a gently wavy line extending downward to create the hanging thread.
Aim for a relaxed, natural curve to suggest movement in the air.
4. Draw the Cloud
Next to the party orb, draw a soft, fluffy cloud using rounded humps to shape the outline.
This adds a dreamy, sky-like element to your sketch.
5. Add Final Touches
Include a small curved line inside the floating decoration for a subtle highlight.
Go over your lines to make sure they’re clean and visually smooth.
Tips for Kids – Balloon with Cloud
- Use a pencil so you can easily make corrections.
- Trace a round object to help with the balloon’s circular shape.
- Draw the cloud freely—clouds can be any shape, so have fun!
- Keep the string light and wavy for a relaxed look.
- Add colors to bring your drawing to life!
14. Balloon with a Flower

A minimalistic black-and-white a balloon drawing featuring a single, round shape with a small knot at the bottom and a thin, slightly curved balloon string drawing. A tiny flower is attached to the string, adding a charming detail. This simple drawing of balloon creates a light and cheerful design, perfect for kids’ art projects or decorative sketches.
Steps – Balloon with a Flower
- Draw the Balloon Shape
- Start with a large circle to form the main part of the balloon.
- Add a small triangle or trapezoid shape at the bottom of the circle for the knot.
- Add the String
- Draw a long, slightly wavy line extending downward from the knot.
- Keep the string thin and gentle in its curve to give a floating look.
- Draw the Flower
- Partway down the string, draw a small circle or oval for the flower center.
- Add simple petal shapes around the center, usually five, to form the flower.
- Add Leaves
- Draw two small leaves on either side of the flower, angling them outward.
- Make the leaves pointed or oval-shaped to keep them simple.
- Refine and Finalize
- Go over the lines to make them smooth and clear.
- Add any small details, like a vein in each leaf, if desired.
Tips for Kids – Balloon with a Flower
- Use a pencil first so you can make adjustments easily.
- Trace a round object to help with the balloon’s circular shape.
- Keep the flower simple—even just a few petals will look great.
- Make the string slightly wavy for a realistic floating effect.
- Color the flower to add a pop of color to your drawing.
15. Spiral Balloon

A black-and-white a balloon drawing featuring a simple spiral pattern inside. The spiral gently circles down, giving the balloon a whimsical look. This simple drawing of balloon is easy for kids to replicate, making it a fun option for those exploring drawing on a balloon with creative, playful designs.
Steps – Spiral Drawing
1. Draw the Balloon Shape
Start with a large, round circle for the main body of the air-filled decoration.
Keep the lines smooth and even to form a classic floating shape.
2. Add the Knot and String
Draw a small triangle or trapezoid at the base of the circle to represent the tie of the inflated figure.
Extend a slightly curved line downward from the knot to create the hanging string.
3. Draw the Spiral in the Center
Inside the party orb, draw a spiral starting from the center and expanding outward.
Keep the spiral loose and flowing to give it a playful, whimsical look.
4. Add Decorative Details (Optional)
Around the edge of the round float, add small, irregular shapes like loops or tiny leaves to create a fun decorative border.
Space the details evenly to maintain visual balance. For more fun ideas, check out simple drawing inspiration.
5. Refine and Smooth Out
Go over your lines to make sure everything looks clean and polished.
Add any extra details if there’s leftover space to enhance your artwork.
Tips for Kids – Spiral Balloon
- Start with light lines to help with adjustments.
- Make the spiral simple and loose to keep it easy.
- Experiment with different border shapes to make your balloon unique.
- Add a slight curve to the string for a more realistic look.
- Color the spiral and border for extra flair if you’d like.
16. Balloon Bouquet with Ribbon Tie

A black-and-white line drawing of three classic balloons tied together at the bottom with a small bow. Each balloon has a round shape, and the strings are gathered neatly to create an elegant design suitable for celebrations.
Steps – Bouquet with Ribbon Tie
1. Draw the First Balloon
Start with a large oval shape for the center air-filled figure, slightly elongated vertically.
Add a small triangle or trapezoid at the bottom to represent the knot.
2. Add the Left and Right Balloons
Draw a similar shape slightly overlapping on the left side of the center floating form.
Repeat on the right side to create a bouquet of three inflated shapes clustered together.
Add a small knot at the base of each one.
3. Draw the Strings
From each knot, draw a straight line downward to form the decorative strings.
Let the strings come together near the bottom and draw a small ribbon bow to tie them together neatly.
4. Add Highlights and Shading (Optional)
Draw a small curved line near the top left of each party orb to create a highlight.
Lightly shade around the edges to give the bouquet a soft, three-dimensional look.
5. Refine and Finalize
Go over your lines to make them clean and smooth.
Add any final touches or refine the ribbon bow to complete your festive cluster design.
Tips for Kids – Balloon Bouquet
- Draw with light pencil strokes to make adjusting shapes easier.
- Keep the bow simple by using two loops and flowing ribbon ends.
- Use curved lines for highlights to give the balloons a shiny look.
- Draw each one at a time to keep their sizes even and balanced.
- Color each shape to give your bouquet a fun and festive finish.
17. Miniature Balloon Drawing

A black-and-white illustration featuring a cluster of miniature balloon shapes with short strings. The balloons are small and slightly imperfect, giving them an organic, hand-drawn feel. Perfect for cheerful, festive drawings.
Steps – Miniature
1. Draw the Balloon Shapes
Start by drawing several small circles to represent mini air-filled decorations.
Arrange them close together in a cluster, varying their heights slightly for a more natural look.
Allow some floating orbs to overlap to create depth.
2. Add the Knots and Strings
Draw a small triangle or rectangle at the bottom of each inflated shape to show the knot.
Extend a short, wavy line downward from each knot to form the tiny decorative strings.
3. Refine the Design
Add small, curved lines to each party puff to represent highlights or light reflections.
Go over your outlines to ensure the design is clean and smooth.
4. Optional Details
Lightly shade one side of each mini float to give it a 3D look.
Add playful patterns like dots or stripes to make your design more fun and detailed.
Tips for Kids – Miniature Balloons
- Group balloons naturally by overlapping some to create a fuller cluster.
- Vary the string lengths to give your drawing a more dynamic, floating feel.
- Use bright colors to make the miniature shape look cheerful and festive.
- Add creative patterns like polka dots, stars, or stripes for extra fun.
- Include a background scene such as a sky or party setting to complete the look.
- For more creative tips, explore fun drawing ideas.
18. Double Balloon with Hearts

A black-and-white illustration of two balloons tied together, one decorated with a tiny heart shape. This minimalistic design feels friendly and sweet, perfect for love or friendship themes.
Steps – with Hearts
1. Draw the Balloon Shapes
Start by drawing two large circles next to each other to represent floating decorations.
Position them close together to show they’re drifting side by side.
Leave a small gap at the bottom of each circle for the ties of the inflated figures.
2. Add the Knots and Strings
Draw a small triangle or rectangle at the base of each air-filled shape to represent the knots.
Extend lines downward to form the hanging strings, letting them cross or curve slightly for a natural effect.
3. Draw the Heart Detail
Inside one of the party orbs, draw a small heart shape—either centered or placed off to one side.
Add a small curved line near the top of each floating form to create a soft, shiny highlight.
4. Refine the Design
Go over the outlines to ensure a clean and polished look.
Add any finishing touches like extra highlights or subtle patterns to bring your design to life.
Tips for Kids – Double Balloon with Hearts
- Try different heart designs by adding smaller hearts or even a smiley face inside one balloon.
- Use red, pink, or other fun colors to make the hearts and object stand out.
- Add a background like clouds or stars to make the scene look more magical and floating.
- Personalize it by writing your initials or a friend’s initials inside the heart shape.
- Shade lightly on one side of each object to create depth and a 3D effect.
19. Balloon with Polka Dots

A black-and-white illustration of a balloon with small polka dots scattered across its surface. The playful dots add a festive and cheerful touch, making it a delightful design for kids.
Steps – Polka Dots
1. Draw the Balloon Shape
Start with a large circle to form the main shape of the air-filled decoration.
Leave a small space at the bottom of the circle for the knot of the floating figure.
2. Add the Knot and String
Draw a small triangle or rectangle at the bottom of the inflated shape to represent the knot.
Extend a line downward from the knot to create the hanging string — you can make it straight or gently wavy for a softer look.
3. Add Polka Dots
Inside the party orb, draw small circles scattered randomly across the surface to create the polka dot pattern.
Vary the sizes of the dots to add energy and visual interest.
4. Refine and Finalize
Go over all lines to ensure the outline is smooth and clean.
Add any extra touches or playful patterns to enhance your decorative float.
Tips for Kids – Polka Dot Balloon Drawing
- Vary dot sizes by making some larger and others smaller to create a lively pattern.
- Experiment with different shapes like hearts, stars, or even tiny spirals instead of just circles.
- Use bright and fun colors to give the polka dots a festive and cheerful look.
- Add a shine effect by drawing a small curved line near the top to show light reflection.
- Draw multiple balloons with different patterns to create a fun and creative object display.
20. Triangular Balloon Drawing

A black-and-white line drawing of a unique triangular-shaped balloon. The shape is soft and playful, with a slightly wavy string extending downward, making it an approachable design for kids.
Steps – Triangular Balloon
1. Draw the Balloon Shape
Start with a triangular shape to form the main body of the air-filled figure, keeping the edges slightly rounded for a softer, friendlier look.
Leave a small space at the bottom where the knot of the floating decoration will go. For more creative ideas, visit drawing inspiration.
2. Add the Knot and String
Draw a small triangle or rectangle at the bottom of the shape to represent the tie of the inflated form.
Extend a gently wavy line downward from the knot to create the hanging string.
3. Refine the Outline
Go over your lines to make sure the edges are clean and smooth.
Add a small curved line inside the triangular float to show a reflective shine.
4. Optional Details
Lightly shade one side of the shape to give it a 3D appearance.
Add playful patterns like dots or stripes to personalize your decorative shape.
Tips for Kids – Triangular Balloon
- Practice drawing triangles with soft, rounded edges for a unique and simple shape.
- Make the string curvy to create a light, floating effect.
- Add a small highlight to give the balloon a shiny, realistic appearance.
- Use bright colors or playful patterns to make the design stand out.
- Try variations by experimenting with different string styles or extra decorations like dots or stars.
Conclusion:
Balloon drawing is a fun and engaging activity that sparks creativity and encourages young artists to explore different balloon shapes drawing, patterns, and decorations. Whether it’s a simple round balloon, a festive star balloon drawing, or a cluster of balloons drawing tied with a ribbon, each design brings joy and adds charm to any artwork.
Encourage kids to personalize their work by adding unique patterns like polka dots, hearts, or stars, and experimenting with color combinations. With practice and imagination, they’ll create wonderful balloon designs drawing that showcase their creativity and artistic flair!r!


5 Comments