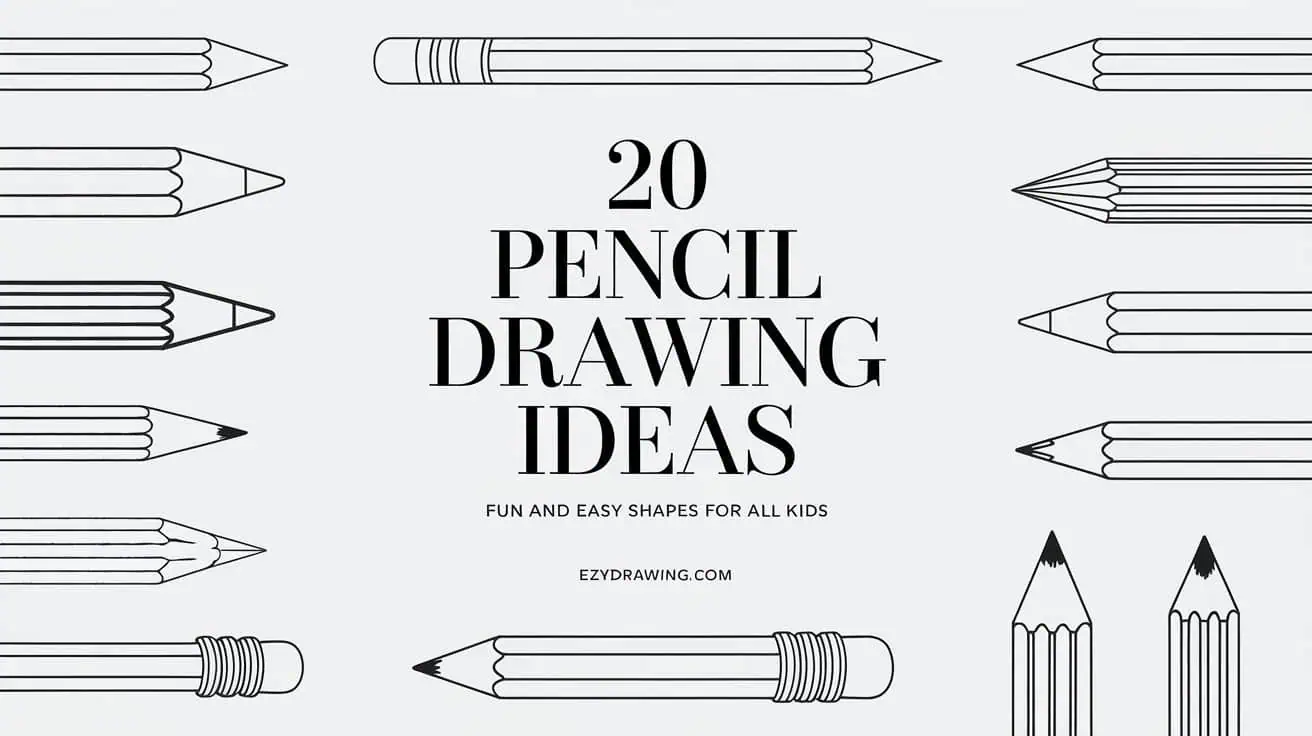
20 Pencil Drawing Ideas: Fun and Easy Shapes For All Kids
Pencil drawing ideas are a fantastic way for kids to practice their sketching skills while having fun. Whether it’s a simple pencil design, a character with a cheerful face, or a drawing surrounded by magical confetti, these creative pencil sketching ideas are perfect for young artists.
In this article, we’ve gathered 20 fun things to draw with pencil that encourage kids to play with different shapes, expressions, and accessories, while boosting their imagination and fine motor development.
1. Simple Pencil Drawing

A simple yet elegant example of pencil drawing ideas easy is a minimalistic illustration featuring a basic outline and subtle shading. This slightly angled pencil sketch uses clean lines and clear form, making it ideal for those exploring shapes pencil shading or just starting with drawing pencil ideas to build confidence and technique.
Drawing Steps
- Draw the Pencil Outline
- Start with two parallel lines to form the pencil body.
- Add a pointed end for the sharpened tip, and draw a small rectangle on the opposite end if it’s an eraser.
- Add Details and Shading
- Draw the lead at the sharpened tip using a small triangle or shaded area.
- Add a few lines near the eraser for a metal band if included.
- Lightly shade along one side of the pencil to create a simple shadow effect. For more inspiration, explore easy drawing ideas.
Tips for Kids
- Keep Lines Clean and Straight: Practicing smooth, straight lines builds control—an important skill in any pencil drawing or sketch.
- Light Shading Adds Depth: Use light, even shading on one side to create a simple 3D effect a basic yet powerful drawing technique.
- Focus on Proportions: Ensure the pencil body is longer than the eraser and tip to keep your drawing looking realistic.
- Experiment with Line Thickness: Try using thin or bold strokes to explore different art styles and effects with your drawing pencil.
- Practice Patience: Take your time—clean lines and careful sketching help you draw more realistically, even as a beginner.
2. Pencil with Face

A delightful example of fun pencil drawings is a sketch of a pencil with a cheerful face, complete with expressive eyes and a bright smile. This playful character adds personality to your art and makes a great addition to any collection of cute drawing ideas with pencil, especially for kids looking to enjoy creative expression.
Drawing Steps
- Draw the Pencil Shape
- Start with two parallel lines for the body, creating a cylinder shape.
- Add a pointed tip at the bottom and a slightly rounded top if it’s a single-ended pencil.
- Draw the Face and Details
- Draw two big circles for the eyes, adding small circles inside them for sparkle.
- Add a curved line below the eyes for the smile, with smaller curves at the ends if you want a blushing effect.
- Optionally, add eyebrows, freckles, or eyelashes to give the face more character.
Tips for Kids
- Make the Smile Big and Friendly: A large smile makes the pencil look happier and more inviting.
- Play with Eye Shapes: Try making the eyes round, oval, or even heart-shaped for variety.
- Add Blush for Cuteness: Small circles or lines near the cheeks can make the face look extra adorable.
- Customize with Accessories: Add a small hat, bow, or glasses to make the character unique.
- Be Creative with Expressions: Experiment with different expressions by adjusting the eye and mouth shapes for a variety of moods.
3. Pencil Drawing with Patterns

This whimsical sketch is a great choice for those exploring unique drawing ideas with pencil. Featuring stars, dots, and decorative patterns, it transforms a basic tool into an enchanted object. These playful details make it stand out as one of the more creative pencil drawing ideas, perfect for adding magic and charm to your sketchbook.
Drawing Steps
- Draw the Basic Pencil Shape
- Start with two parallel lines for the body and add a pointed end for the pencil tip.
- Complete the pencil by drawing the eraser or second point on the other end if it’s a double-ended pencil.
- Add Magical Patterns
- Draw small stars, circles, and swirls along the pencil body for a magical effect.
- Make sure to space out the patterns, balancing between stars, circles, and swirls.
- Add a few lines near the pencil tip to show a sharpened texture.
Tips for Kids
- Balance Your Patterns: Try to evenly distribute the stars and circles for a neat look.
- Use Different Sizes: Make some stars and circles smaller or larger to create visual interest.
- Experiment with Swirls: Swirls can be a fun addition; make them curved and gentle.
- Take Breaks: Drawing patterns can be detailed work, so take short breaks to avoid mistakes.
- Be Creative: You can add extra shapes or even small hearts or diamonds to make it unique to you! For more ideas, check out creative balloon drawing ideas.
4. Pencil with a Bow

A decorated sketch with a tiny bow tied around the eraser brings a sweet, whimsical flair to the page. This charming design adds character without being overly detailed, making it an excellent choice for those exploring simple drawing ideas with pencil that remain fun and kid-friendly.
Drawing Steps
- Draw the Pencil Shape
- Start with two parallel lines to form the pencil body.
- Draw a rounded rectangle on top for the eraser and add the point at the bottom for the pencil tip.
- Add the Bow and Details
- Draw two loops on either side of the pencil near the eraser for the bow.
- Add ribbon tails hanging down, and a small square or circle in the center to complete the bow.
- Add additional details like the sharpened wood lines and metal ring just below the eraser.
Tips for Kids
- Symmetry Matters: Try to make the bow symmetrical by drawing one side first, then mirroring it on the other.
- Add Soft Curves: Make the bow loops round and soft to give a realistic bow appearance.
- Use Light Lines for Bow First: Drawing the bow lightly helps adjust its shape before finalizing.
- Customize the Bow: Add patterns like stripes or dots to the bow to make it more personal.
- Stay Patient: Take your time with the details, especially on the bow, to make it neat and clean.
5. Pencil with Heart

This cheerful cartoon-style sketch features a pencil character holding a heart, complete with a big smile and expressive eyes. It’s a great example of cartoon pencil drawing ideas that help kids learn how to bring objects to life through playful features and emotional expressions.
Steps for Drawing
Step 1: Draw the Pencil Body
- Start by drawing a tall rectangle with slightly rounded edges for the pencil’s body.
- Draw a triangular tip at the top for the sharpened part of the pencil, and add a small rectangle for the eraser at the bottom.
Step 2: Add the Face and Expression
- Draw two small dots or lines near the top of the rectangle for the eyes.
- Draw a curved line below the eyes for a big smile, and add small lines on each side of the smile for dimples.
- You can add eyebrows or rosy cheeks to give the pencil more personality.
Step 3: Draw the Arms and Heart
- Draw two curved lines on each side of the pencil to create the arms. One arm should hold the heart shape.
- Draw a large heart shape near the end of one arm to make it look like the pencil is holding it.
Step 4: Add the Legs and Feet
- Draw two simple lines at the bottom of the pencil for the legs.
- Add small ovals or rounded shapes at the ends of the legs for the feet.
Tips for Kids
- Draw a Background: Add a simple background like floating hearts or stars to make your pencil drawing more fun and artistic.
- Experiment with Expressions: Change the look by drawing different eyes, a bigger smile, or unique illustration styles to give your sketch more personality.
- Add Details to the Heart: Draw small lines around the heart to make it look like it’s glowing—a great way to enhance your drawing technique.
- Color It In: Use classic colored pencils for the pencil’s body and eraser, and pick bright red or pink for the heart to make your art pop.
- Make It Personal: Get creative with details—add a bow, tiny shoes, or patterns on the body to give your drawing a unique style.
6. Pencil with Friends

This joyful cartoon-style illustration features a pencil character holding a heart, with a bright smile and friendly expression. It’s a fun way to explore pencil drawing inspiration, especially for those learning to give everyday objects personality through expressive faces and whimsical details. For more imaginative concepts, you can also check out playful candle drawing ideas.
Steps for Drawing
Step 1: Draw the Pencil Body
- Start by drawing a tall rectangle with slightly rounded edges for the pencil’s body.
- Draw a triangular tip at the top for the sharpened part of the pencil, and add a small rectangle for the eraser at the bottom.
Step 2: Add the Face and Expression
- Draw two small dots or lines near the top of the rectangle for the eyes.
- Draw a curved line below the eyes for a big smile, and add small lines on each side of the smile for dimples.
- You can add eyebrows or rosy cheeks to give the pencil more personality.
Step 3: Draw the Arms and Heart
- Draw two curved lines on each side of the pencil to create the arms. One arm should hold the heart shape.
- Draw a large heart shape near the end of one arm to make it look like the pencil is holding it.
Step 4: Add the Legs and Feet
- Draw two simple lines at the bottom of the pencil for the legs.
- Add small ovals or rounded shapes at the ends of the legs for the feet.
Tips for Kids
- Experiment with Expressions: Try changing the expression by adding different eyes or a bigger smile to make the pencil look even friendlier.
- Add Details to the Heart: You can add small lines around the heart to make it look like it’s shining or glowing.
- Color It In: Use classic pencil colors for the body and eraser, but feel free to color the heart in a bright red or pink.
- Make It Personal: Add extra details like a bow on the pencil, shoes on the feet, or even patterns on the pencil body to make it unique.
- Draw a Background: Add a simple background, like a few floating hearts or stars, to make it look more fun.
7. Pencil on a Desk

This sketch shows a classic writing tool resting on a surface, complete with a sharpened tip, hexagonal body, and eraser—instantly familiar and easy to identify. It’s an ideal subject for practicing shapes pencil shading and mastering the basics of form and light.
Steps for Drawing
Step 1: Draw the Pencil Body
- Start by drawing a long rectangle for the pencil’s body.
- Add a triangular point at one end for the pencil tip, making sure to add a line dividing the wood from the lead.
Step 2: Add the Eraser
- On the opposite end of the pencil, draw a small rectangle for the eraser.
- Add two or three lines near the eraser to represent the metal band that holds it in place.
Step 3: Add Shading
- Shade one side of the pencil lightly to give it a three-dimensional look.
- Add a shadow beneath the pencil by drawing light lines or a shaded area along one side.
Tips for Kids
- Add Color: Color the body yellow (or your favorite color), the eraser pink, and the metal band silver.
- Practice Straight Lines: Keep the lines for the pencil body straight to make it look neat and even.
- Add Realistic Details: Draw light wood grain lines near the pencil tip to make it look more realistic.
- Use Shading for Depth: Shade one side of the pencil body and the tip to add depth and make it look three-dimensional.
- Experiment with Shadows: Draw a simple shadow on one side of the pencil to make it look like it’s lying on a surface.
8. Pencil in Action

This sketch features a slanted tool in motion, drawing a flowing, wavy line. With attention to details like the wood grain and eraser top, it offers a touch of realism. The curved line adds energy to the scene, making it a great pick for those exploring drawing ideas in pencil that feel lively and dynamic.
Steps for Drawing
Step 1: Draw the Pencil Body
- Draw a slightly angled rectangle to represent the pencil’s body.
- Add a pointed tip at one end for the lead and the wood around it.
Step 2: Add the Eraser and Details
- On the opposite end, draw a small rectangle for the eraser.
- Add two or three lines near the eraser to create the metal band detail. For more inspiration, check out easy leaf drawing ideas.
Step 3: Draw the Wavy Line
- Starting from the pencil tip, draw a loose, wavy line moving outward to show the pencil in action.
- Add light shadow lines beneath the pencil to make it look like it’s floating slightly.
Tips for Kids
- Use Color: Try coloring the pencil yellow with a pink eraser for a classic look.
- Add Realistic Details: Draw small wood grain lines near the tip and slight lines on the pencil body for a more authentic look.
- Draw Wavy Lines: Experiment with different wavy lines to make the drawing fun and dynamic.
- Use Shading: Add light shading to one side of the pencil and the tip for a three-dimensional effect.
- Add a Background: Draw a piece of paper or notebook beneath the pencil to create a scene.
9. Pencil with Wings

This imaginative sketch shows a writing tool with wings, representing creativity in motion. The feathered details add elegance, while the upright stance suggests readiness to take off into new ideas. It’s an inspiring option among creative drawing ideas for adults with pencil, encouraging artists to think beyond the ordinary.
Drawing Steps:
- Sketching the Pencil Shape:
- Draw a long, vertical rectangle with a pointed end to form the pencil’s body.
- Add a small circle or oval at the top for the eraser, then connect the eraser with the body using two curved lines.
- Adding the Wings:
- On each side of the pencil, draw curved lines extending outwards for the wings.
- Add feather details by drawing curved lines that taper to a point, layering them for a realistic effect.
- Detailing and Final Touches:
- Add small details on the pencil’s body, such as the lines for the metal part that holds the eraser.
- Refine the wings and make any final touches to give it a finished look.
Tips for Kids:
- Use your imagination – think about what the pencil might be drawing as it flies!
- Start with light lines so you can easily erase if needed.
- Draw each feather on the wing carefully to make it look realistic.
10. Pencil and Stars

This drawing features a large pencil in the center surrounded by scattered small geometric shapes, including circles, triangles, and squares. The combination of the pencil and shapes creates a fun, creative scene, symbolizing imagination and creativity.
Steps for Drawing:
- Draw the Pencil:
- Start by drawing a tall, straight rectangle with slightly tapered edges.
- Add a pointed triangle at the bottom for the pencil tip and shade it in for the lead.
- At the top of the rectangle, add a small, rounded shape to represent the eraser.
- Add Surrounding Shapes:
- Draw various small shapes (circles, squares, triangles) around the pencil, scattering them randomly.
- Vary the sizes of the shapes to create a dynamic look and give the impression of playful, creative energy.
Tips for Kids:
- Remember, this drawing is all about fun and creativity, so feel free to add more shapes or make it colorful!
- Use a ruler to make your pencil straight, but don’t worry if it’s a bit wobbly—creative drawings don’t have to be perfect!
- Practice each shape (circle, triangle, square) separately before adding them around the pencil.
- Try drawing shapes lightly first; you can darken them once you’re happy with the placement.
- Add some shading or different-sized shapes to make the drawing more interesting.
11. Pencil with a Cap

A minimalistic pencil illustration showing a classic design with a sharpened tip, a hexagonal body, and an eraser on top. The lines are clean and hand-drawn, capturing the basic structure of a pencil. For more creative ideas, visit simple drawing ideas.
Drawing Steps
- Draw the Body
- Start with two parallel lines to form the body of the pencil.
- Connect the top with a rounded rectangle for the eraser.
- Add the Details
- At the bottom, draw a pointed shape for the pencil tip.
- Add two lines near the eraser end to represent the metal band.
- For finishing, add light line details on the body to show wood grain.
Tips for Kids
- Take Your Time: Slow and steady drawing helps with accuracy.ething doesn’t look right.
- Use Light Strokes: Start with light lines to make adjustments easily.
- Focus on Proportions: Make sure the body is longer than the eraser and the pointed tip.
- Add Texture: Lightly shade the body or draw small lines to represent the wood texture.
- Eraser for Corrections: Don’t hesitate to erase and redraw if something doesn’t look right.
12. Pencil Drawing with a Smile

Meet the cheerful pencil! With its smiling face and simple lines, this pencil drawing is sure to brighten anyone’s day. It’s a perfect way to practice drawing shapes while creating a friendly character.
Drawing Steps:
- Draw the Pencil Outline: Start by drawing a tall rectangle shape with a pointed triangle at the top for the pencil’s lead.
- Step 1a: Add small jagged lines at the bottom of the triangle to show where the pencil has been sharpened.
- Step 1b: Add a smaller rectangle at the bottom to form the pencil’s eraser.
- Add the Smiling Face: Draw two small circles near the top of the rectangle for the eyes and a curved line underneath for a big smile.
- Step 2a: Place two small dots inside the eyes to add a spark of life.
- Step 2b: Draw simple curved lines above the eyes to make eyebrows, giving the pencil an expressive look.
Tips for Kids:
- Start with light pencil lines so you can easily erase and adjust your drawing if needed.
- Experiment with different types of smiles and eye shapes to give your pencil Drawing a unique expression.
- Add fun details like a background or accessories, like a tiny hat or a thought bubble.
- Practice your shading to make the pencil look more realistic; adding a bit of shadow under the smile can give it depth.
- Remember, don’t worry about making it perfect! Each pencil character can have its own unique personality.
13. Pencil in a Holder

This sketch shows a sharp writing tool standing upright in a plain cylindrical cup, ready for action. The focus is on its pointed tip and the smooth contours of the container, making it a great choice for those practicing drawing ideas with pencil that emphasize clean lines and everyday objects.
Steps to Draw:
- Draw the Cup:
- Start by drawing a tall oval shape for the cup’s top.
- Draw two straight lines down from each side of the oval to create the cup’s body.
- Connect the bottom of these lines with a slight curve to form the base of the cup.
- Draw the Pencil:
- Inside the cup, draw two parallel lines extending up from the cup’s center for the pencil body.
- Add a small triangle at the top of these lines for the pencil tip, and fill in a dark triangle at the end to show the pencil lead.
- Add a few lines near the top of the pencil for the eraser.
Tips for Kids:
- Start with light pencil strokes; it helps to erase any mistakes easily.
- Draw the cup and pencil straight to make it look like the pencil Drawing is standing upright.
- For a realistic look, add a few shading lines inside the cup to show depth.
- Make the pencil’s tip dark to show that it’s sharpened and ready to use.
- If you like, add some patterns or textures to the cup to make it unique.
14. Pencil with Glasses

This is a delightful pencil character with glasses, giving it a smart and quirky appearance. With the large round glasses perched near the top, this pencil has a unique charm, perfect for kids to draw and color.
Steps for Drawing:
- Basic Pencil Outline
- Draw a long vertical rectangle with a slight point at the bottom for the tip of the pencil.
- Add a line near the top, slightly angled to form the top edges of the pencil’s sharpened part.
- Adding Details
- Draw the pencil’s lead at the bottom by creating a small triangle within the tip.
- Sketch two large circles for the glasses, positioning them near the top part of the pencil.
- Inside each circle, draw smaller circles for the eyes.
- Finishing Touches
- Add the glasses’ frames and arms to make them look more defined.
- Add details to the eyes, like pupils, and draw a small smile near the middle of the pencil for a friendly expression.
- Outline and add any final touches to make the drawing bold.
Tips for Kids:
- Keep your lines light in the beginning so you can adjust the shapes easily.
- Make the glasses big and bold to give the pencil Drawing a quirky personality.
- Add details to the glasses, like extra lines or patterns, to make them look cool.
- If you like, add more accessories around the pencil character, like a hat or a bow tie.
- Have fun coloring in the glasses frame and making the character’s face expressive! For more inspiration, explore easy apple drawing ideas.
15. Pencil with a Trail

This lighthearted sketch features a charming character with glasses and a cheerful smile, playfully doodling a wavy line. The design radiates friendliness and creativity, making it a fun addition to your collection of cool drawing ideas with pencil.
Steps to Draw the Pencil with Glasses and Wavy Line:
- Draw the Outline of the Pencil:
- Start by sketching a long, narrow rectangle for the pencil body.
- Add a triangular shape at one end for the pointed tip of the pencil.
- At the other end, add a short rectangle for the eraser.
- Add Details to the Pencil:
- Draw horizontal lines near the eraser to show the metal part.
- On the pointed end, add a small curved line to define the lead.
- Add the Glasses and Face:
- Draw two circles or ovals for the glasses, positioning them near the top of the pencil.
- Inside each lens, draw small circles for the eyes and add tiny dots for the pupils.
- Draw a small curved line below the glasses for a smile, giving the pencil a friendly face.
- Draw the Wavy Line:
- Starting from the pencil Drawing tip, draw a wavy line that extends outward, representing a doodle or scribble.
- Final Touches:
- Go over your drawing with a pen or marker to make it bold and erase any extra pencil lines.
- Add some shading to give the drawing more depth, if desired.
Tips for Kids:
- Keep It Simple: Begin with basic shapes like rectangles, triangles, and circles to build your pencil sketch—a great method for beginners.
- Make It Fun: Customize the face with playful expressions, like big eyes or even a tiny hat, to add charm to your art.
- Draw Lightly First: Use light strokes when you draw so you can easily erase and correct mistakes—perfect for learning drawing techniques.
- Add Details Slowly: Start with the main shapes, then add fun elements like glasses, a smiling face, or a wavy line step by step.
- Experiment with Colors: Use colored pencils or watercolor pencils to bring your drawing to life—try pink for the eraser and yellow for the pencil body, or mix it up with your favorite shades!
16. Pencil with a Party Hat

This fun illustration features a pencil with a party hat, adding a playful touch to a regular pencil. It’s a great drawing to practice for celebrations or to bring some joy to your art! For more creative inspiration, visit creative balloon drawing ideas.
Steps to Draw
- Draw the Pencil Body
- Start by drawing a long rectangle for the pencil’s body.
- Add a pointed tip at the bottom to represent the sharpened lead.
- Outline the pencil’s eraser by drawing a small band at the top.
- Draw lines to show the sections of the pencil.
- Add the Party Hat
- On top of the pencil, draw a triangular party hat.
- Decorate the hat with swirls or dots for a festive look.
- Add a small pom-pom or curly line at the top of the hat.
Tips for Kids
- Use Light Pencil Strokes: Start drawing with light strokes to make it easier to adjust your lines.
- Add Decorations: Feel free to decorate the party hat with stars, stripes, or other fun patterns.
- Experiment with Colors: You can color the hat and the pencil to make it look more festive.
- Practice Your Lines: Straight lines for the pencil Drawing and fun, wavy lines for decorations will help improve your drawing skills.
- Stay Creative: Try adding more party elements like confetti around the pencil for an even more festive look!
17. Pencil with Arms

This playful pencil character is full of energy, running with a big smile and open arms. With its happy expression, it looks like it’s off to make some fun drawings! Kids will enjoy adding this joyful personality to their artwork.
Steps for Drawing
- Start with the Pencil Shape
- Draw the outline of a pencil with a pointed tip on top and a slightly rounded base.
- Add two small circles for the eyes, and sketch a wide smile below.
- Add the Details and Arms
- Draw the arms stretching out from the pencil’s sides with hands open and fingers spread out.
- Sketch the legs in a running position, with one leg bent backward and the other stepping forward.
- Finalize with Expressions and Feet
- Complete the eyes with pupils and eyebrows for a cheerful expression.
- Add shoes or simple lines at the end of each leg to make it look like the pencil is running.
Tips for Kids
- Keep the arms and legs simple for a fun, cartoony look.
- Use light pencil strokes initially; this way, it’s easy to erase and adjust as you go.
- Experiment with different facial expressions to show different emotions.
- Add small motion lines near the legs and arms to show movement.
- Try drawing a background, like a notepad or eraser, to make the scene more lively.
18. Pencil Drawing with a Thought Bubble

This playful illustration shows a friendly character with a thought bubble overhead, filled with hearts and stars—symbols of creativity and wonder. The dreamy design adds a storytelling element, making it a great pick among fun easy drawing ideas for kids that encourage imagination and expression.
Steps to Draw:
- Draw the Pencil:
- Start by sketching a long, rectangular shape for the body of the pencil.
- Add a triangular point at the top for the lead and add small lines to give it a sharpened look.
- Create the Thought Bubble:
- Draw a cloud-like shape above the pencil Drawing to represent the thought bubble.
- Inside the bubble, add simple heart shapes and stars to fill it with whimsical thoughts.
- Add Final Details:
- Draw a few small circles and lines connecting the pencil to the thought bubble.
- Outline the shapes and erase any extra lines to clean up the drawing.
Tips for Kids:
- Use Light Lines First: Begin with light pencil strokes so it’s easy to erase if needed, then go over it with darker lines.
- Practice Hearts and Stars: Take some time to practice drawing hearts and stars on a separate sheet to get them just right.
- Add Your Own Twist: You can fill the bubble with any shapes you like! Try adding smiley faces, flowers, or even little animals.
- Be Creative with Colors: Once the drawing is complete, use colored pencils or markers to make the bubble extra vibrant.
- Have Fun with It: There’s no right or wrong way—just enjoy the process of creating something fun and imaginative! For more ideas, check out easy drawing ideas.
19. Pencil in a Backpack

This simple yet stylish backpack illustration features a pencil tucked inside, hinting at a student or artist’s bag. It has a classic shape with a front pocket, shoulder straps, and minimalistic lines, making it an easy and enjoyable drawing for kids.
Steps for Drawing:
Step 1: Draw the Backpack Outline
- Begin by sketching the main body of the backpack, which resembles a rounded rectangle.
- Add a small loop on the top center, representing the carrying handle of the backpack.
Step 2: Add Details and Pencil
- Draw the front pocket as a smaller rectangle with a slightly curved top.
- Sketch the shoulder straps extending from the sides.
- Draw the pencil sticking out of the backpack, with its pointed tip peeking out from the top.
Tips for Kids:
- Start with Basic Shapes: Think of the backpack as a rectangle and the pocket as a smaller one. This will make the drawing easier.
- Keep Lines Light: Use light lines initially, so you can easily erase and adjust if needed.
- Add Patterns: Personalize your backpack with small designs, like stars or hearts, on the pocket.
- Use Different Colors: Color the backpack, pocket, and pencil to bring your drawing to life.
- Practice Patience: Take your time with the details, especially on the straps and the pocket, to make it look neat.
20. Pencil with Confetti

This imaginative sketch shows a drawing tool surrounded by floating geometric shapes—circles, triangles, and rectangles—that create a lively, creative scene. It’s a fun way to explore interesting shapes to draw while adding energy and movement to a simple concept.
Steps for Drawing:
- Draw the Pencil:
- Begin with a long rectangle for the body of the pencil.
- Add a pointed tip at one end and a small rectangle eraser at the other end. For more creative inspiration, explore playful candle drawing ideas.
- Add Surrounding Shapes:
- Around the pencil, draw a mix of shapes (circles, triangles, and rectangles) scattered randomly.
- Make some shapes larger and others smaller to add variety and movement.
Tips for Kids:
- Don’t worry about making the shapes perfect; creativity is about fun, not perfection!
- Try using different pencil pressures to make some shapes lighter or darker.
- You can add more shapes like stars or diamonds to make it even more imaginative.
- If you want to add color, try shading each shape with a different color for a vibrant look!
- Experiment with spacing; you can put shapes closer together on one side and spread them out on the other for a dynamic effect.
Conclusion:
With these 20 pencil drawing ideas, kids can explore their imagination and bring ordinary pencils to life in unique ways. Whether they’re drawing a pencil with a party hat, creating a pencil character with wings, or doodling a pencil with confetti, each idea provides an opportunity to practice and have fun. These pencil drawing ideas are not just about perfecting technique, but about encouraging creativity and making the drawing process enjoyable.